Managing Appointments
The calendar is where you'll spend most of your time in Salonnare. Since 21 April 2026 you can schedule multiple services back to back in a single appointment -- handy for clients who, for example, get a cut first and then colour with the same or a different staff member.
Viewing your calendar
Open Bookings in the sidebar. At the top you can switch between views:
- Day -- all appointments for one day, with a column per staff member.
- Week -- the broader overview for your whole week.
- Month -- a high-level overview, handy for spotting busy days at a glance.
- Rooms -- appears only when you have treatment rooms configured; shows a column per room.
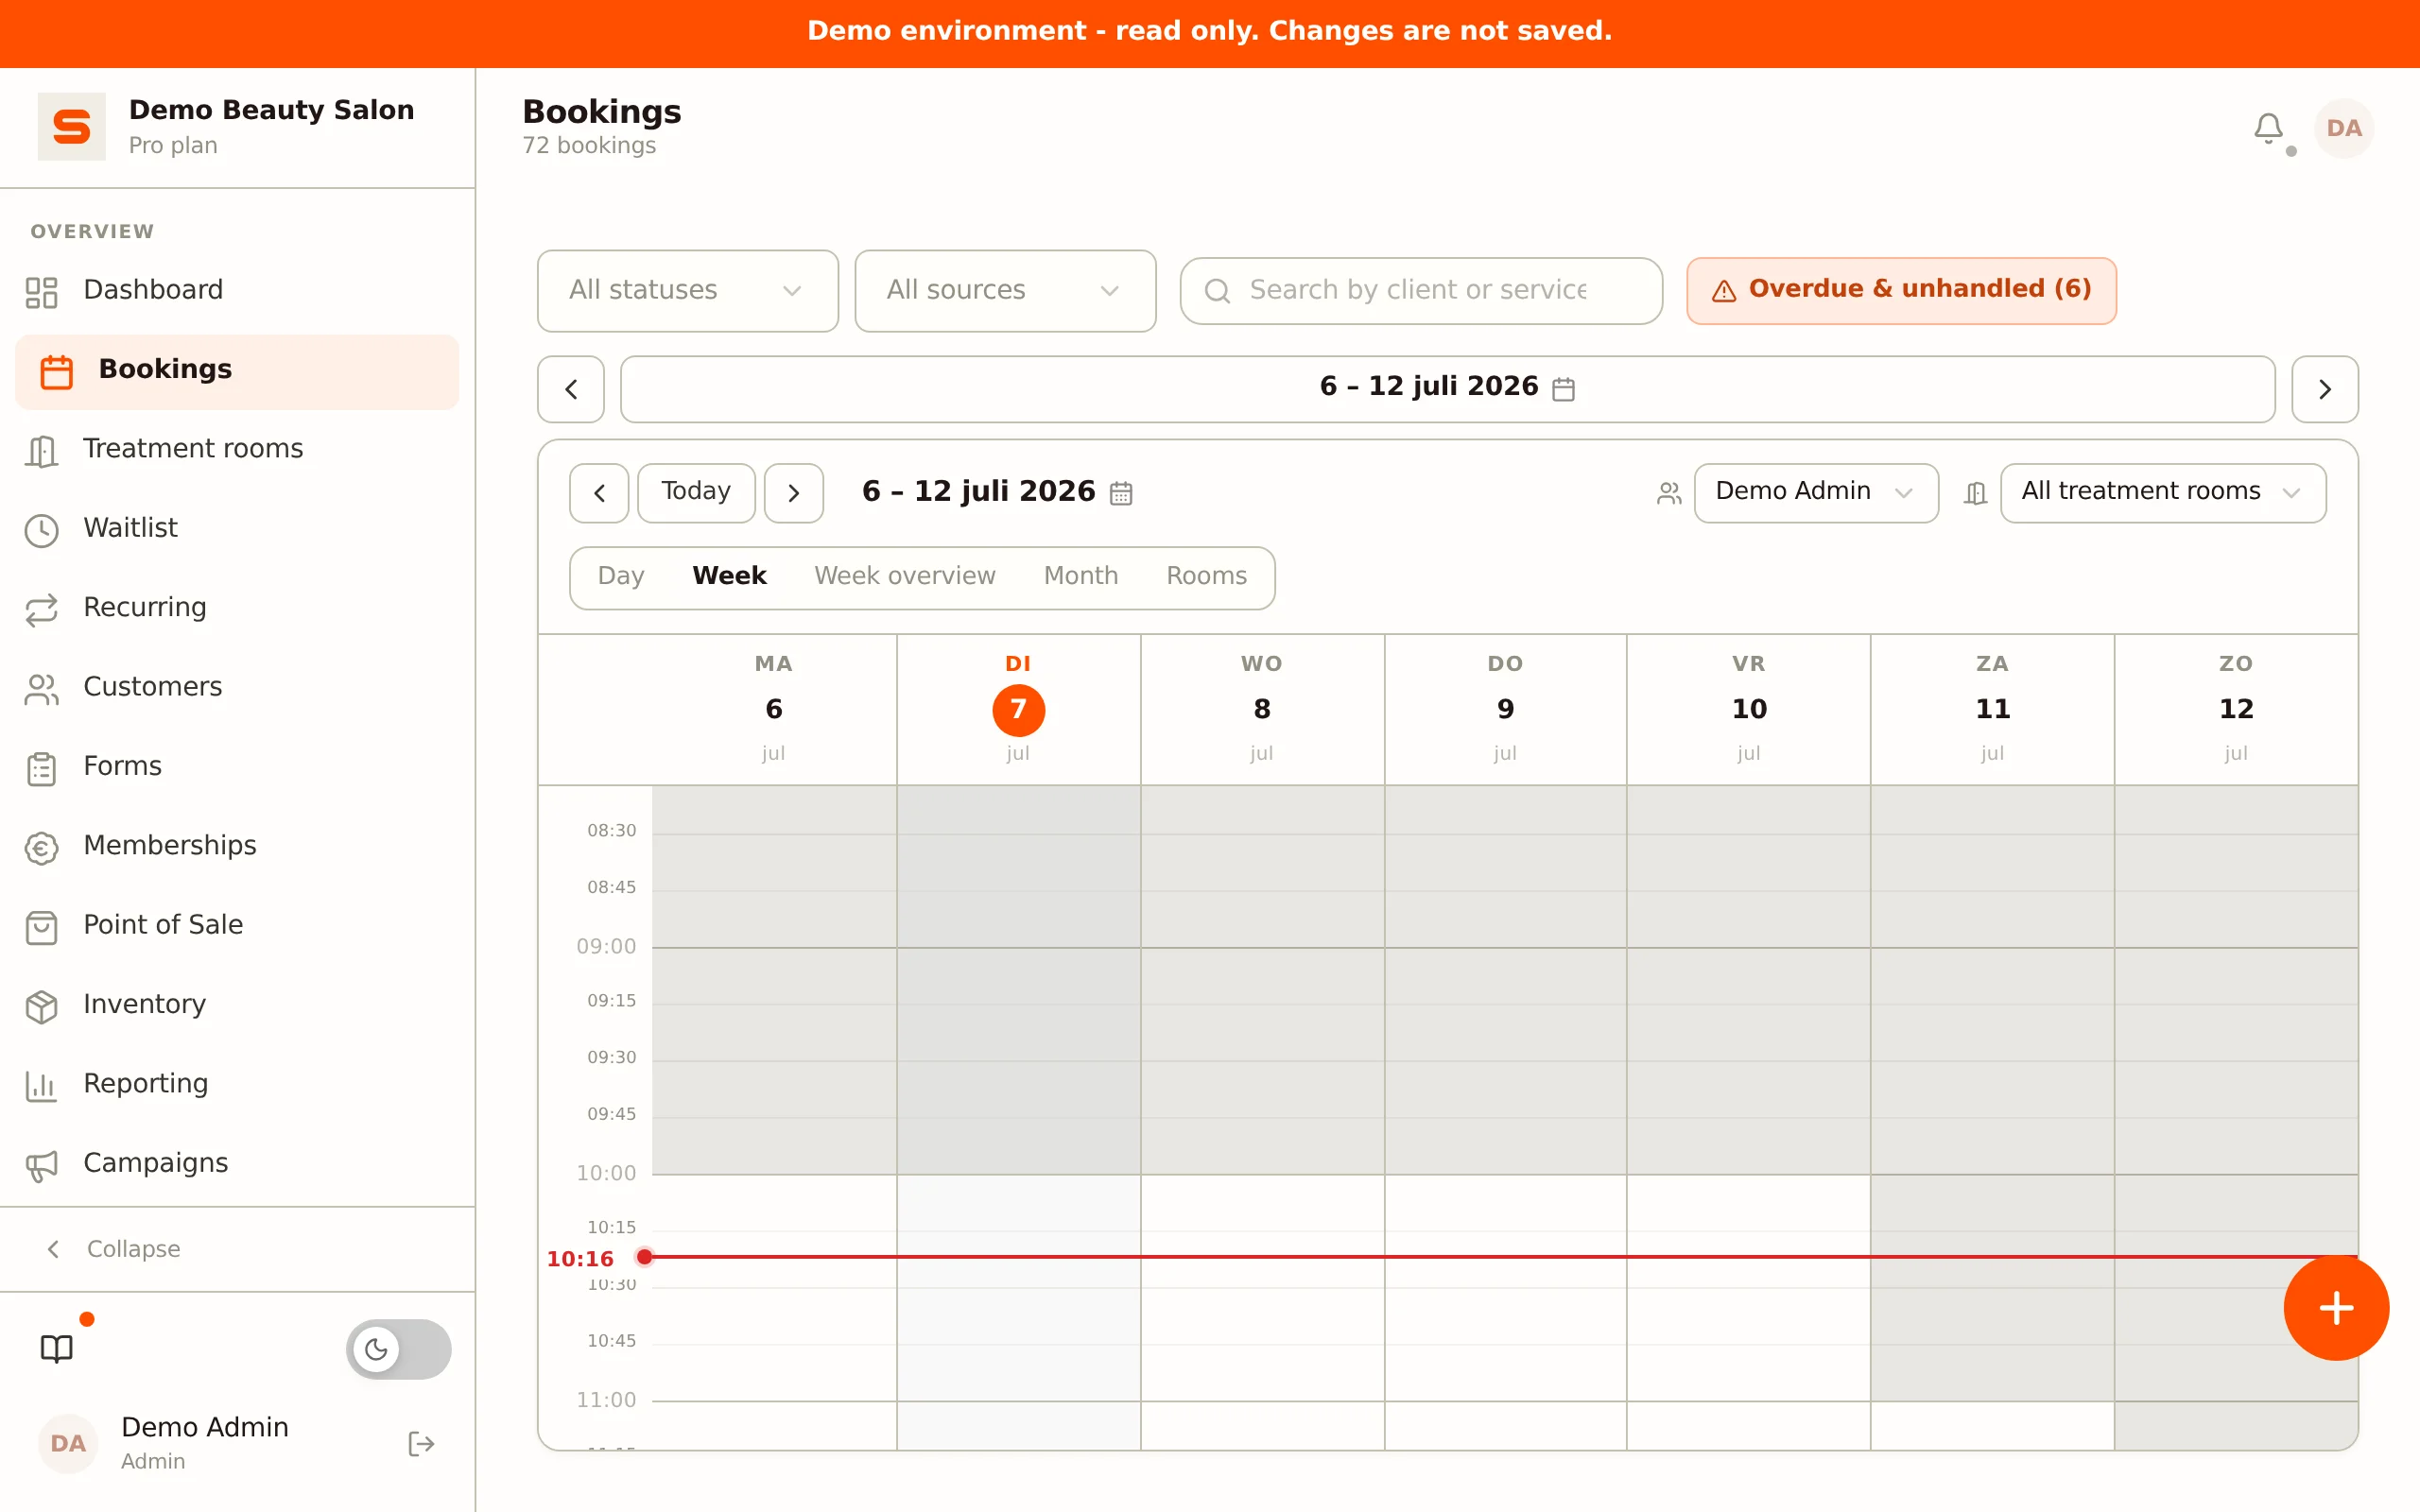
Use the arrows at the top to jump forwards or back. Today brings you back to the current day in one click.
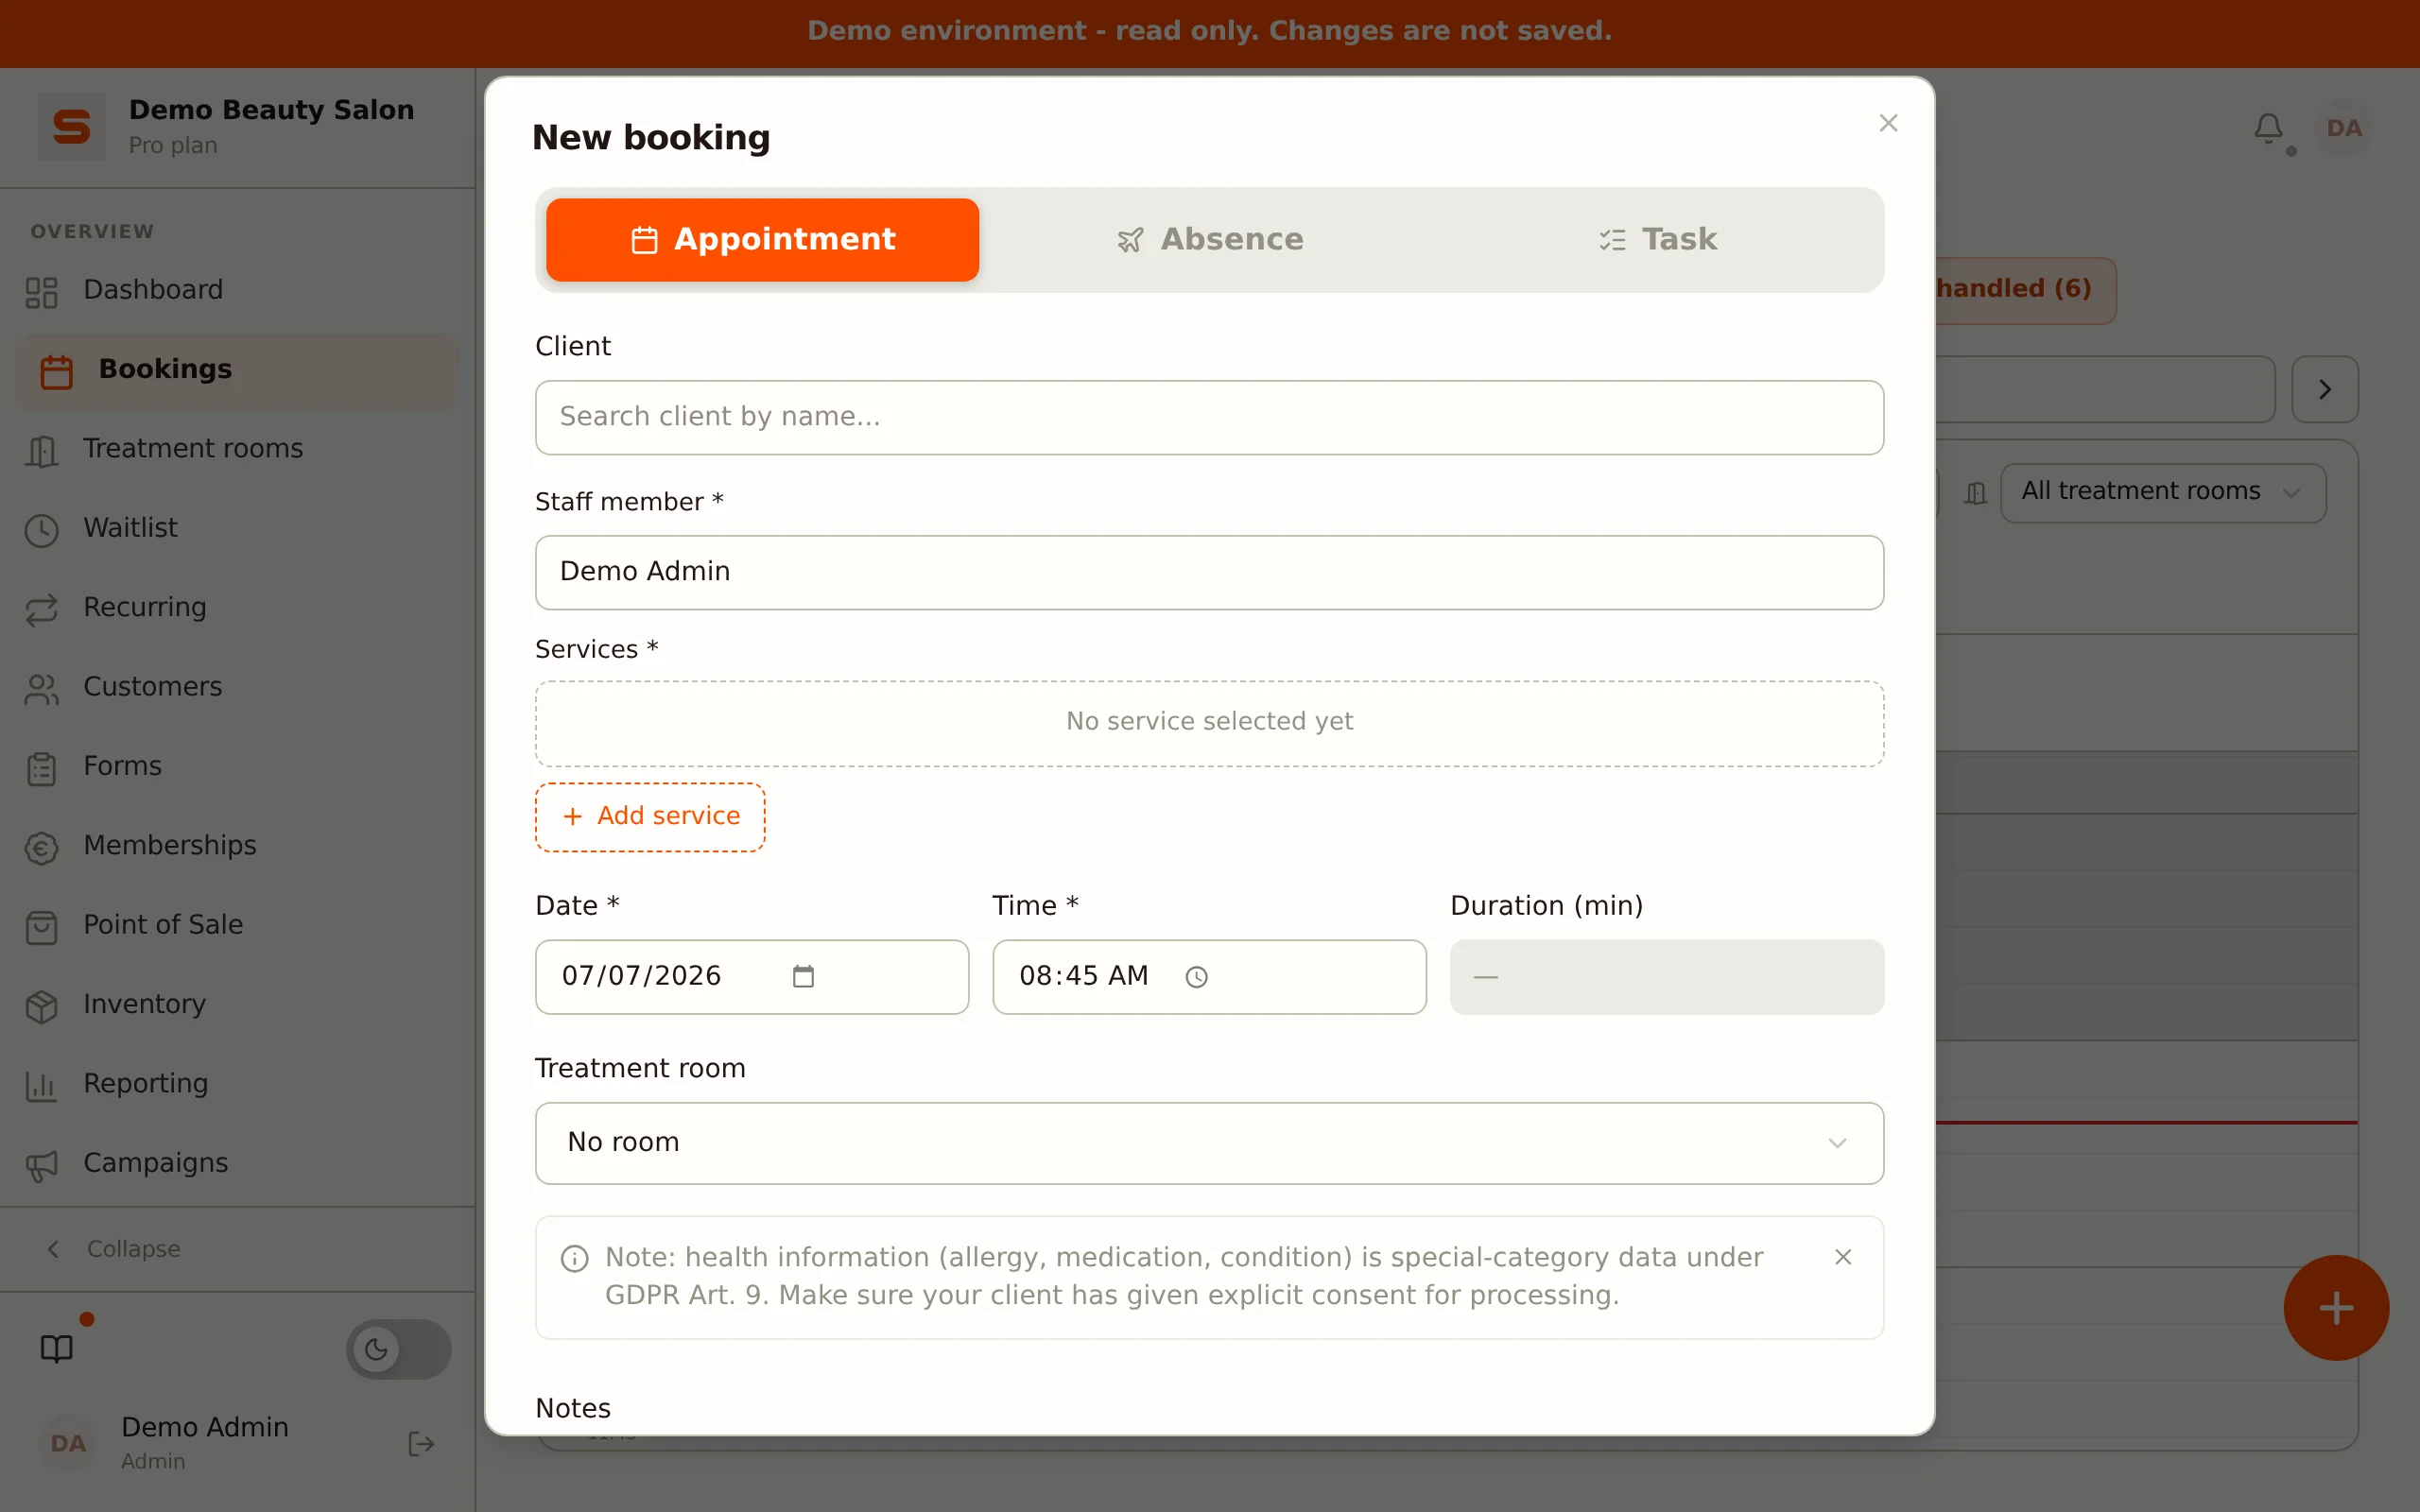
Creating an appointment
- Click an empty slot or the New appointment button.
- Pick the client -- just type to search.
- Add one or more services. The first is the primary one; below it you can stack extra services with + Add service.
- For each service, choose the staff member (can differ per service).
- Confirm the date and start time. The end time is calculated automatically from the duration of each service.
- Optionally assign a treatment room (only visible when you have rooms configured).
- Optionally add notes or internal notes (see below).
- Click Save.
The appointment lands in the calendar right away and your client automatically receives a confirmation email.
Notes and internal notes
The editor has two text fields:
- Notes -- general remarks about the appointment (for example "wants a trim, no layers").
- Internal notes -- visible to staff only, never to the client. This field has a dashed border so it stands out visually from the regular notes field.
Treatment rooms
If you have treatment rooms set up, you can choose a treatment room per appointment in the editor. In the calendar you can then filter by room, and the Rooms view shows a column per room. Appointments without a room assignment appear under "No room".
Editing an appointment
- Click an appointment in the calendar.
- Adjust what's needed: time, services, staff, room, or notes.
- Click Save.
Changes are emailed to the client automatically.
Moving an appointment
- Drag-and-drop -- grab the appointment and drag it to a new time slot or another staff column. Press Ctrl+Z to undo a drag.
- Via the editor -- open the appointment and change the date, time, or staff member manually.
Cancelling an appointment
- Click the appointment.
- Set the status to Cancelled.
- Confirm.
Your client automatically receives a cancellation email. The appointment is kept in your records and simply marked as cancelled.
Appointment statuses
Every appointment has a status:
- Confirmed -- confirmed and scheduled (the default status of a new appointment).
- Provisional -- waiting for your approval (with booking-on-request).
- Completed -- the treatment is finished.
- Cancelled -- the appointment was called off.
- No-show -- the client didn't turn up.
Change a status via the dropdown in the editor (when editing an appointment) or via the quick actions in the notification center.
Handling no-shows
- Open the appointment.
- Set the status to No-show.
- If you have no-show fees enabled, Salonnare asks whether you want to send a payment request right away.
See No-show fees for the settings.
Tips for a smooth calendar
- Buffer time -- in Settings, add automatic breaks between appointments for cleaning up or client handover.
- Colour code -- colour appointments by service category or by staff member -- which also helps you scan the calendar quickly.
- Start with the dashboard -- check the Dashboard each morning for the day's overviews.
Want appointments to repeat automatically? Read Recurring appointments.