Services & Products and stock management
Whether you sell shampoo at the register or track how much hair color your team uses, stock management in Salonnare helps you stay on top of your stock. You always know what you have, what's running low, and what you need to order.
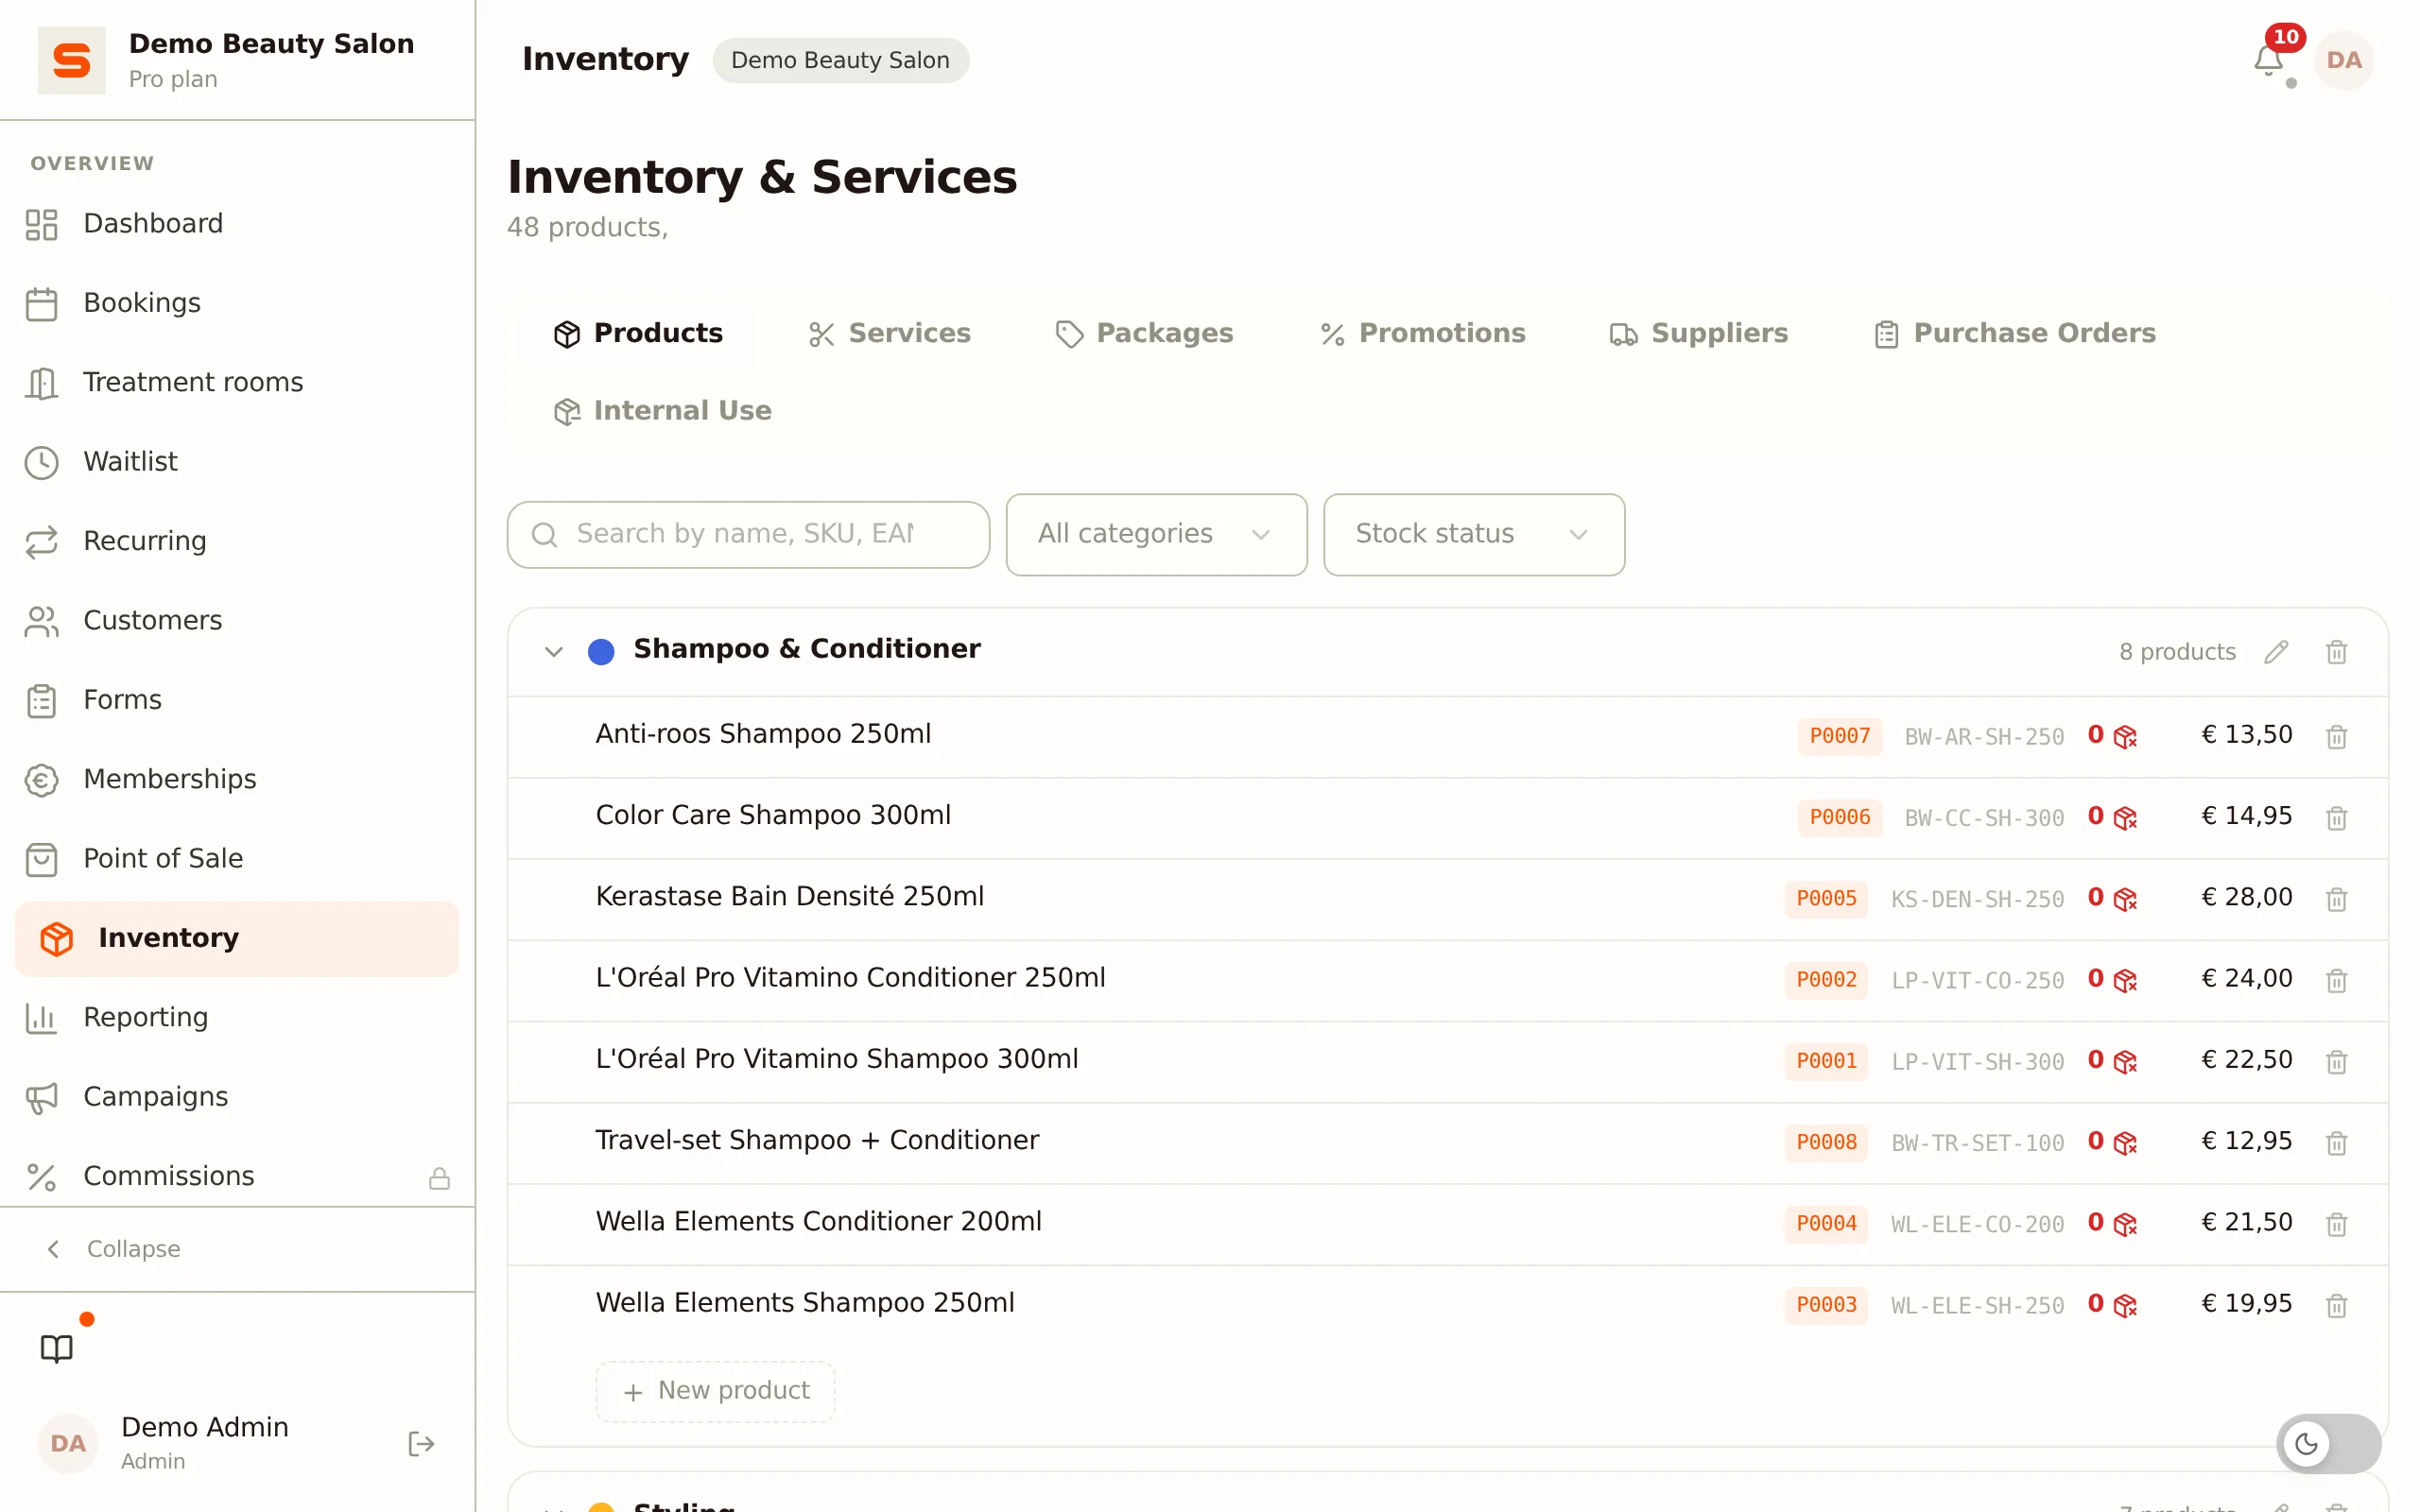
Where to find what
Products and stock live in two places in the sidebar:
Services & Products has three tabs:
- Services -- the treatments your salon offers, organized by category. This tab opens by default. See Services.
- Products -- your product catalog and stock levels, with the work lists All products, Internal use and Counting.
- Promotions -- containing Packages (see Packages) and Promotions (discount codes, see Promotions).
If a tab is not part of your plan (products, packages and promotions come with Starter and up), you see an explanation on how to upgrade instead of the content.
Purchasing & stock only appears when purchase orders are enabled, and has these tabs:
- Internal use -- write off products your team uses internally (only when internal use is enabled). This tab comes first and opens by default. See Internal use.
- Suppliers -- your suppliers. See Suppliers & purchase orders.
- Purchase orders -- orders placed with your suppliers.
Services, packages, and promotions each have their own help article. This article focuses on the Products tab and stock management.
Categories and work lists
You group products by category. When you create or edit a category, you choose a name, a colour and whether it is visible in the POS.
Above the product list are three work lists. Note the difference: the Internal use work list here shows which products you use yourself; writing off that use happens on the Internal use tab under Purchasing & stock.
- All products -- your retail stock: every category that is visible in the POS, plus products without a category.
- Internal use -- stock that never crosses the counter. This holds the categories with Visible in POS switched off, plus the individual products with stock type Internal use that sit in a retail category.
- Counting -- the counting mode for your stock take. See Stock counting.
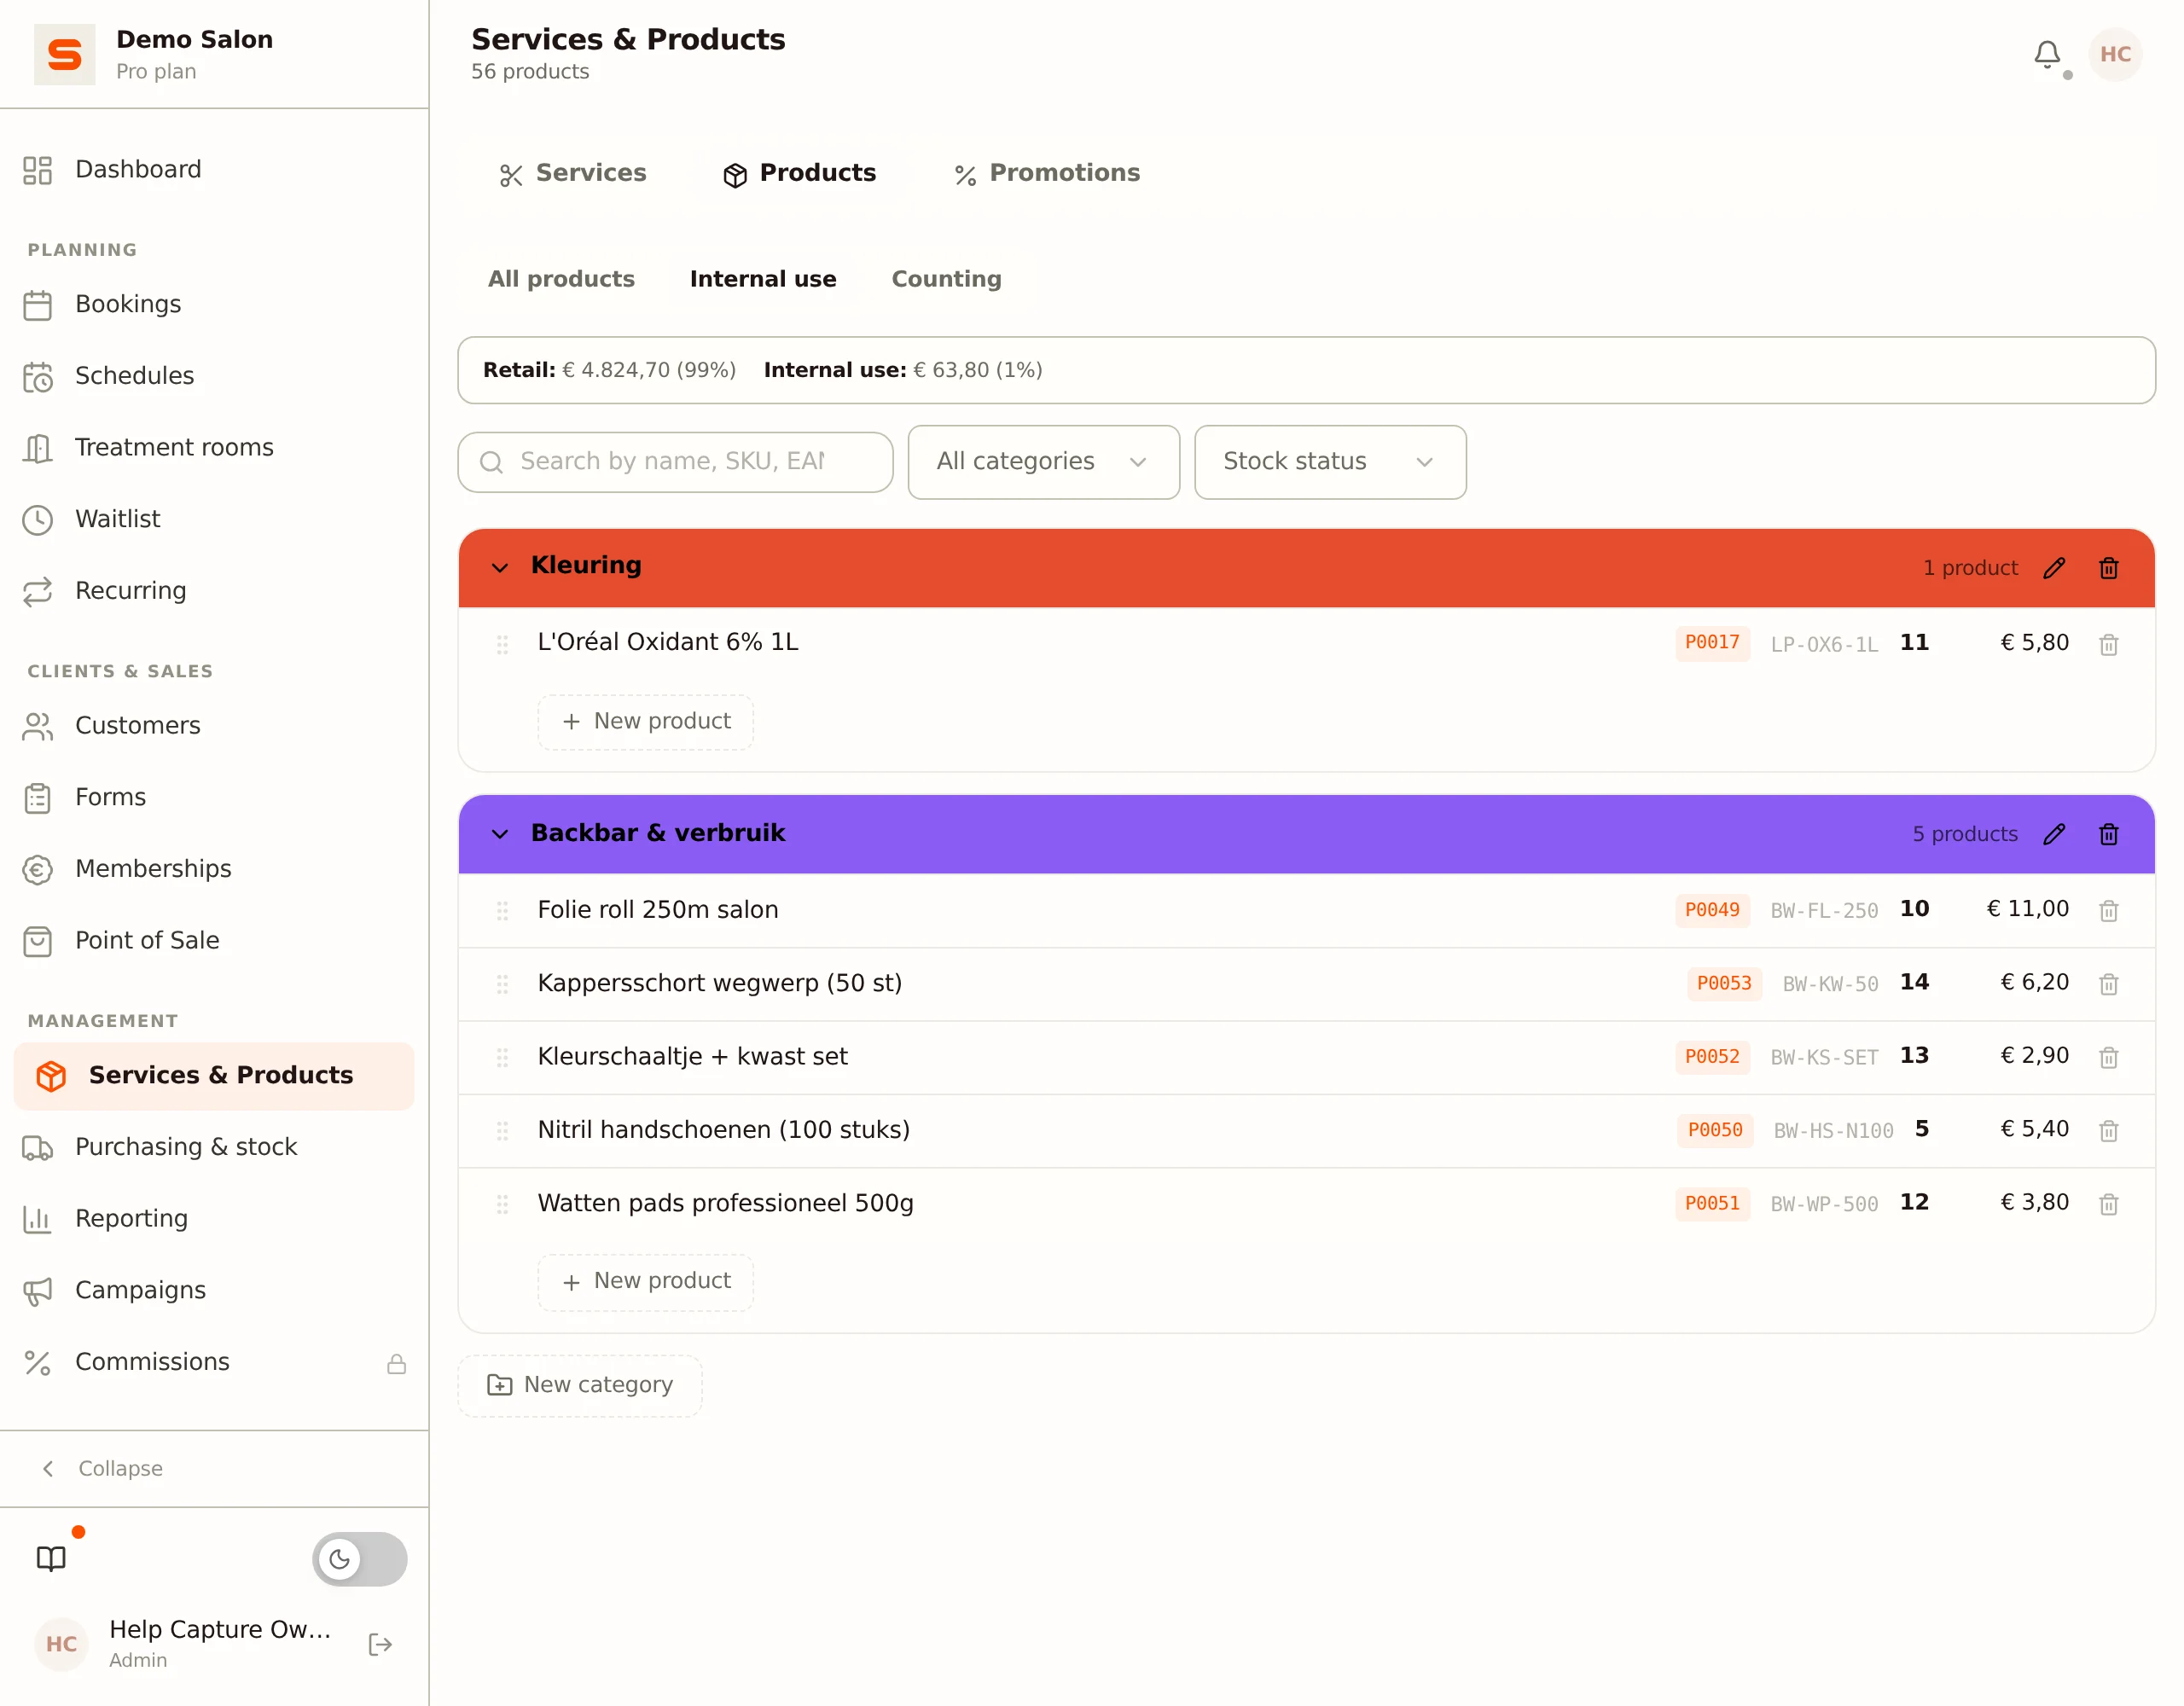
Switch Visible in POS off and that category moves, products and all, to Internal use and disappears from All products. So a new category you immediately mark as not visible shows up there, even while it is still empty. Switch it back on and everything returns to All products: this only arranges your screen, it does not change the stock type of your products.
The tab and work list you pick stay in the address bar. Refresh the page or share the link and you land in the same place.
Adding products
-
Open the Products tab.
-
Click New product.
-
Fill in the details:
- Name -- What you call the product (for example "Olaplex No. 3").
- Category -- Group similar products (optional).
- Price -- The sale price: what you charge the client. Optional: leave it empty for a product you only use yourself.
- Purchase price -- What you pay your supplier. Optional.
- Supplier -- Link it to a supplier for easy reordering (optional).
- EAN code -- The product's barcode (optional). Any barcode works here: a supplier's EAN or UPC, but also your own code on a label you printed yourself.
- No supplier barcode? Click Generate code. Salonnare creates an EAN-8 starting with a 2 -- the range GS1 reserves for codes a company issues itself, so it can never clash with a real product barcode. For an existing product the code is saved straight away, so a label you print right after always points to this product. For a new product the code is saved together with the product.
- Why not a text code like
ARGANOIL5ML? In Code 128 that takes more than twice as many bars. On a 25 mm label each bar becomes so thin that a label printer can no longer set the width ratios, and those ratios are exactly what a scanner reads. An EAN-8 fits with room to spare.
- SKU -- A short code to identify the product (see below).
- Stock -- The quantity on hand. If you change it later on an existing product, Salonnare books the difference as Manual correction in the stock history.
- Min. stock -- The level at which you want a low-stock alert.
- Order quantity -- The quantity you normally order at a time. A new line in a purchase order starts at this quantity (see Suppliers & purchase orders).
- VAT rate -- The rate to apply (optional).
- Inventory type -- Retail (sold on to the client), Internal use (used during treatments) or Both. You only see this field when Split retail and internal use is on under Settings > Advanced > Features; otherwise every product counts as retail and the category (Visible in POS) decides whether it appears under Internal use.
- Description -- Optional.
-
Click Save.
The article number is assigned automatically -- there's nothing you need to do for that.
You may leave both prices empty. Do fill in the purchase price if you want to see your margins and the cost of internally used products. Leave the sale price empty and the stock list shows a dash instead of an amount, while the till asks for an amount if you do sell the product.
Auto-generating the SKU
You can leave the SKU blank: Salonnare then generates one automatically on save. If you want to see or edit it yourself, click the Generate button next to the SKU field. It builds a clean code from the product name and (if chosen) the supplier as the brand -- for example WELLA-COLOR-TOUCH. You can freely adjust the generated code afterwards.
Half-filled and closed by accident? For a new product, Salonnare keeps what you had typed. Reopen the form and a bar appears at the top — You filled in this form earlier — with a choice of Restore or Discard, so your fields are never quietly put back. The draft is kept for seven days, on this device only and only for your account, and disappears when you log out.
Sizes: one product in several formats
Do you sell the same oil in 5ml, 20ml, 200ml and 500ml? You no longer need four separate products for that. You create one product and hang the sizes underneath it. Every size has its own price, its own stock and its own barcode.
Adding sizes
-
Open the Products tab and click the product the sizes belong to. Sizes always hang off an existing product: on a new product it says "Save the product first. After that you can add sizes to it."
-
Scroll down in the form to the Sizes block and click Add size.
-
Fill in what differs per size:
- Size -- what you call the format (for example "200ml").
- Sale price and Purchase price -- per size, so the 500ml may well cost more than the 200ml.
- Stock and Min. stock -- every size has its own counter and its own threshold for the low-stock alert.
- Order quantity -- the number of this size you normally order at a time.
- EAN code -- every size gets its own barcode. The Generate code button works here exactly as it does on a regular product.
- Print labels -- on a saved size you can print labels right away. The label carries the name with the size after it ("Argan Oil — 200ml") plus that size's own barcode.
-
Click Save. Below the block you then see how many sizes there are and how many units you hold in total.
Category, supplier, VAT rate and stock type you set once on the main product. Those fields are not in the size form: the sizes inherit them. Switch suppliers and you change it in one place.
The first size takes over the main product's stock. If there are still 12 bottles on the product itself, they move to the size you create first -- the form says so before you save. And so it should: a product with sizes is no longer sold on its own, so those 12 would otherwise sit there forever without ever being written off. Enter a quantity on that first size yourself and it is added on top.
Where you see the sizes
- In the product list the main product appears once, with the number of sizes and the combined stock below it. The individual sizes are not listed as separate rows.
- At the register the Choose a size dialog appears as soon as you tap such a product, with the price and the stock next to each size. See Point of Sale.
- In internal use you get the same dialog, but with the purchase price instead of the sale price.
- When scanning there is nothing extra to do: the 200ml label puts that size straight onto the receipt, because every size has its own barcode.
- In stock counts, purchase orders and the low-stock alert the sizes do appear as separate rows. That is where the stock sits, so that is what you count and order.
Sizes go one level deep: a size cannot have sizes of its own. A main product with sizes cannot be deleted while its sizes are still there -- delete or detach them first. Detach sits next to every size and cuts it loose into a standalone product: the stock, the barcode and the history stay with that row, only the size label is dropped. And note: there is not yet a tool that automatically merges existing separate products into sizes. If a product already has a refill you cannot add sizes to it -- a product has either sizes or a refill.
Refills: the same contents without the packaging
Do you sell a cuticle oil in a pump bottle and separate refills for that same bottle? Then you hang a refill under the product. The client buys the bottle once and after that only the refill -- that saves packaging waste and is usually cheaper.
Cuticle oil 20ml      stock 2   EUR 16.00   <- with bottle
  refill              stock 5   EUR 11.00   <- contents only
Adding a refill
-
Open the Products tab and click the product the refill belongs to. Just like with sizes, the product has to be saved first.
-
Scroll to the Refill block and click Add refill.
-
Fill in what is specific to the refill:
- Name -- pre-filled with "Refill"; you can change it, for instance to "1 kg bag".
- Sales price and Purchase price -- a refill is almost always cheaper than the packaged product.
- Stock and Min. stock -- the refill has its own counter. Nothing moves: the bottles on the main product stay where they are.
- Order quantity, EAN code and Print labels -- exactly as with a size, with its own barcode for the refill.
-
Click Save.
The main product stays on sale. That is the difference with sizes: with the first size the stock moves off the main product and that main product becomes a hanger, with a refill it does not. Tap such a product in the till and the Product or refill? dialog asks which of the two goes over the counter, with its own price and stock per line.
There can be one refill per product, and a product has either sizes or a refill -- never both. On a product with 5ml, 20ml and 200ml "the refill" cannot be placed: nothing says which size it belongs to. If a product already has sizes the Add refill button disappears, and the other way around Add size disappears once there is a refill. Detach turns the refill back into a standalone product; after that you can attach it elsewhere if you want.
Adjusting stock via right-click or long-press
On the Products tab, right-click a product row (or press and hold it on mobile) to open a quick menu with:
- Edit -- open the product form.
- Adjust stock -- enter an amount to raise or lower the stock by (a positive or negative number) with a reason. This also writes a line to the stock history.
- Mark out of stock -- set the stock to zero in one go.
- Stock history -- view all stock movements for this product.
You can also change the stock in the product form; Salonnare then books the difference as Manual correction. Want to give a reason yourself (breakage or a stock take, for example)? Use Adjust stock in the quick menu. Either way a line is added to the stock history.
How stock changes
Your stock counts update automatically in several situations:
- A product is sold at the register -- stock goes down.
- A purchase order is received -- stock goes up.
- Internal use is recorded -- stock goes down.
- A manual adjustment is made -- via "Adjust stock" in the quick menu or in the product form.
- A stock count is posted -- see Stock counting.
You never have to recalculate anything by hand.
Purchase orders and suppliers
When you need to reorder from a supplier, you use the Suppliers and Purchase orders tabs under Purchasing & stock in the sidebar. The full process -- creating suppliers, placing orders, and receiving deliveries -- is in Suppliers & purchase orders.
Internal use
Internal use tracks which products your team uses during treatments -- like hair color, developer, or styling products. This lets you see the real cost of each service. You write it off on the Internal use tab under Purchasing & stock; that tab only exists when both purchase orders and internal consumption are enabled. Read Internal use for the details.
Enabling or disabling purchase orders and internal use
These features are optional. If you prefer simpler stock management:
- Go to Settings > Features.
- In the Inventory & Purchasing group, turn off Purchase orders (and optionally Internal consumption).
When purchase orders are disabled, Purchasing & stock disappears from the sidebar, and with it the Suppliers, Purchase orders and Internal use tabs. You then manage your stock entirely via "Adjust stock" in the quick menu or the product form.
Low-stock alerts
When a product drops below the minimum stock level you've set, Salonnare automatically sends you an alert. Low-stock items also appear on your dashboard so you see them at a glance.
To get the most out of this:
- Set a realistic min. stock for each product when you add it.
- Check your dashboard regularly for the low-stock card.
- Use the alert as a reminder to create a purchase order and reorder before you run out.
Printing labels
Got a label printer, or printing onto an A4 sheet of labels? On an existing product there is a printer button next to the EAN field.
- Choose the label type:
- Product -- mostly the barcode. If there is room for one more line below the barcode, the product name is added; on a sticker that is too small it is left off, so the barcode keeps enough height to scan reliably. The dialog then tells you what is left out.
- Shelf -- name, price and barcode. For the shelf edge. If the price or description does not fit the chosen size, Salonnare says so in the dialog before you print.
- Choose the label format. The list covers the common rolls from DYMO, Brother and the cheap thermal printers (Munbyn, Phomemo, Rollo) plus two Avery A4 sheets -- search by size or by part number. Mark the rolls you use often with the star; they then appear at the top.
- Enter the number. Below the field you'll see how many feeds or sheets that becomes.
- Digits below the barcode is off. That line costs height the barcode badly needs -- on a 25 mm roll leaving it off gains 39%, and the product name on the label is already your fallback when a scan fails. Want to be able to type the code by hand? Switch it on; Salonnare remembers the choice.
- Click Print. The labels open as a PDF in a new tab and the print dialog appears straight away; pick your printer there. In the app on your phone or tablet, your device's share menu opens instead, with Print in it.
Your printer does not need to be set up in Salonnare. Your computer's print dialog already knows it, whether it is connected by USB, network or bluetooth -- and that same dialog prints to an ordinary A4 printer too. One thing is up to you: picking the right paper size. How to do that is below.
Setting the paper size
Which paper sizes you get to pick from is decided by your printer -- not by Salonnare. The print dialog reads that list from your printer's software, and what is not in there, Salonnare cannot put in. It does not help that the label is already supplied at the right size either: if your roll size is not in your printer's list, you have to add it there first. Paper size and scale sit under More settings in Chrome's print dialog. The bottom of Salonnare's label dialog tells you which paper size to pick and how to set the scale to 100% in your browser.
On Windows the manufacturer's driver usually brings the roll sizes along. If all you see is A4 and envelopes, Windows is running on a generic driver. Install the manufacturer's software (DYMO Connect, Brother P-touch Editor, or the driver that came with your thermal printer) and open the print dialog again -- the whole range will be there.
On a Mac Chrome only shows the sizes the driver reports, and with a generic macOS driver that is sometimes just one, for example "10 x 10 mm". You then create the size yourself:
- At the bottom of Chrome's print dialog, click Print using system dialog... (or press Option-Command-P, ⌥⌘P). The macOS print dialog opens; that is the only place where you can add a size.
- Open Paper Size and choose Manage Custom Sizes....
- Click +, fill in the sheet size from the table below -- width first, then height -- and set all four margins to 0. Give the size a name you will recognise, for instance that of the roll.
- Pick your new size under Paper Size and set Scale to 100%.
Chrome remembers the choice per printer, so this is a one-off. If you print from Safari you get the macOS dialog straight away and start at step 2.
Set the scale to 100%, not to "Fit to paper". In Chrome, choose Custom under Scale and type 100; in Firefox, clear the Fit to page width checkbox and set the scale to 100%; in Safari, set Scale to 100. Fitting to the paper enlarges the label by about 1.2x. A label still comes out of the printer, and that is exactly what makes it tricky: you only notice when you see that the outermost text is just clipped, and on a roll with two labels side by side the second one loses its product name.
The sheet sizes
For a custom size, fill in the sheet size, not the size of the label itself. On the roll with two labels side by side the sheet is larger than one label: the printer feeds those two through as one piece.
Mind the order. The name of a roll puts the long side first ("51 x 28 mm"), while the print dialog asks for the width -- and that is the short side, the width of the roll. So for that roll you enter 28 x 51. On a roll printer the label comes out sideways, which is why the text is shown rotated in the preview. That is how it should be.
| Format as it appears in the list | Sheet size (width x height) |
|---|---|
| 25.4 x 12.7 mm -- DYMO 30333 (2 side by side) | 25.4 x 25.4 mm |
| 51 x 19 mm -- DYMO 11355 (multipurpose) | 19 x 51 mm |
| 54 x 25 mm -- DYMO 11352 (return address) | 25 x 54 mm |
| 57 x 32 mm -- DYMO 11354 (multipurpose large) | 32 x 57 mm |
| 89 x 28 mm -- DYMO 99010 (address) | 28 x 89 mm |
| 51 x 28 mm -- multipurpose | 28 x 51 mm |
| 23 x 23 mm -- Brother DK-11221 (square) | 23 x 23 mm |
| 54 x 17 mm -- Brother DK-11204 (multipurpose) | 17 x 54 mm |
| 90 x 29 mm -- Brother DK-11201 (address) | 29 x 90 mm |
| 40 x 30 mm -- thermal roll | 40 x 30 mm |
| 50 x 30 mm -- thermal roll | 50 x 30 mm |
| 30 x 20 mm -- thermal roll | 30 x 20 mm |
| 63.5 x 38.1 mm -- Avery L7160 (A4 sheet with 21 labels) | A4 (210 x 297 mm) |
| 45.7 x 25.4 mm -- Avery L7654 (A4 sheet with 40 labels) | A4 (210 x 297 mm) |
The two Avery sheets do not need a custom size: there you simply pick A4. Scale goes on 100% there too.
If Salonnare warns that the bars are getting too fine, take it seriously. A barcode that looks fine on screen comes out of the printer unreadable. Pick a larger label, or use Generate code for a shorter barcode -- an EAN-8 takes less than half the space of a text code.