Buffer time after a treatment
Buffer time is time that stays free in the calendar after a treatment: to tidy up, prepare the treatment room or write notes. The buffer time is part of the appointment. That way nobody can book online right after the treatment, and you see it striped below the appointment in the calendar.
You set a general buffer time for all services. Does a treatment need more or less time, such as a massage after which you remake the table? Then give that service its own buffer time.
Set the general buffer time
-
Step 1: Turn on the general buffer time
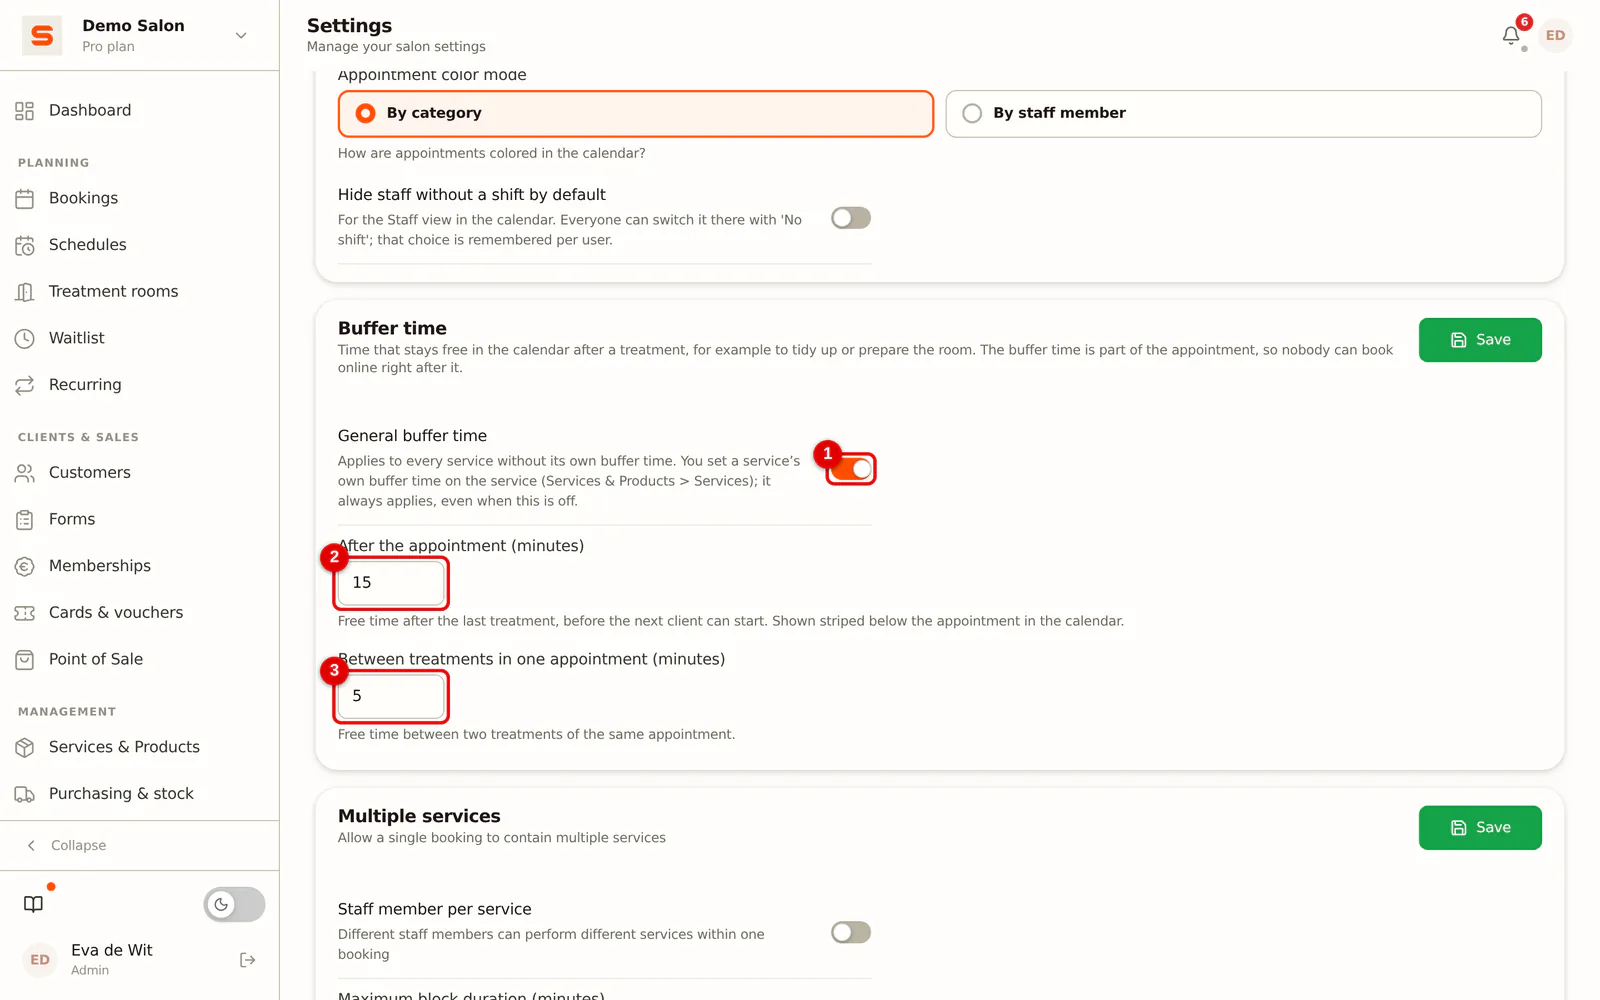
Go to Settings > Calendar and find the Buffer time card. Turn on General buffer time and fill in:
- After the appointment (minutes): the free time after the last treatment, before the next client can start.
- Between treatments in one appointment (minutes): the free time between two treatments of the same appointment.
Click Save.
 (Enlarge image)
Its own buffer time for a service
-
Step 1: Open the service
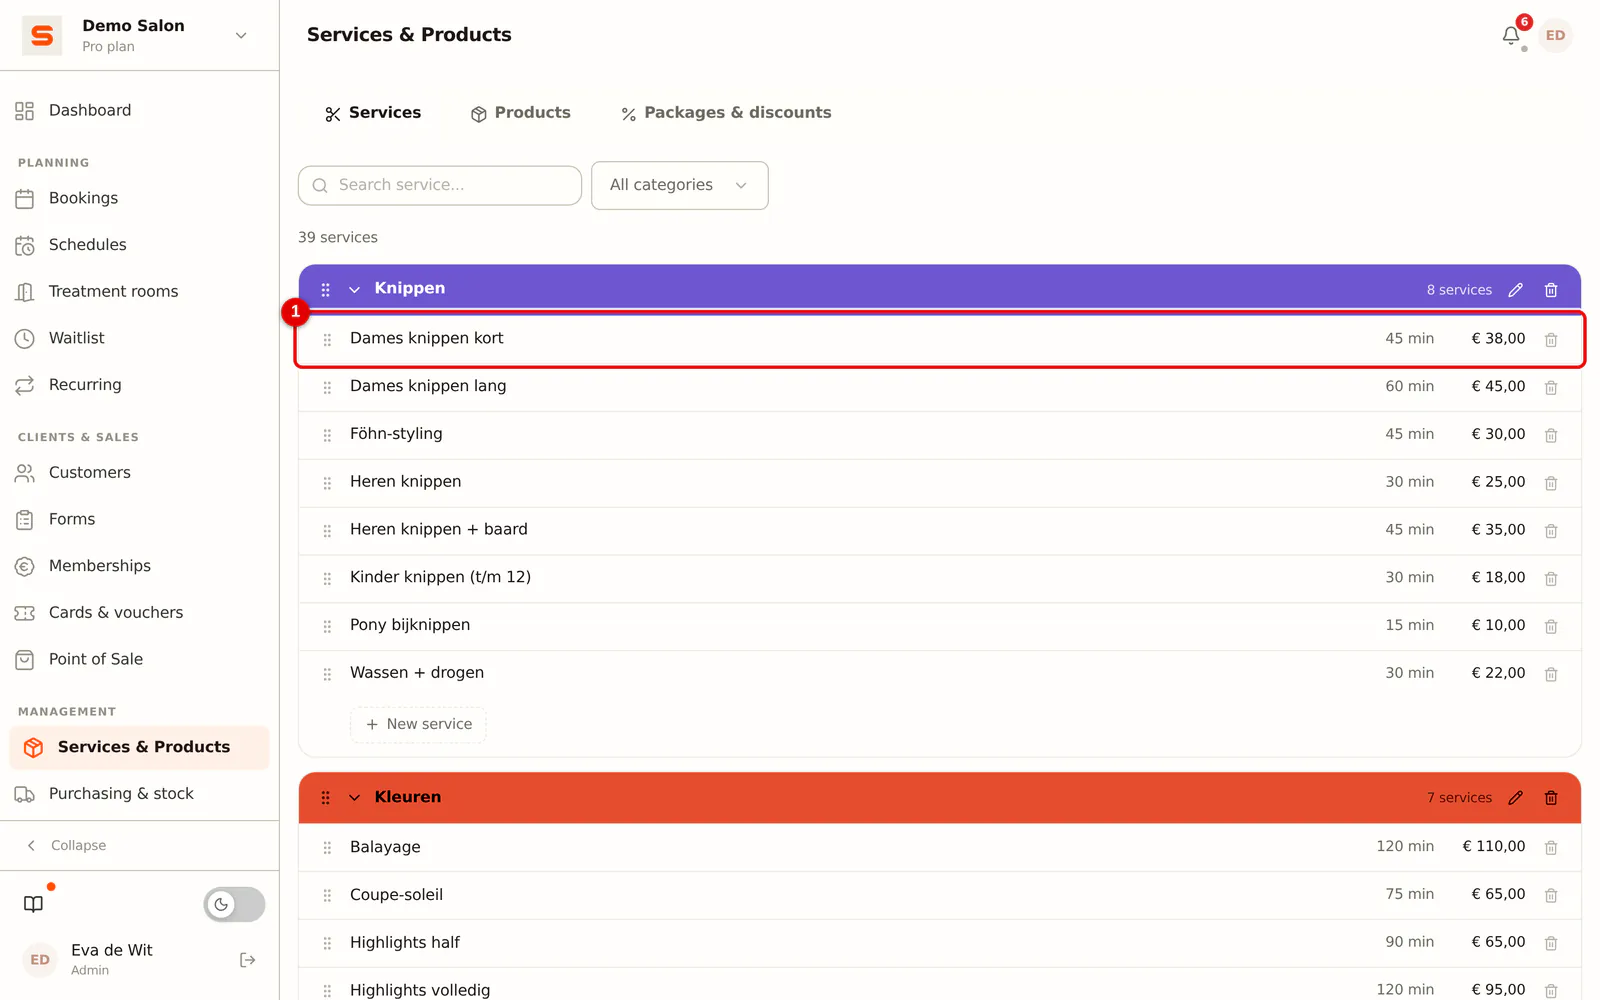
Go to Services & Products > Services and click the service.
 (Enlarge image)
-
Step 2: Fill in the service's buffer time
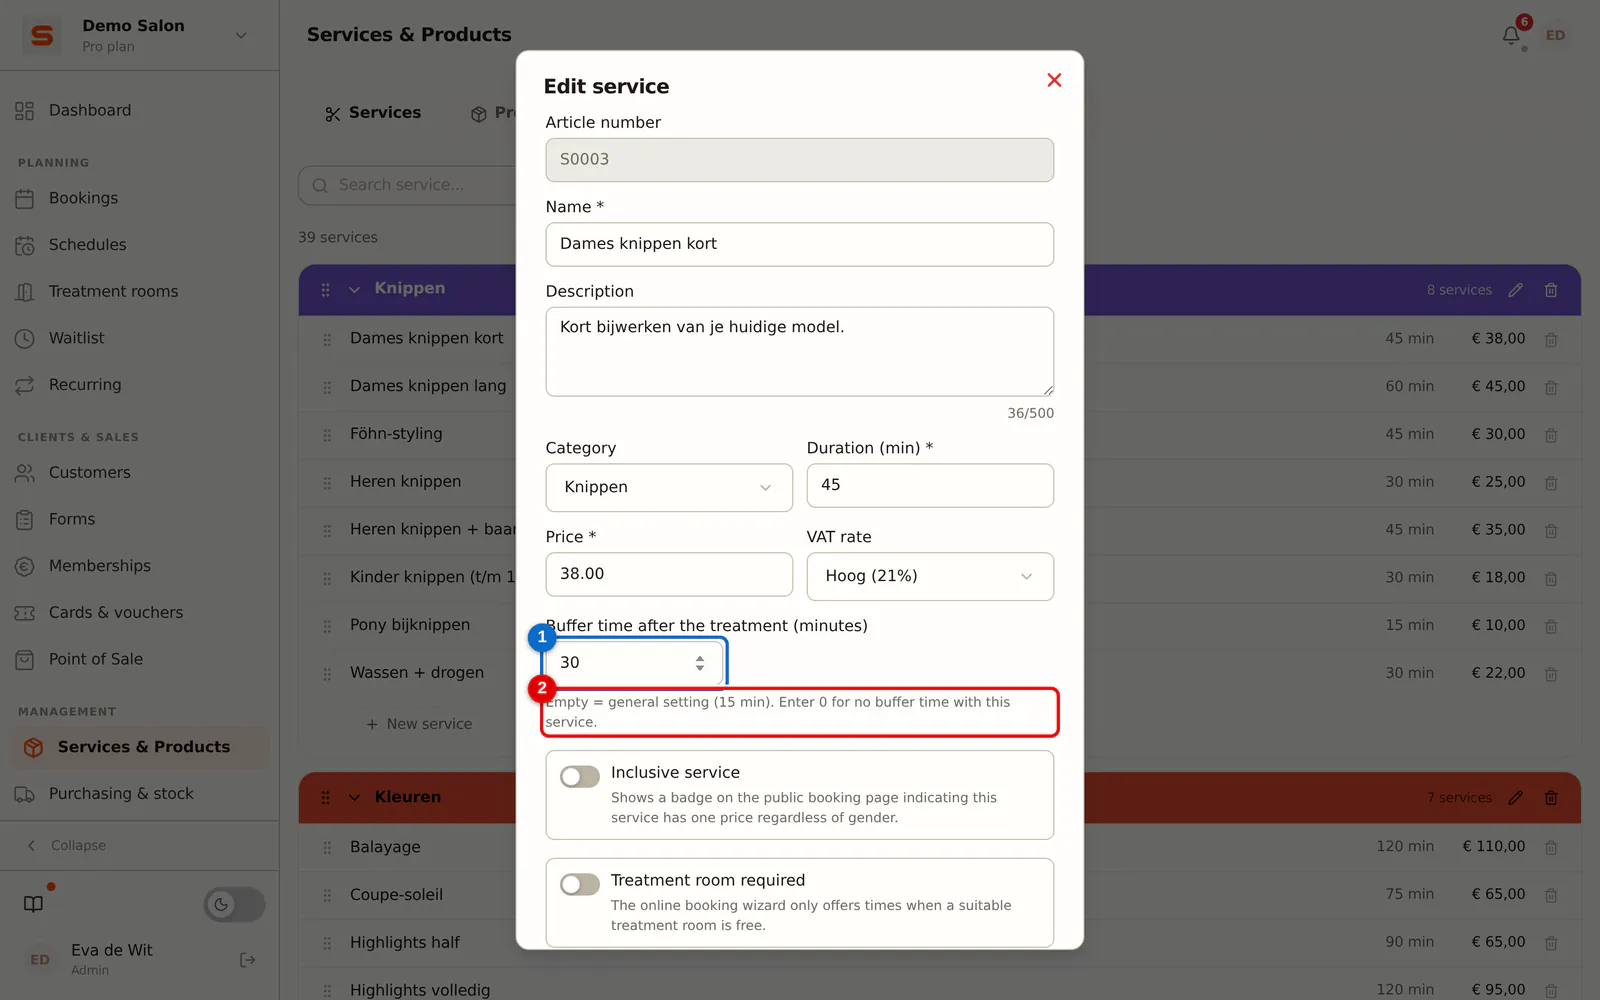
Enter the number of minutes under Buffer time after the treatment (minutes) and click Save.
- Empty: the service follows the general buffer time. Below the field you see how many minutes that is now.
- 0: this service deliberately has no buffer time, even when the general buffer time is on.
- A number (whole minutes, up to 240): this buffer time always applies, even when the general buffer time is off.
 (Enlarge image)
How you see the buffer time in the calendar
-
Step 1: Plan an appointment
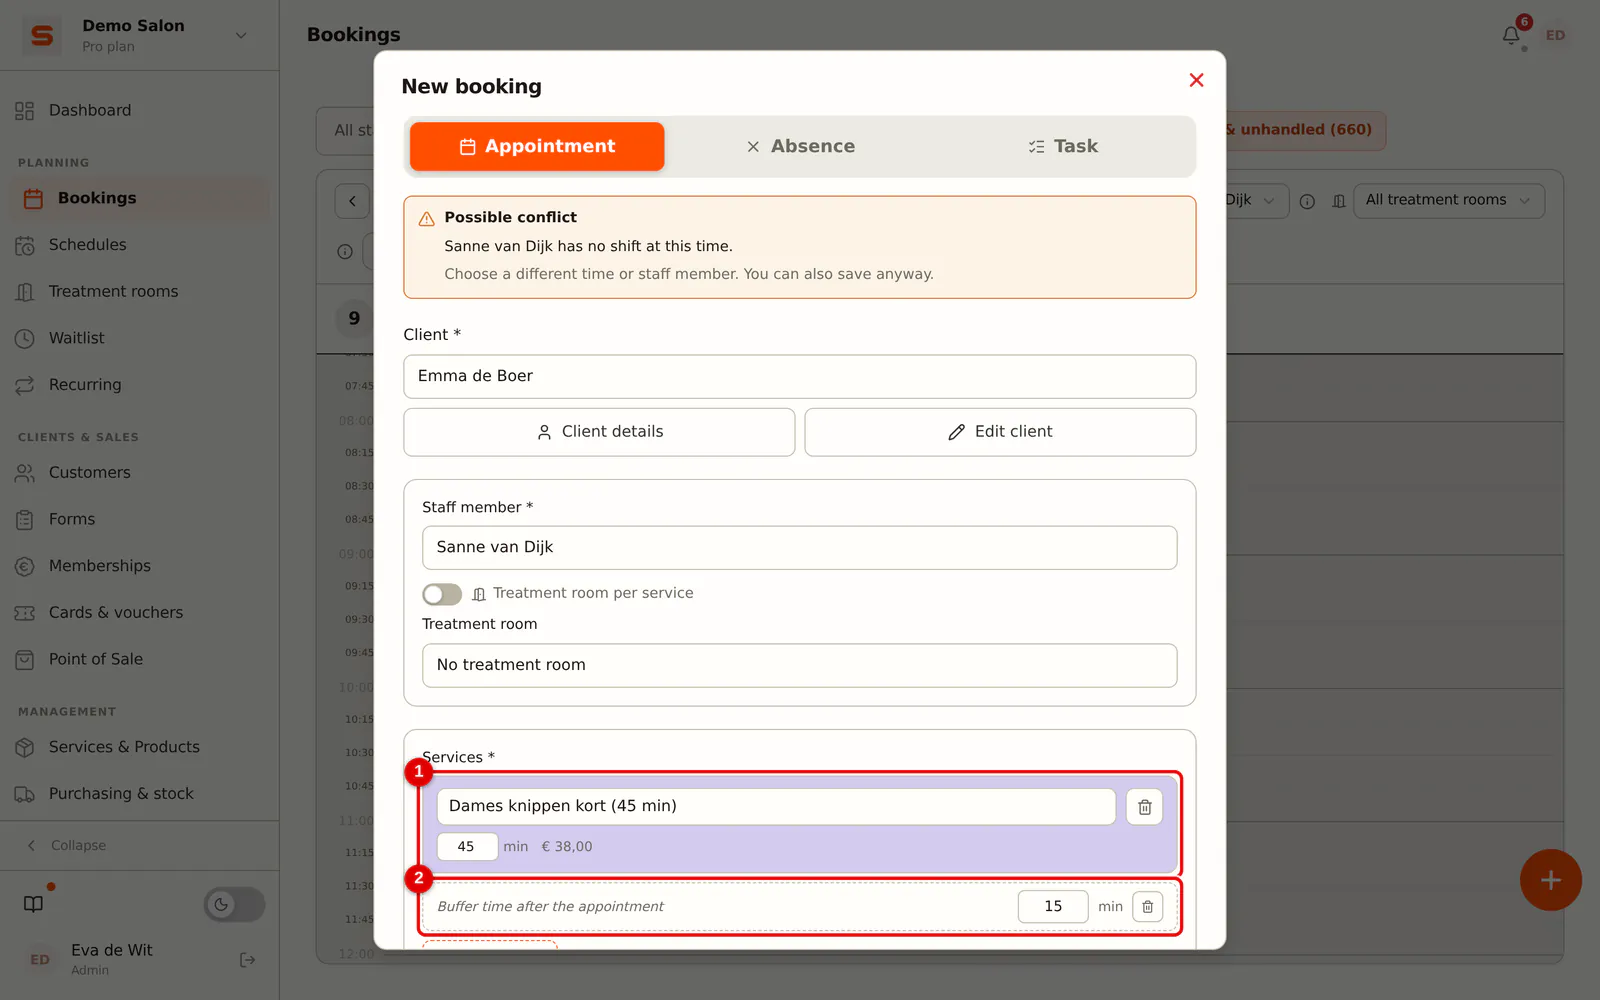
When you choose a treatment in a new appointment, Salonnare puts that service's buffer time below it, as the row Buffer time after the appointment. You can change the minutes for this one appointment or remove the row with the bin icon.
 (Enlarge image)
How Salonnare calculates
- After the appointment, the buffer time of the last treatment counts.
- Between two treatments, the buffer time of the treatment before it counts. If that one has no buffer time of its own, the general time between treatments applies.
- The buffer time counts towards the duration of the appointment. Online booking, the waitlist, courses and Google Reserve all use it: a time whose buffer time no longer fits within working hours is not offered.
- If a new client gets extra time for a first visit, it is added to the buffer time after the appointment.
What if ...
... I change the buffer time? New appointments get the new time. Existing appointments keep the buffer time they had.
... I enter a negative number, a number above 240 or a decimal? Then Salonnare does not save the service and says the field is not right. Enter whole minutes, or leave the field empty.
Frequently asked questions
Do clients see the buffer time?
No. Online, clients only see the duration of the treatment. The buffer time only makes sure nobody is booked right after it.
Where was this before?
The general buffer time used to be called Transition time and was under Multiple services. Your settings have simply carried over.