Setting up the treatment chart
With the treatment chart you keep a digital treatment report per client: findings on a drawing, pick lists, before and after photos and your notes. There are five templates: Foot, Skin analysis, Injectables (botox and fillers), Lashes and Reflexology.
The treatment chart is part of the Starter and Pro plans. You work with it as an administrator, or as a staff member who has Access to health notes switched on (see Treatment chart and privacy).
Before you fill in the first chart, set up two things: the pick lists per template, and which service belongs to which template.
Adjusting the pick lists
-
Step 1: Open the treatment chart settings
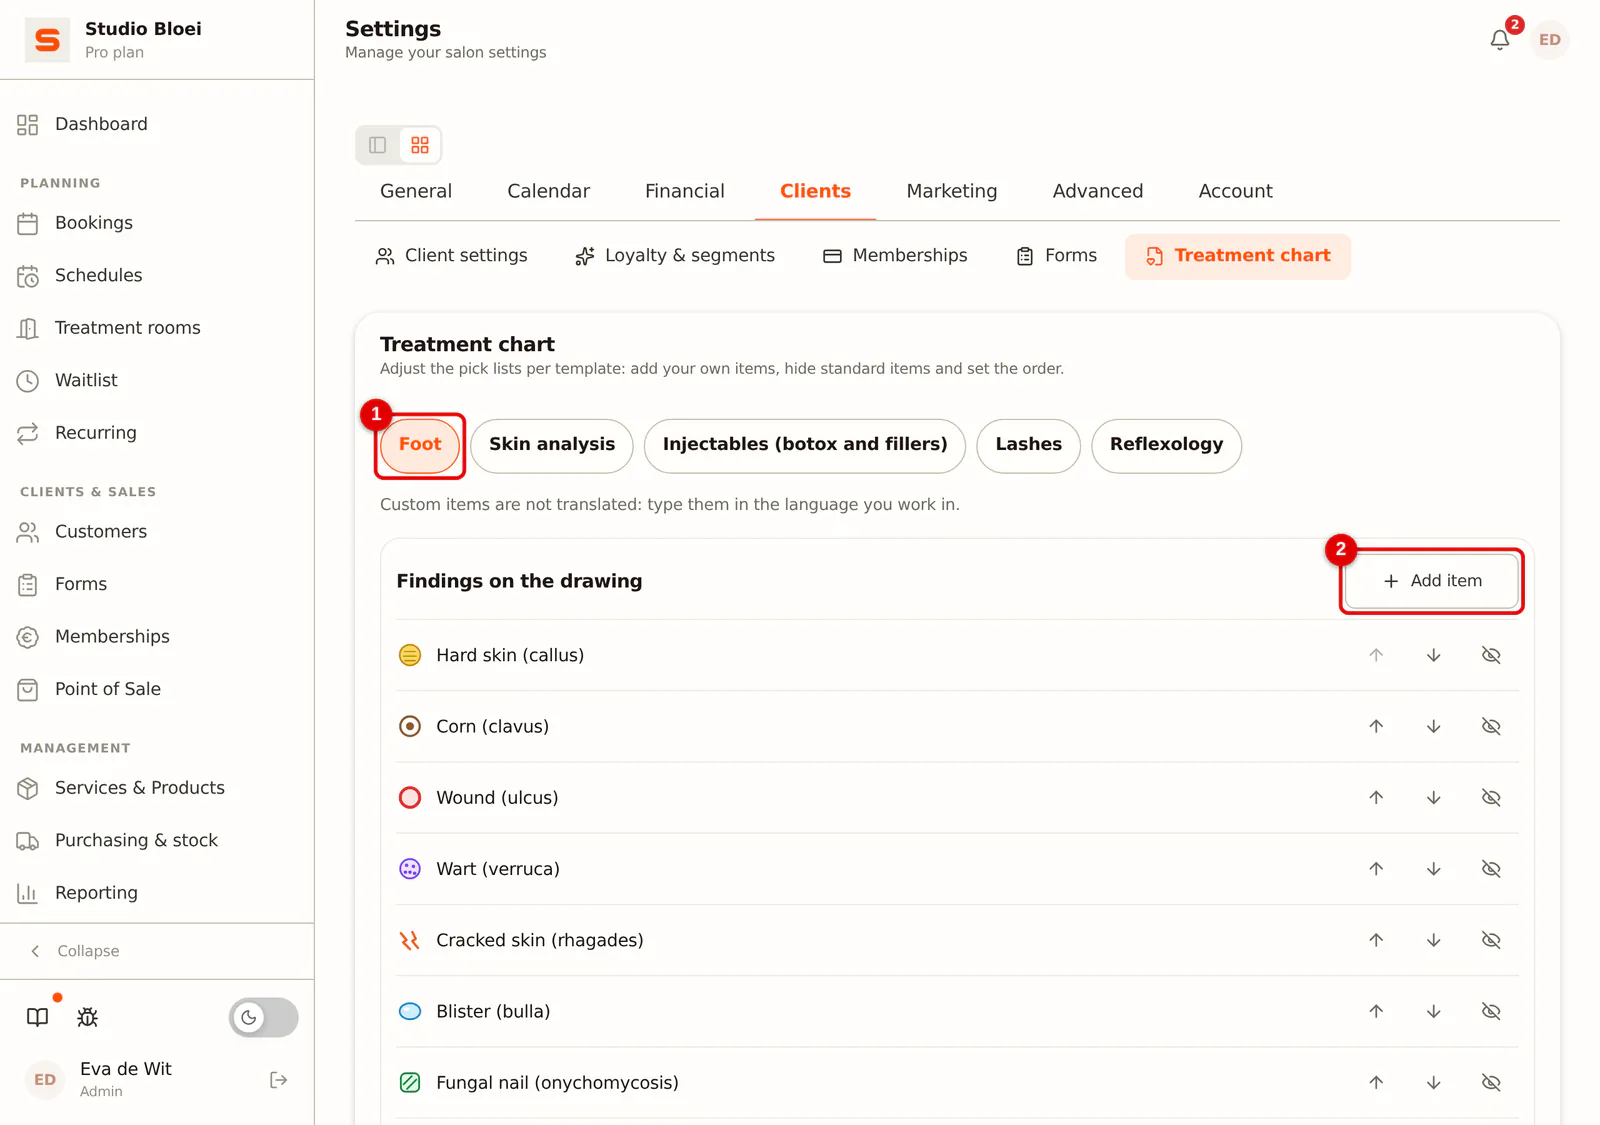
Go to Settings > Clients > Treatment chart. At the top, choose the template you want to adjust. Below it are the lists of that template, for example Findings on the drawing. Click Add item next to a list.
 (Enlarge image)
-
Step 2: Create your own item
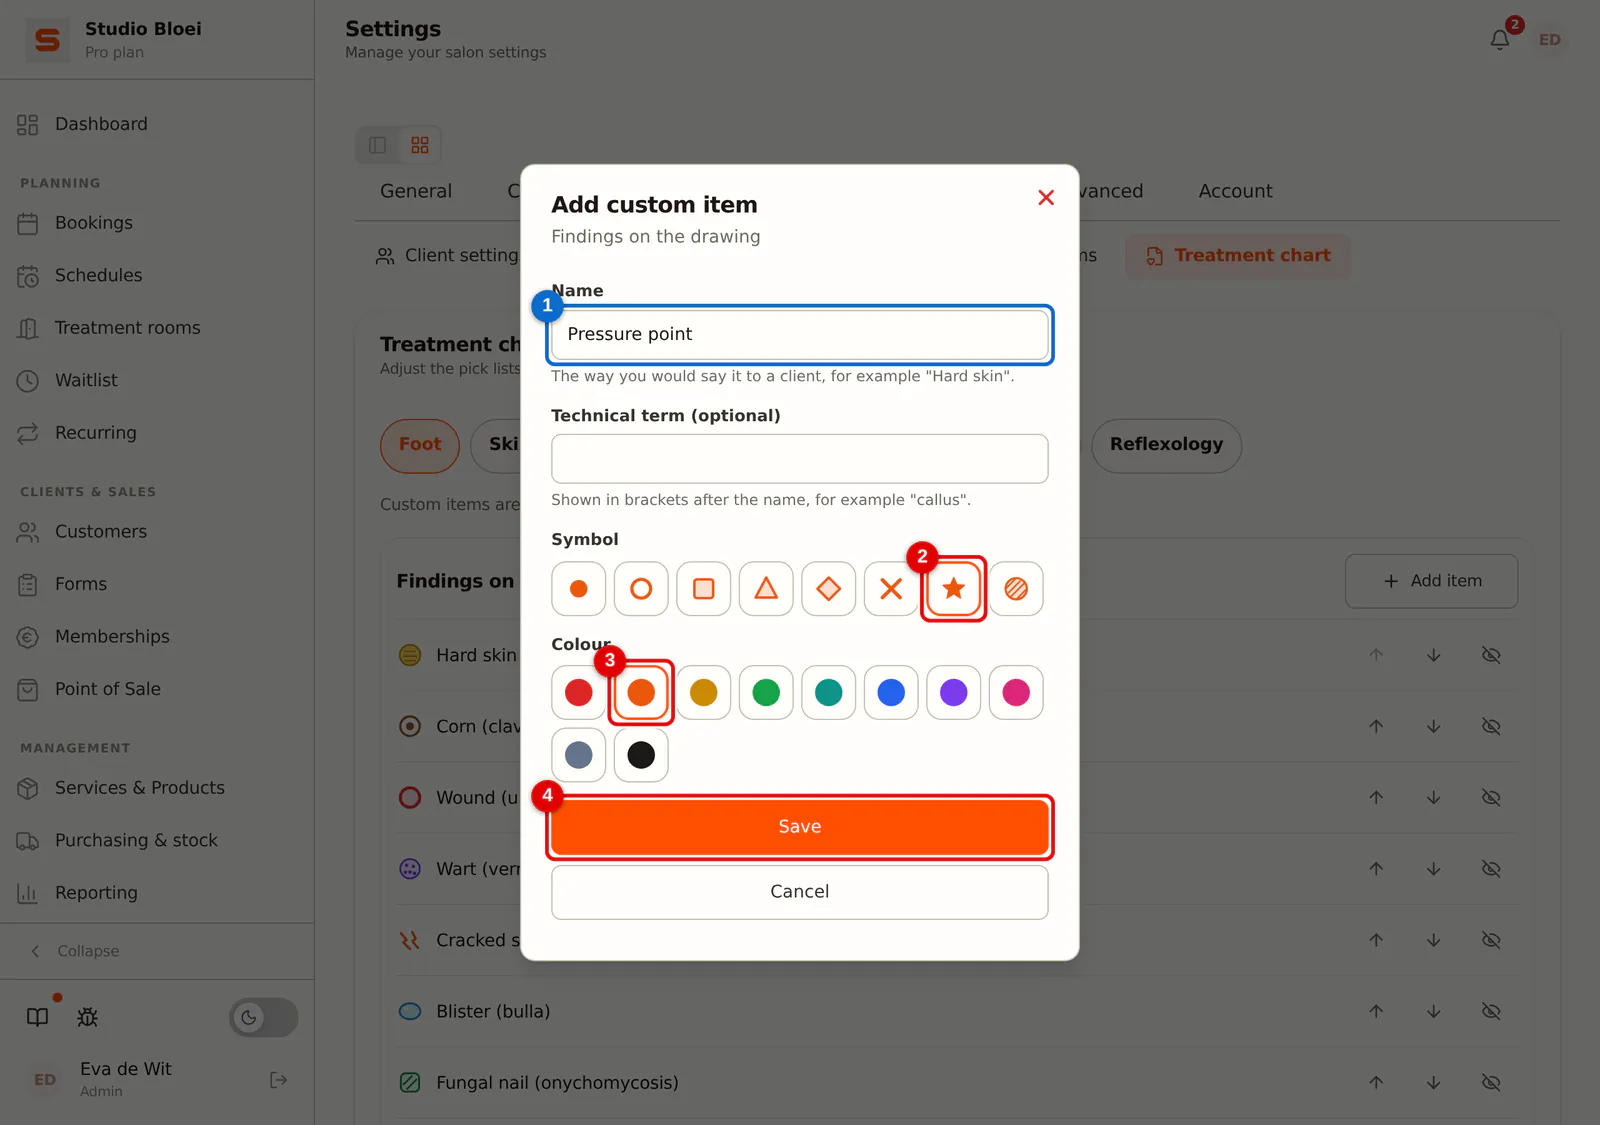
Fill in the Name the way you say it to a client, for example "Pressure point". Under Technical term you can add the technical term; it is then shown in brackets after the name. For a finding on the drawing you also choose a Symbol and a Colour. Click Save.
 (Enlarge image)
-
Step 3: Set the order and hide what you don't use
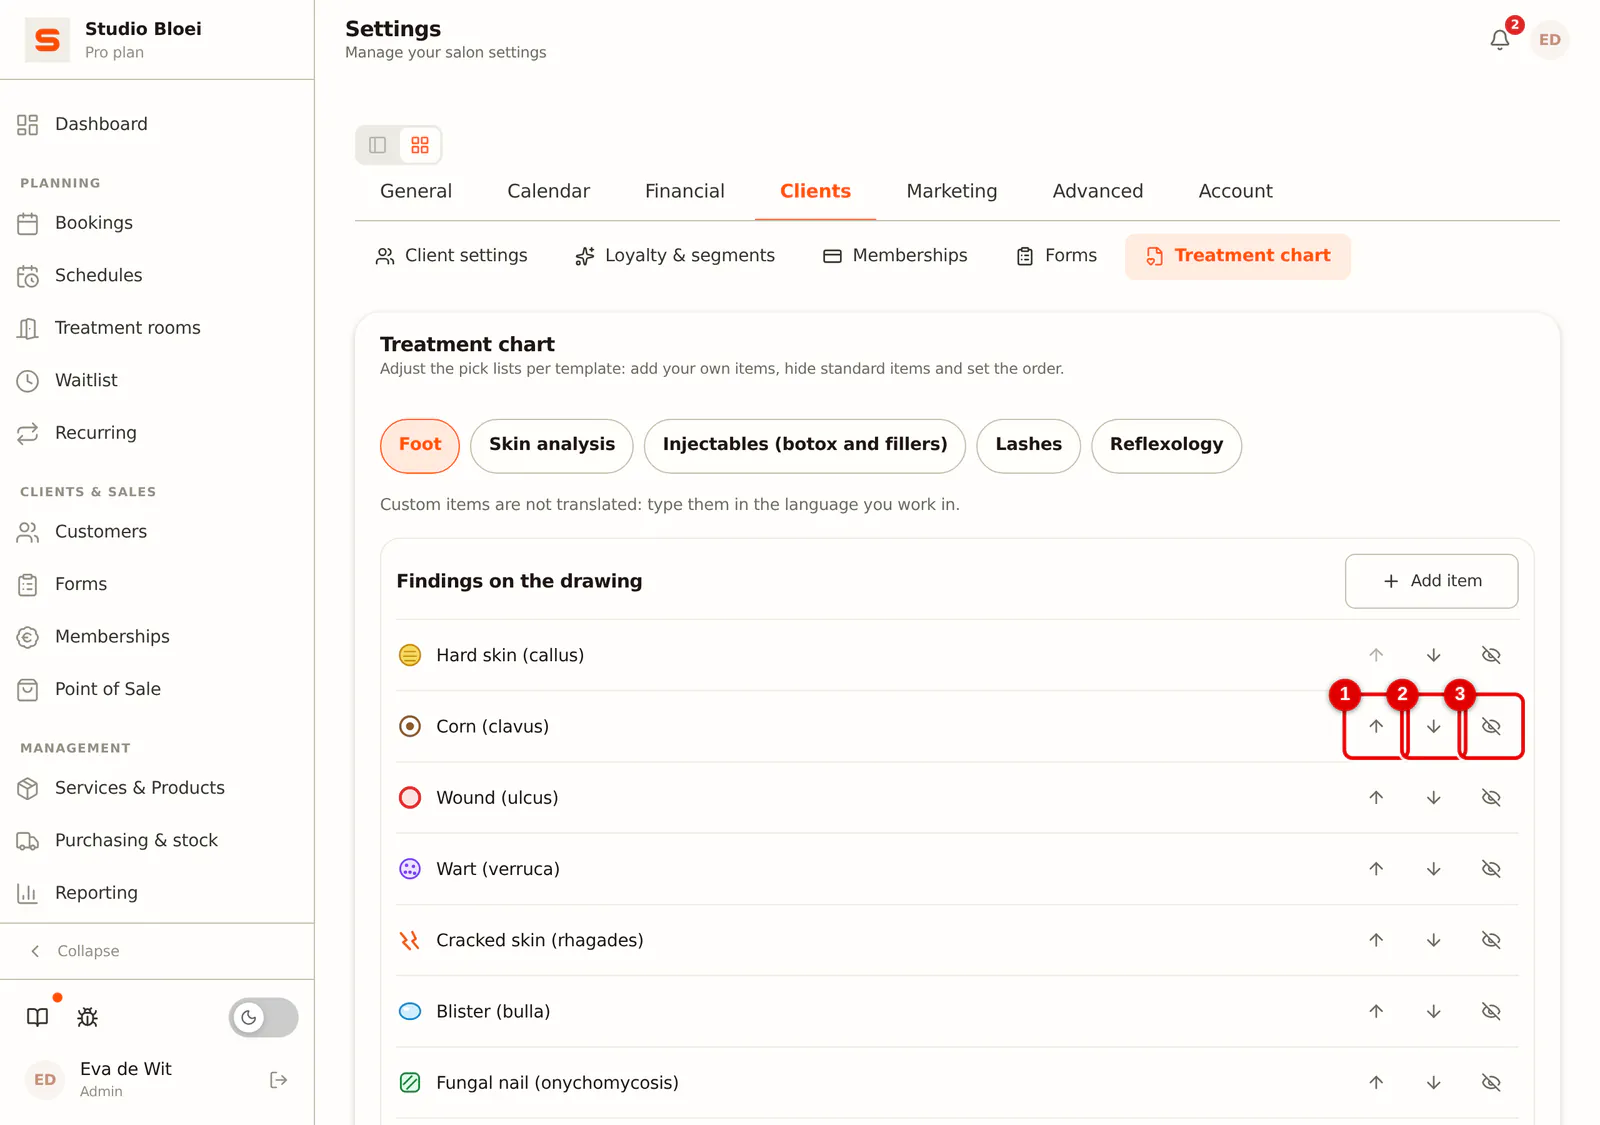
Use the arrows to move an item up or down, so what you use most is at the top. If you never use a standard item, click the crossed-out eye to hide it. It disappears from the pick list when filling in, but older reports keep showing it.
 (Enlarge image)
-
Step 4: Adjust aftercare and safety too
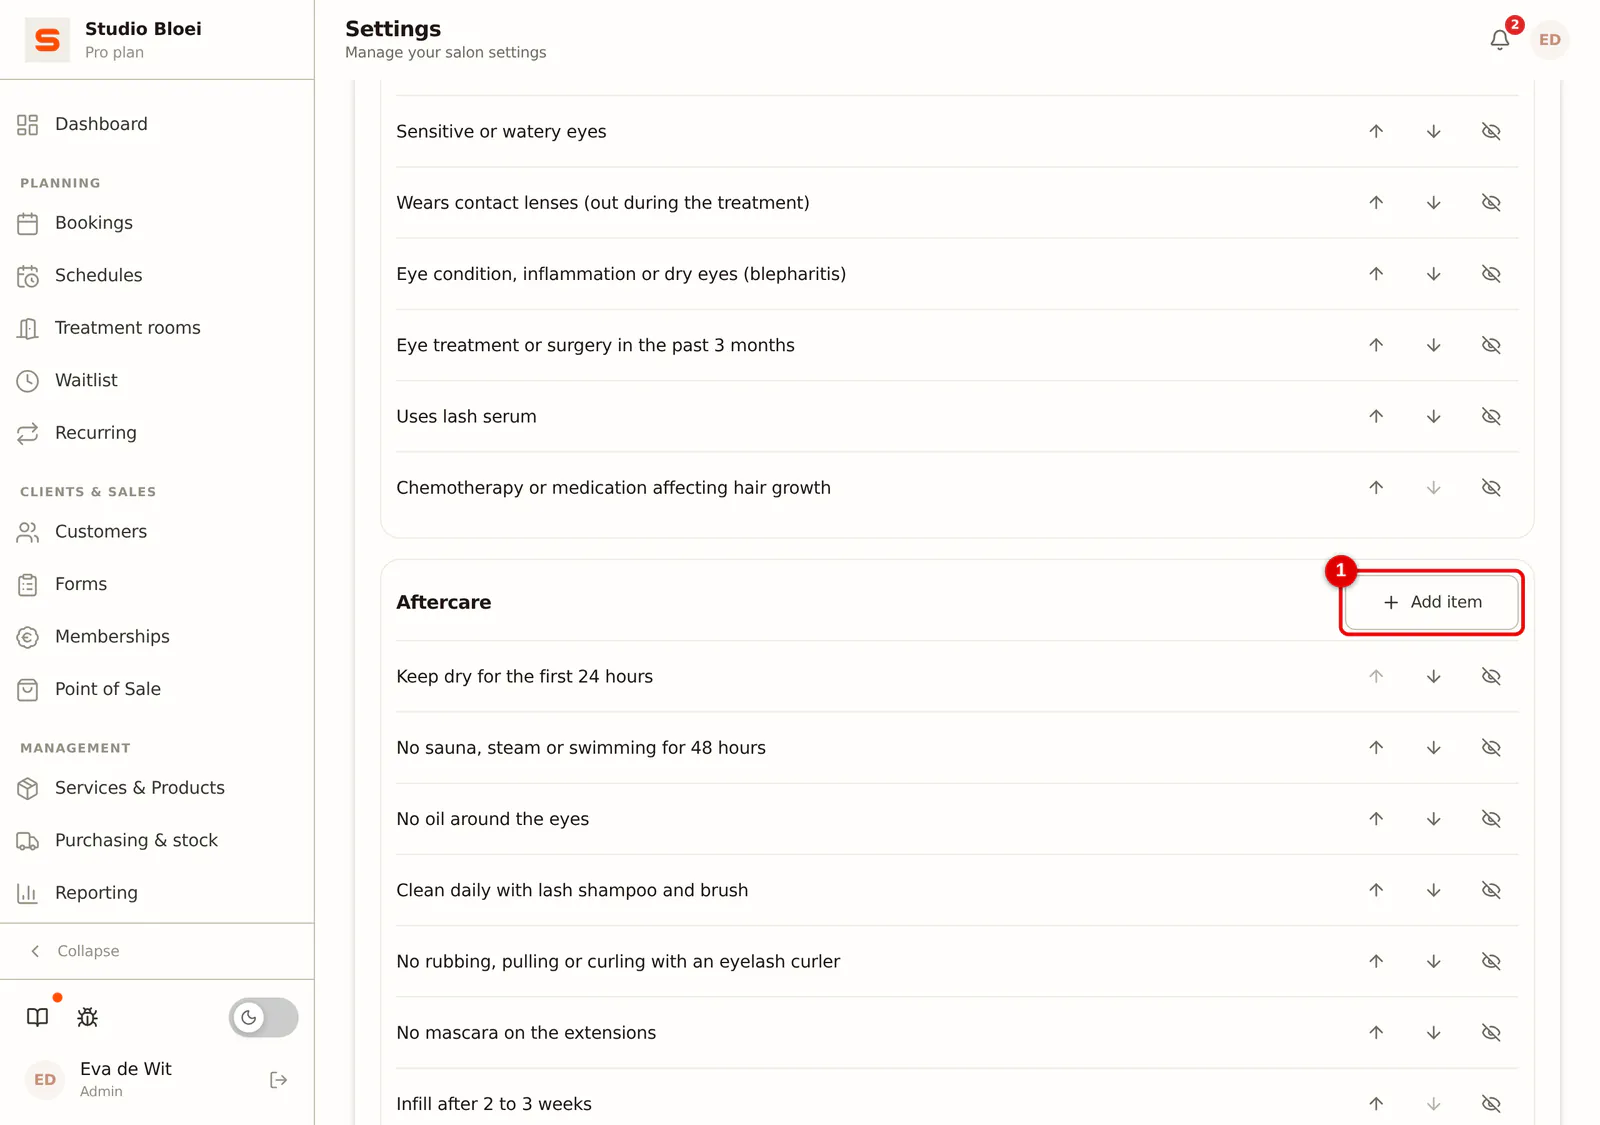
Not only the findings can be adjusted. Choose, for example, the Lashes template and add your own points under Aftercare or Safety, such as the aftercare advice you always give. For Skin analysis and Injectables you can add to the Contraindications in the same way.
 (Enlarge image)
Hidden and archived items are at the bottom of a list under Hidden and archived. You bring them back there with Show again or Restore.
A custom item that is already used in a report cannot be deleted. Archive it instead: it disappears from the pick list and existing reports stay correct. A custom item that hasn't been used anywhere yet can be deleted. Custom items are not translated: type them in the language you work in.
Linking a template to a service
When you link a template to a service, every appointment with that service shows a button to fill in the treatment chart. After the appointment you also get a reminder (see Treatment charts overview).
-
Step 1: Open the service
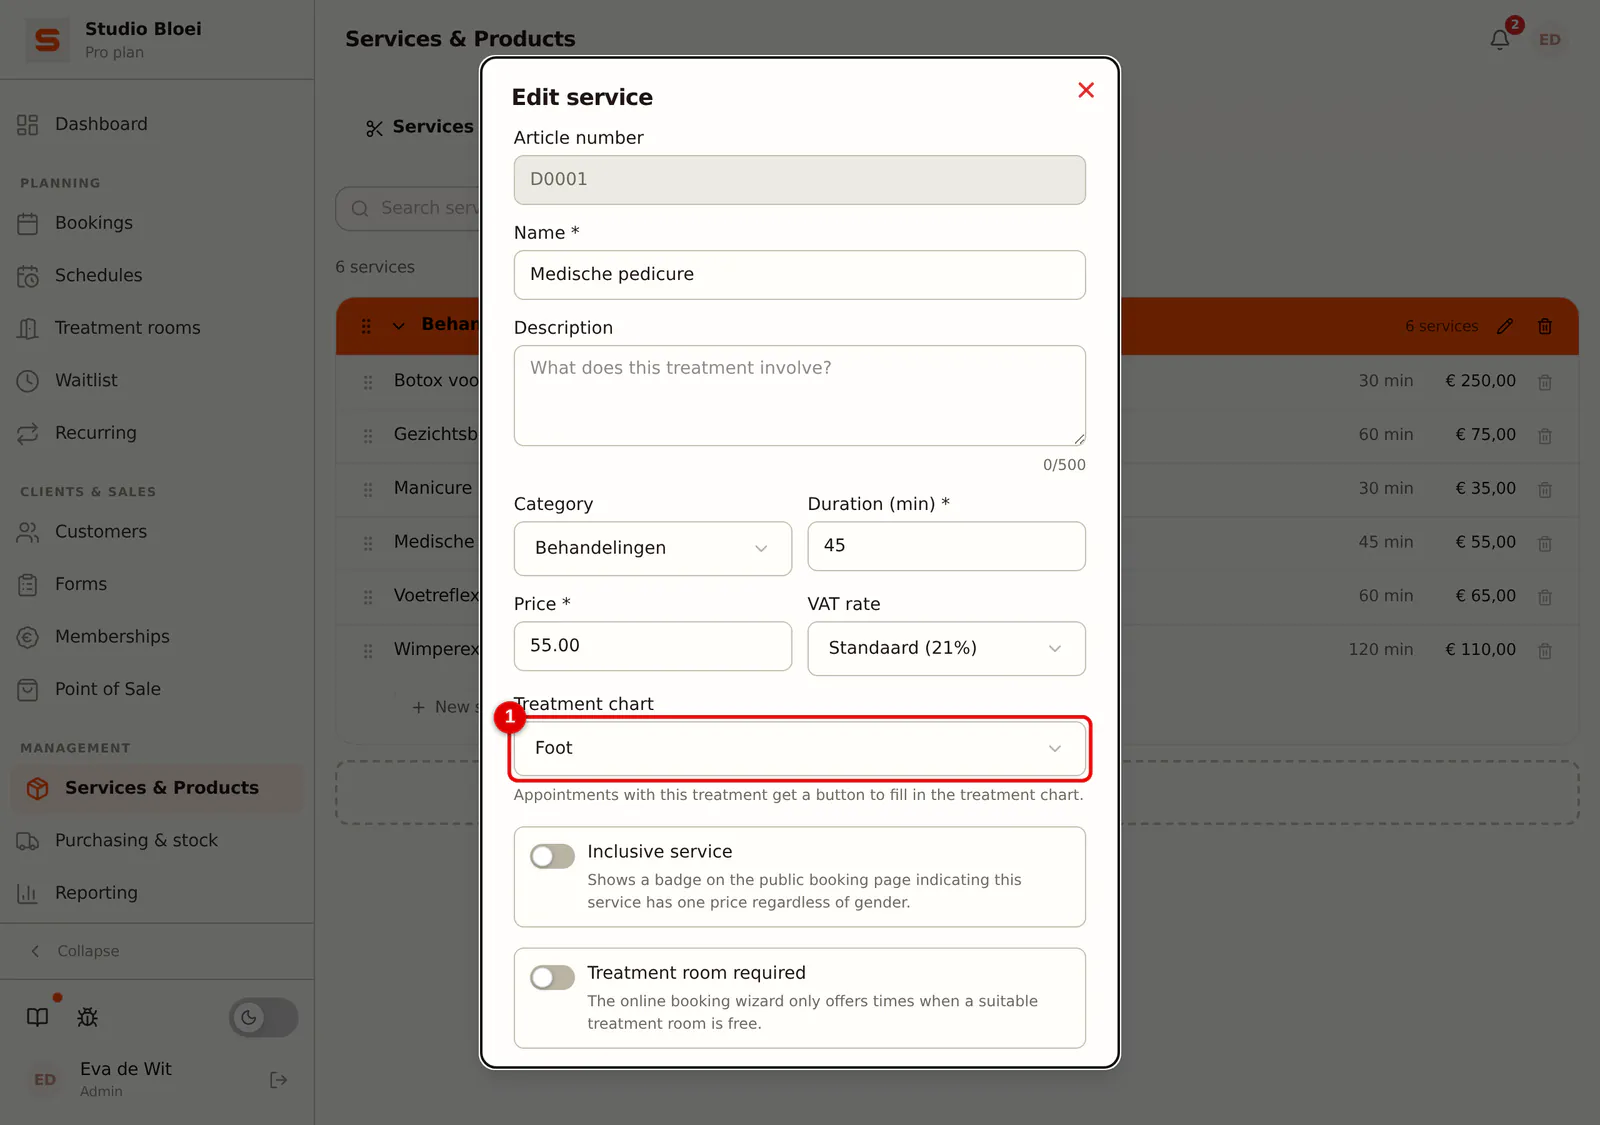
Go to Services & Products, open the service and scroll in the form to the Treatment chart field.
 (Enlarge image)
-
Step 2: Choose the template
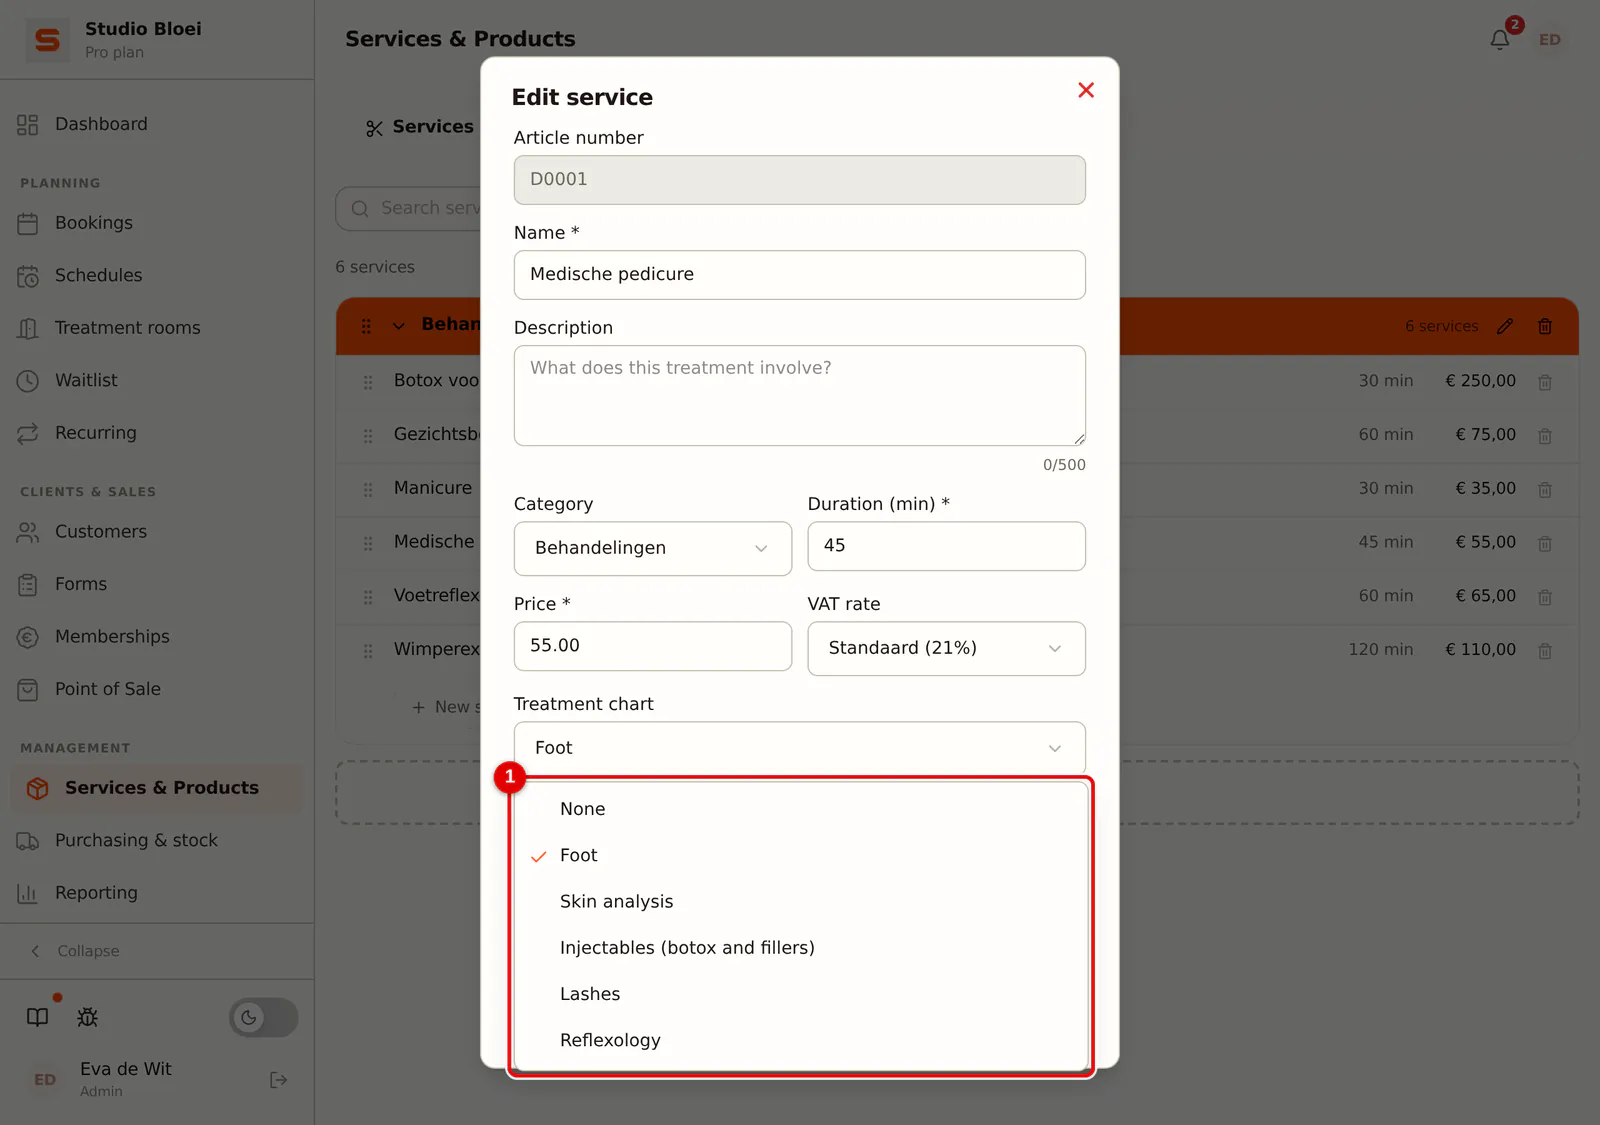
Choose the template that belongs to this service, for example Foot for a medical pedicure. Choose None if no treatment chart belongs to it. Save the form.
 (Enlarge image)
Frequently asked questions
Who can adjust the pick lists? Anyone who may manage the form settings. Someone with view rights only sees the lists but cannot change them.
Does a change affect my old reports? No. A report keeps the items as they were when you saved it. Hiding or archiving only removes an item from the pick list for new reports.
How many custom items can I add? Up to 40 per list.