Treatment chart and privacy
A treatment chart contains health data: special categories of personal data under the GDPR. Salonnare therefore handles it separately from the rest of the client record:
- Stored encrypted, just like the health vault. The photos too.
- Every access is logged: who opens, prints or erases a report is recorded in the log.
- Retention period: up to 20 years after the last treatment. After that the reports are erased automatically.
- No email: Salonnare never emails a treatment chart, not even to the client.
Recording consent
Without recorded consent for special categories of personal data you cannot create or change a report.
-
Step 1: Open the client
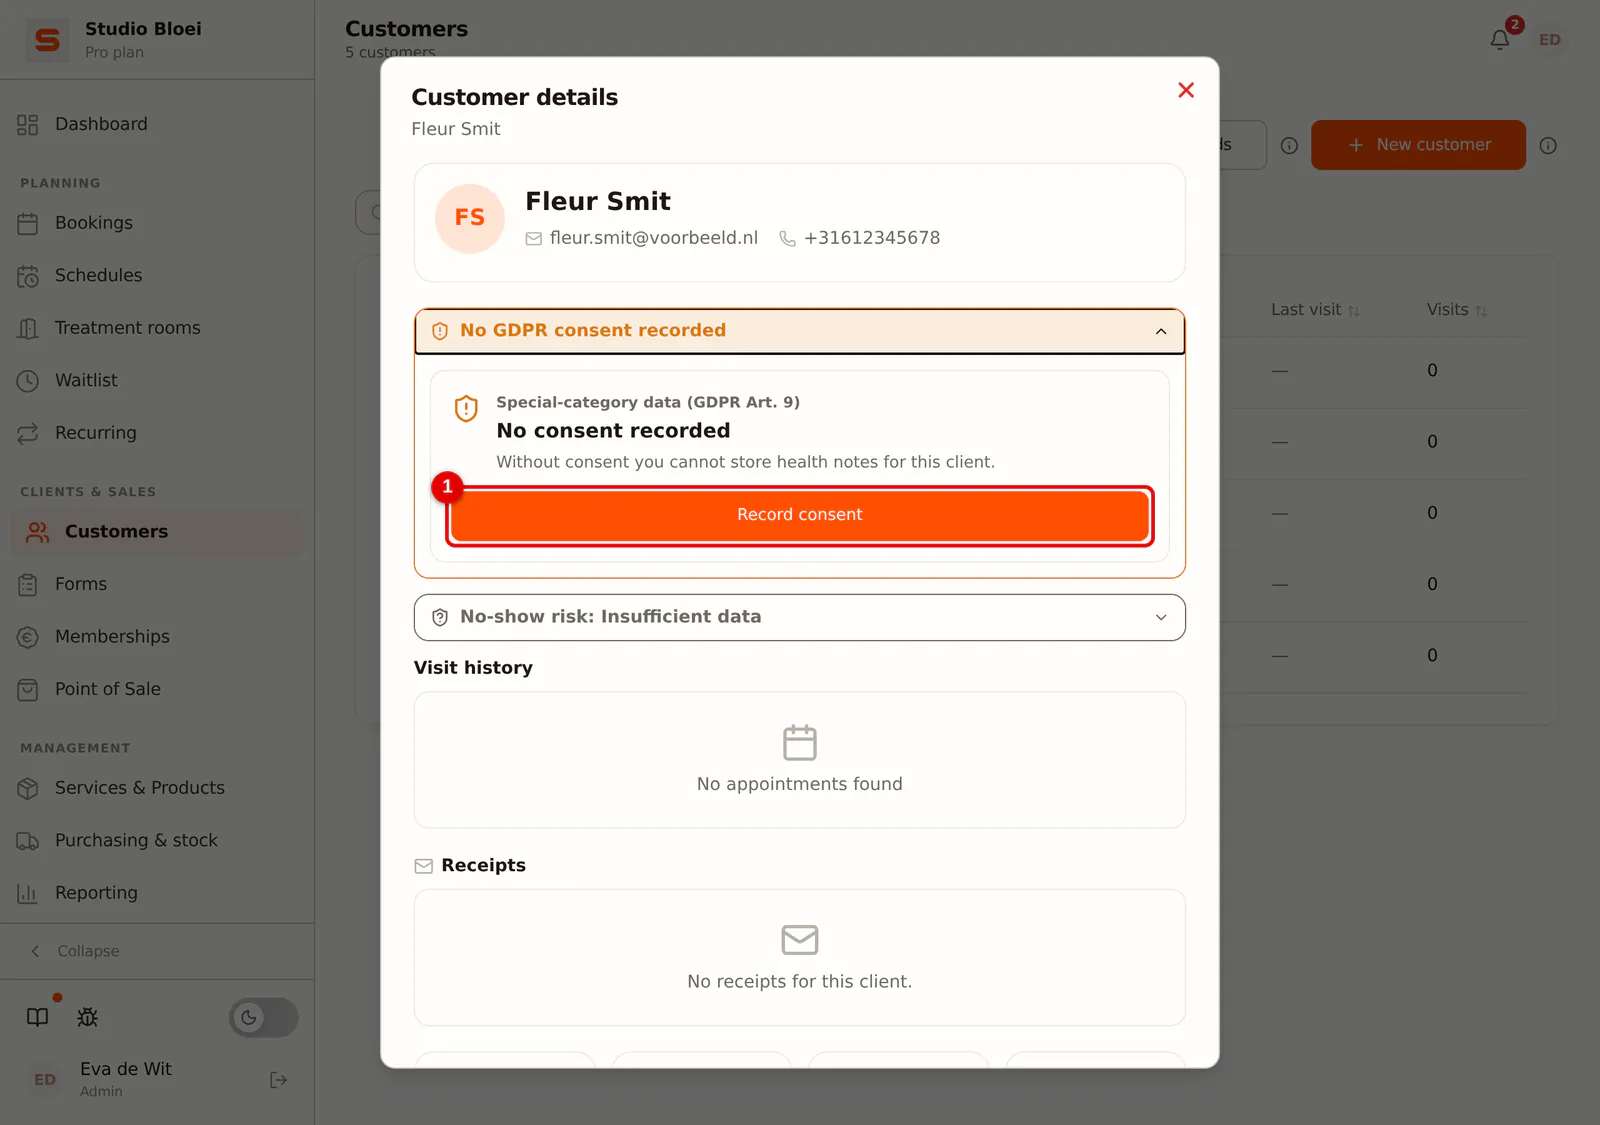
Open the client via Customers. If no consent has been recorded yet, you see No consent recorded at the top. Ask the client for consent and click Record consent.
 (Enlarge image)
-
Step 2: Choose the legal basis and record it
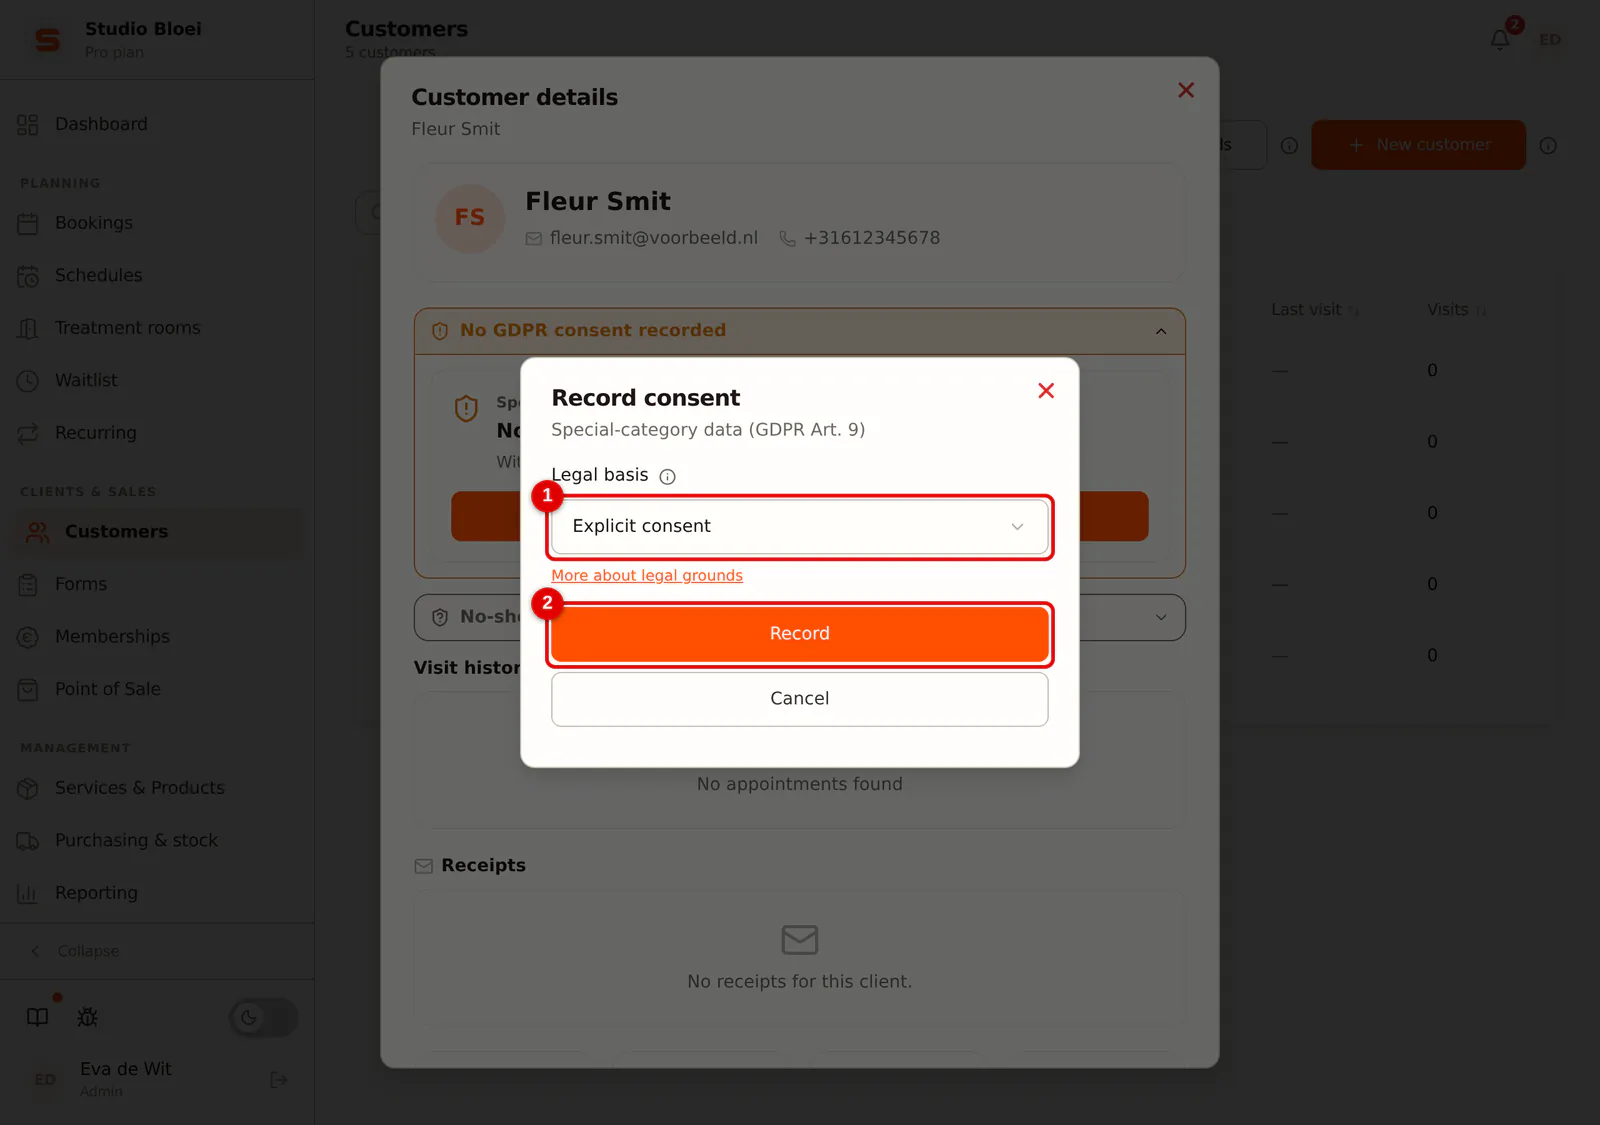
Choose the Legal basis; for a treatment chart that is usually Explicit consent. Click Record. You can read more about the legal bases in Which legal ground do you pick for health data?.
 (Enlarge image)
If the client withdraws her consent, the existing reports can still be read, but you can't create or change any.
Who may see the treatment chart
Administrators always see the treatment chart. A staff member only if Access to health notes is switched on for her; otherwise she doesn't see the buttons and the warnings at the appointment at all.
-
Step 1: Open the staff member
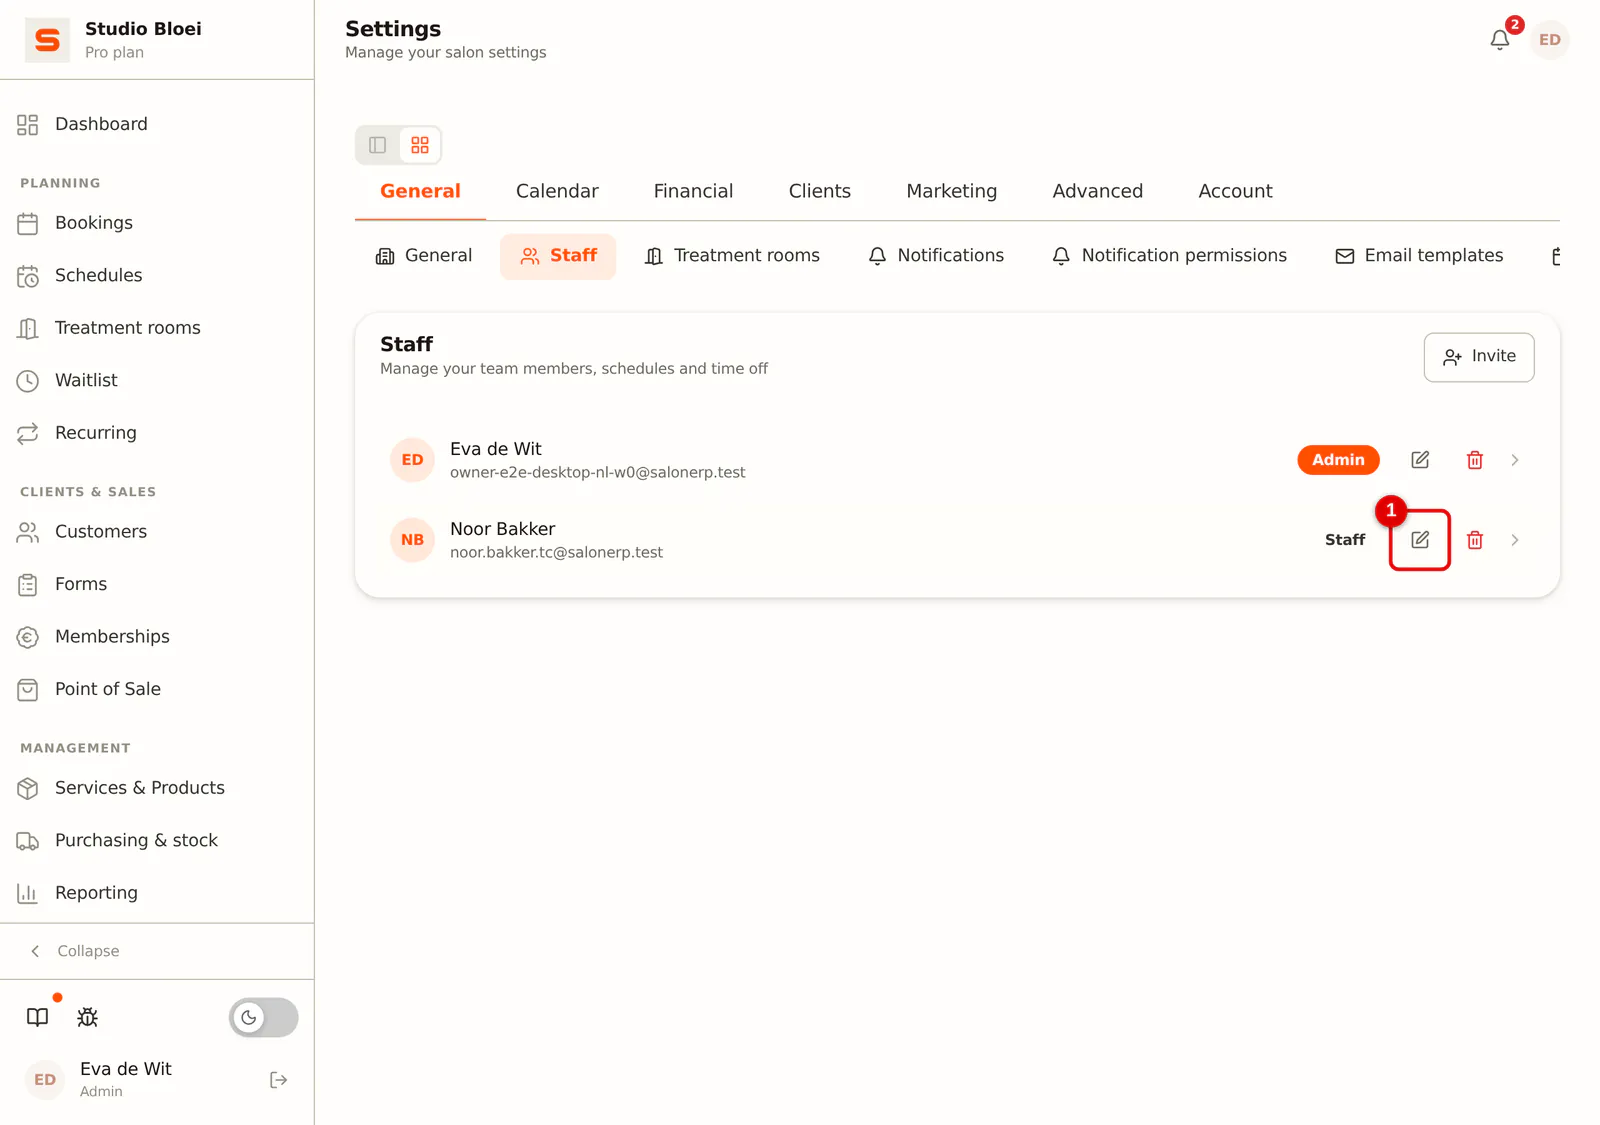
Go to Settings > General > Staff and click the pencil next to the staff member.
 (Enlarge image)
-
Step 2: Switch the right on or off
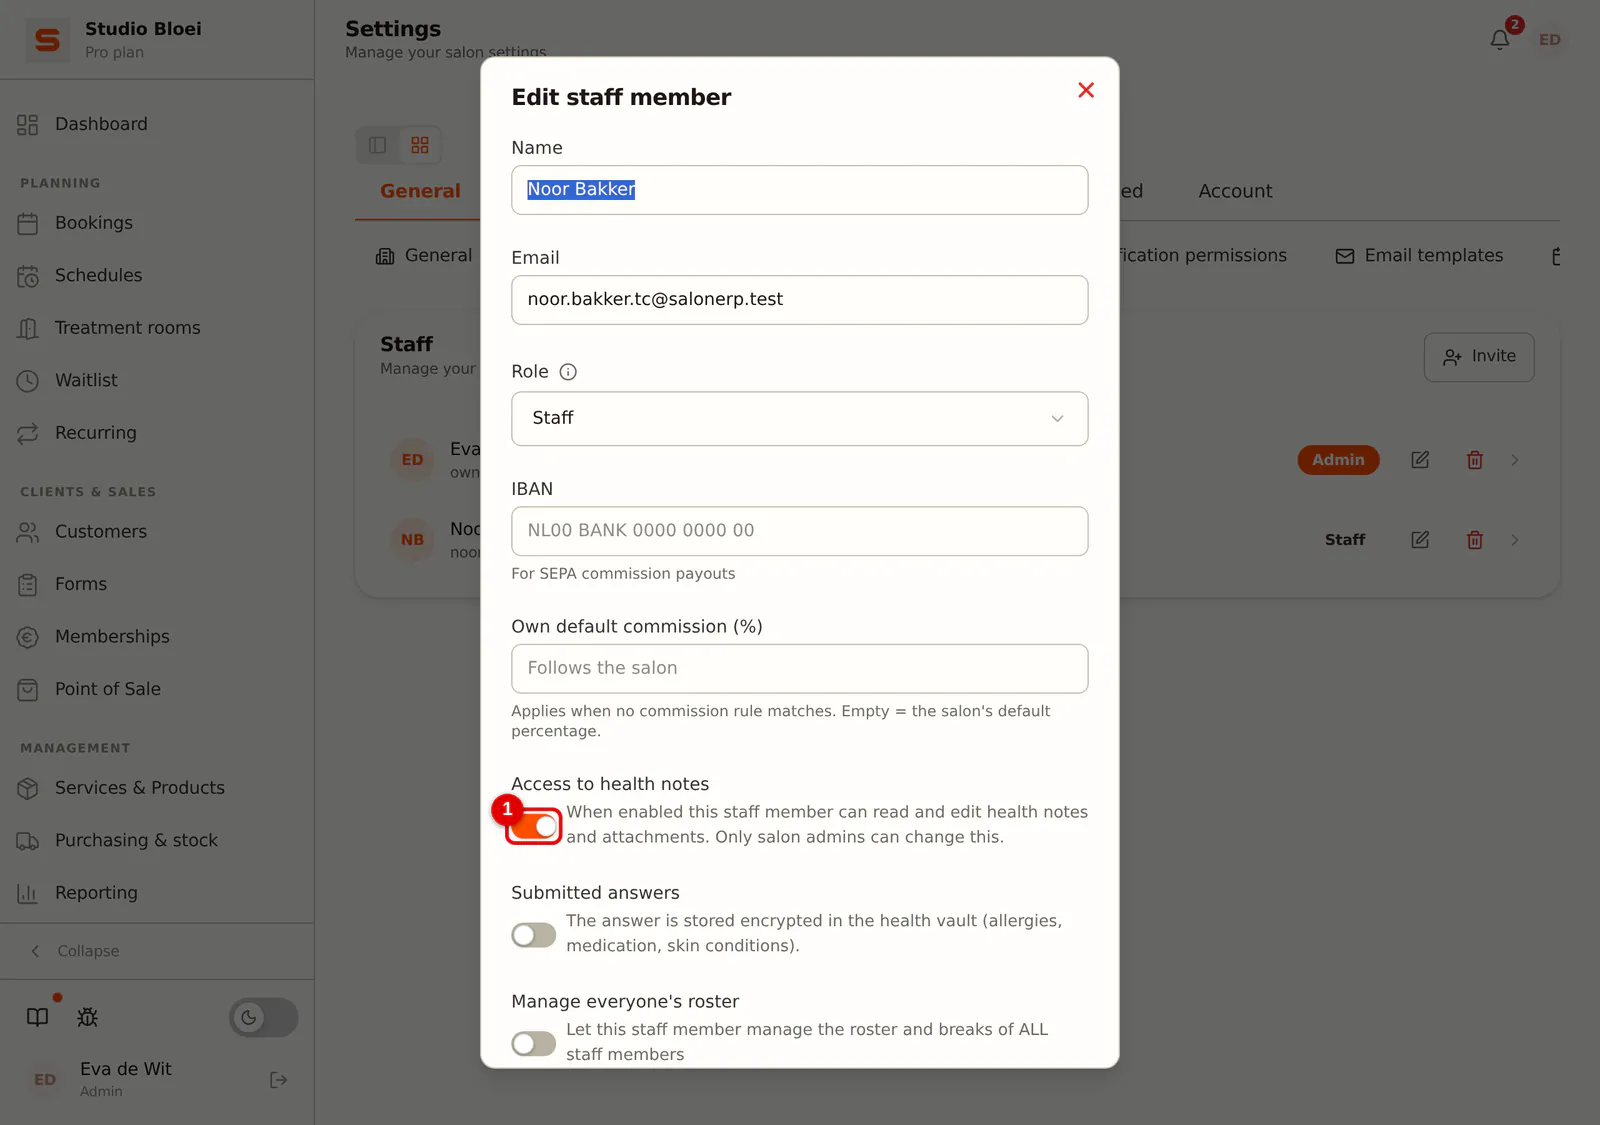
Switch Access to health notes on or off and save. The same right applies to the health vault.
 (Enlarge image)
Printing or a PDF for the client
If a client asks for her data, you give her the reports on paper or as a PDF.
-
Step 1: Print
Open the client's treatment chart. Print all creates one document with all reports, including drawings, addenda and photos. You print a single report with Print / PDF at the bottom of that report. In the print window choose your printer, or Save as PDF.
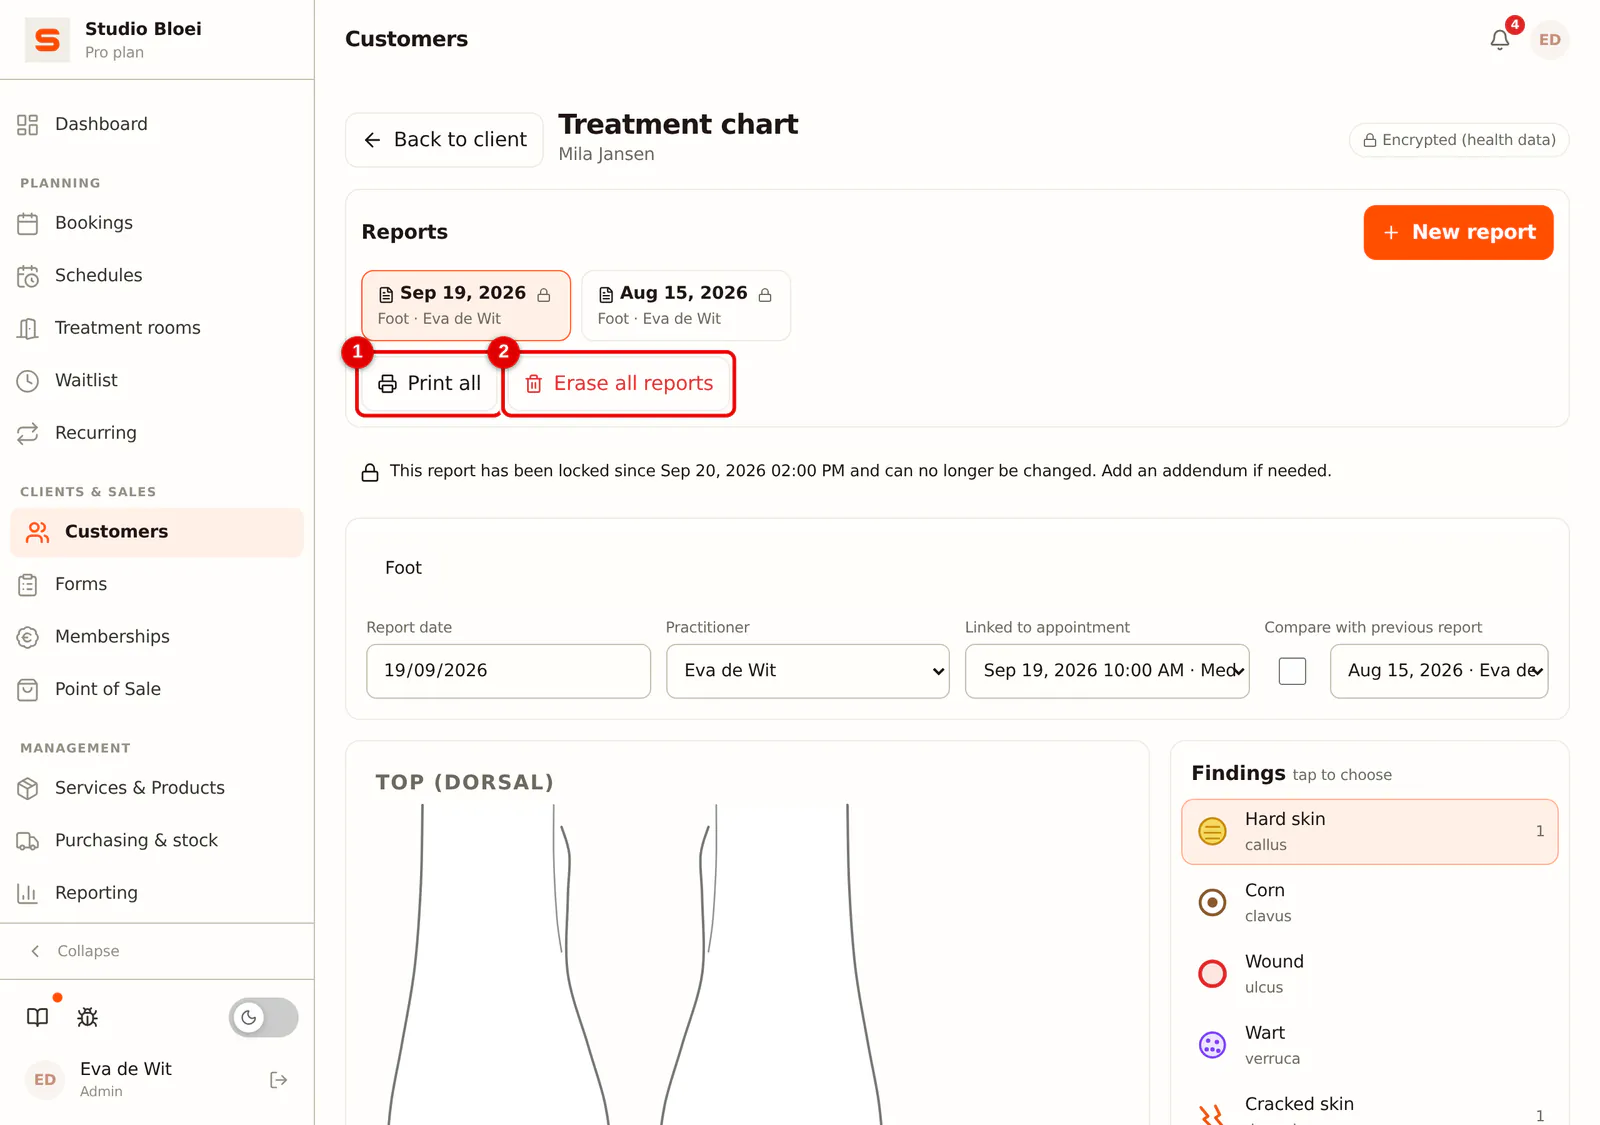 (Enlarge image)
Erasing all reports on request
If a client wants her treatment reports removed, an administrator can erase them in one go.
-
Step 1: Confirm with the client's name
Click Erase all reports. Type the client's name to confirm and click Erase permanently. All reports, addenda and photos of this client are permanently erased; this cannot be undone. The log only keeps the fact that an erasure took place, without content.
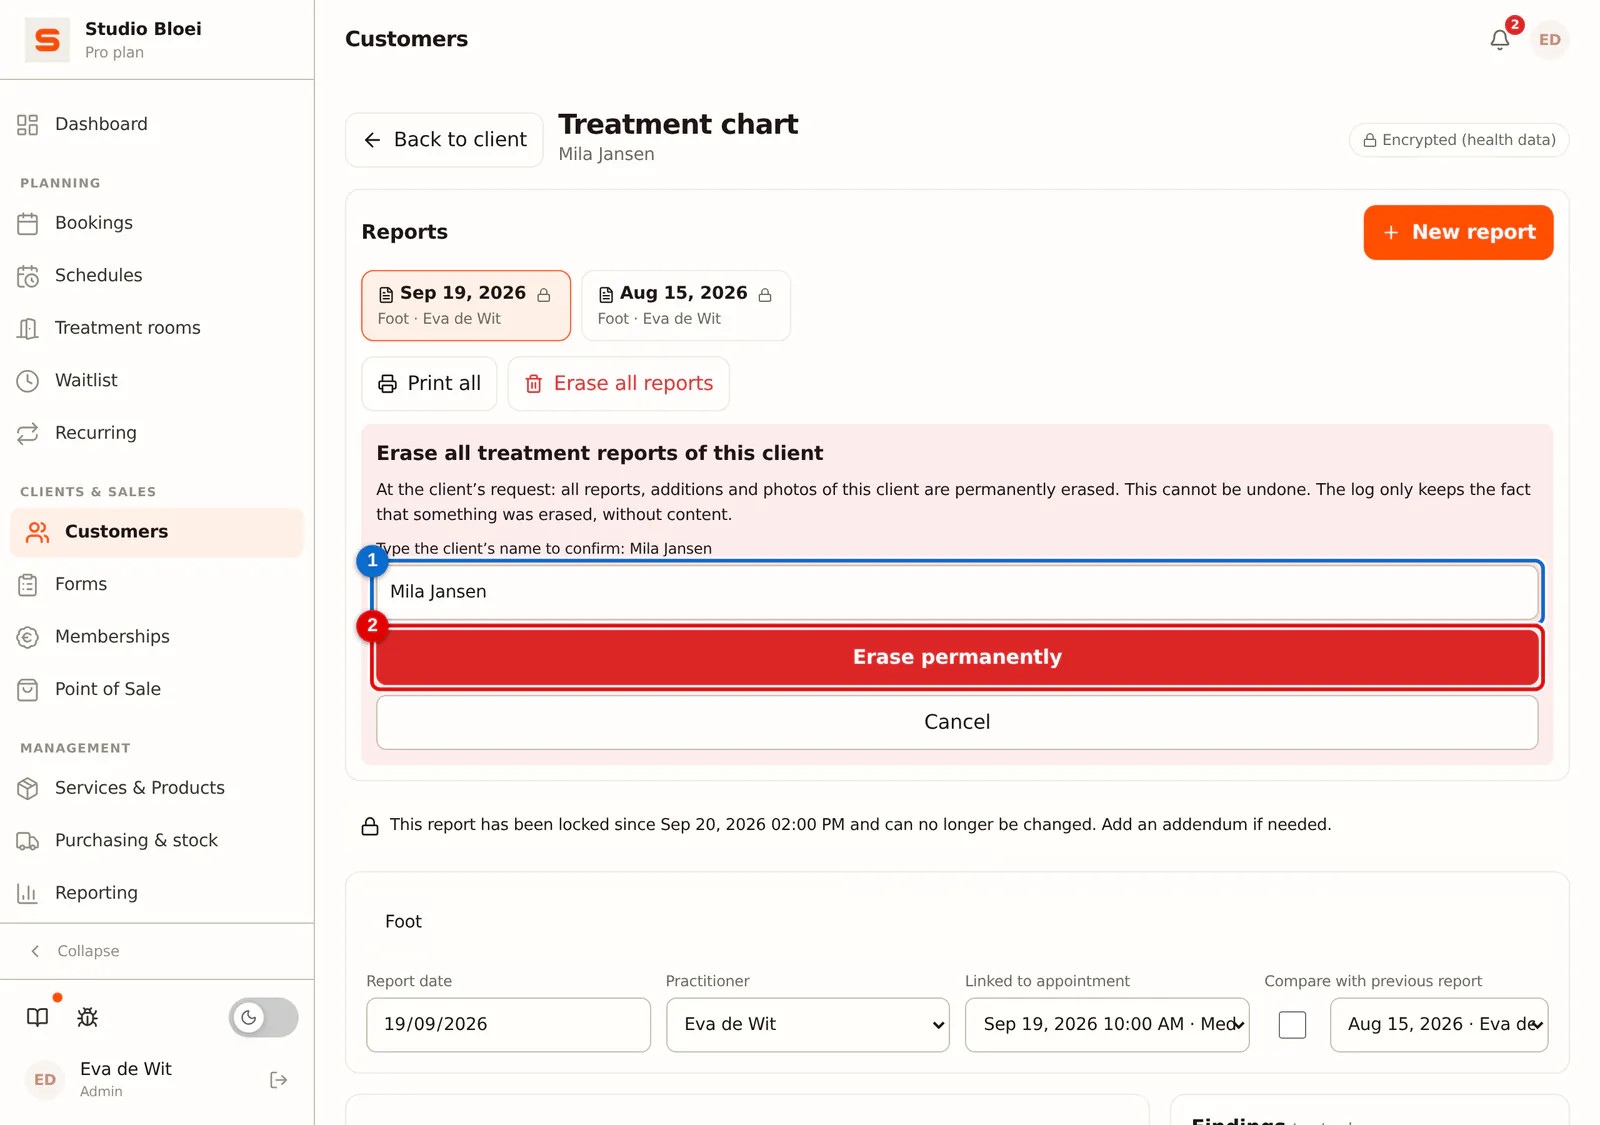 (Enlarge image)
Print the reports first or save them as a PDF if the client wants to have them. After erasing that is no longer possible.