Filling in a treatment chart
A treatment chart consists of reports: one per treatment. In a report you put findings on a drawing, tick the lists, add photos and write your notes. Everything is stored encrypted.
You need:
- the Starter or Pro plan;
- the administrator role, or Access to health notes for your account;
- recorded consent from the client for special categories of personal data (see Treatment chart and privacy). Without consent you cannot create a report.
From the appointment
-
Step 1: Open the appointment
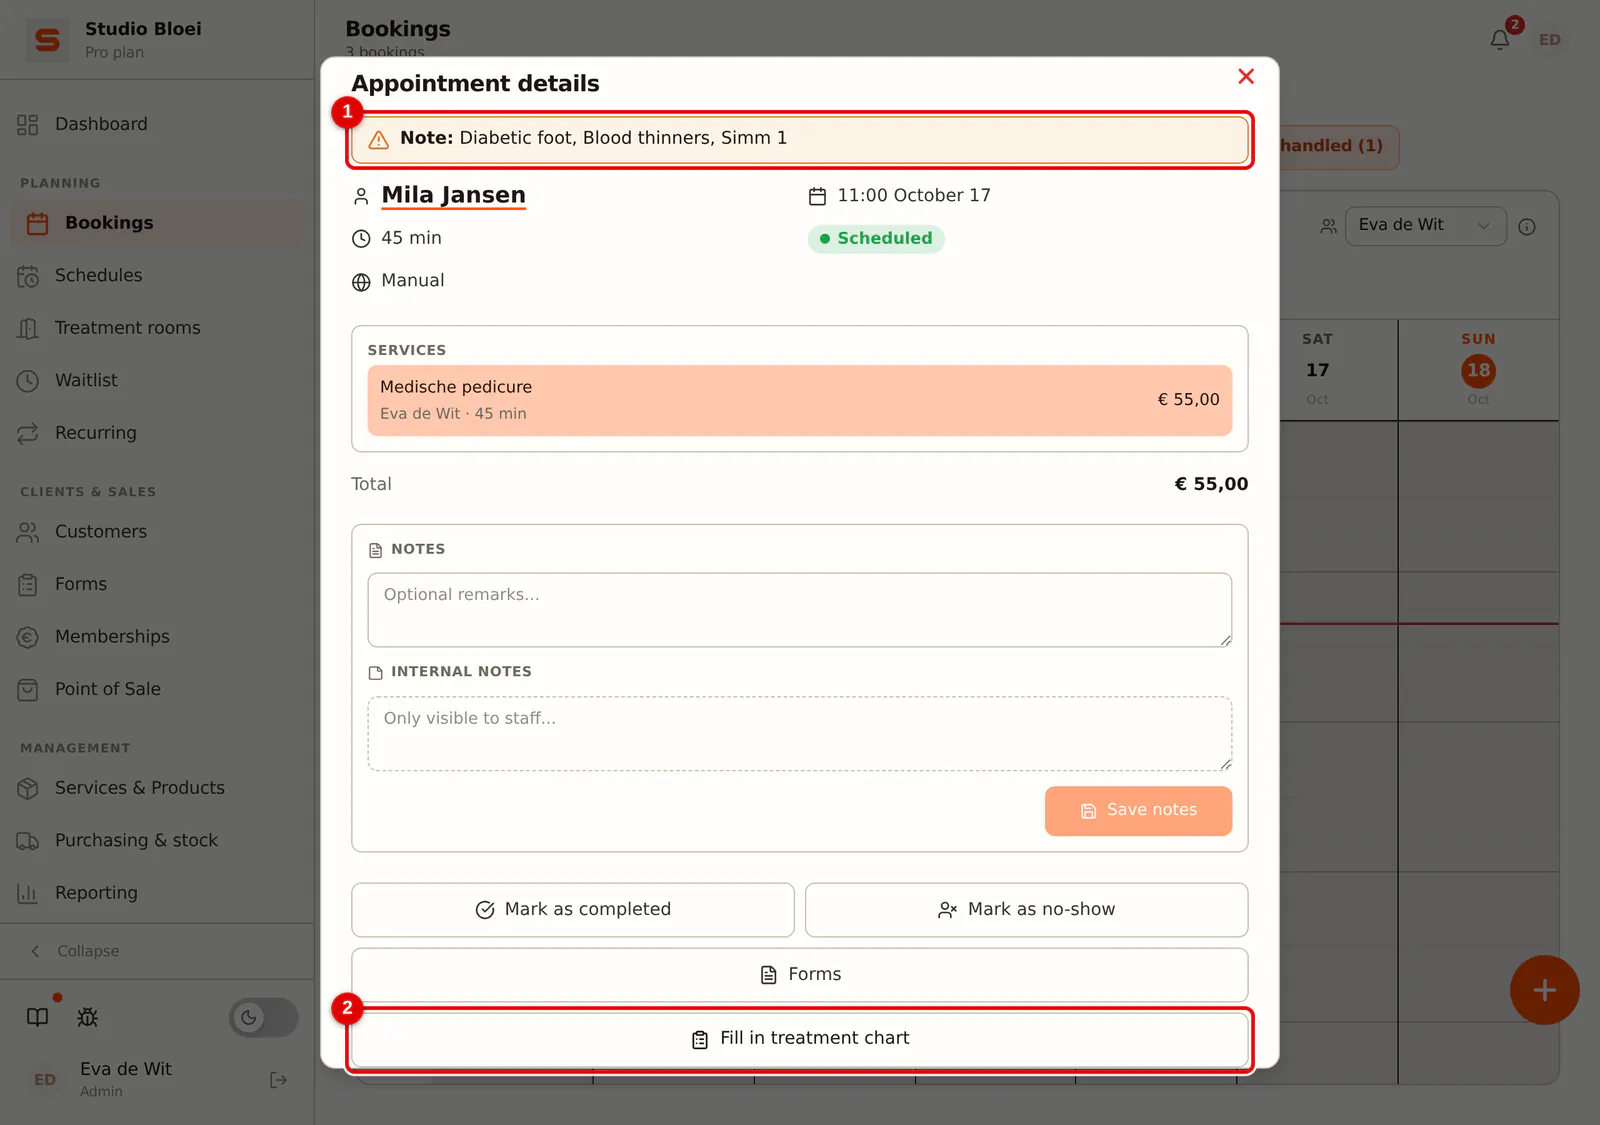
Open the appointment in the calendar. If a template belongs to the service (see Setting up the treatment chart), you see the Fill in treatment chart button. If Note: is shown at the top, the client has a contraindication or a risk according to her last report, such as blood thinners. Check whether the treatment can go ahead like this. Click Fill in treatment chart.
 (Enlarge image)
-
Step 2: Check the details at the top
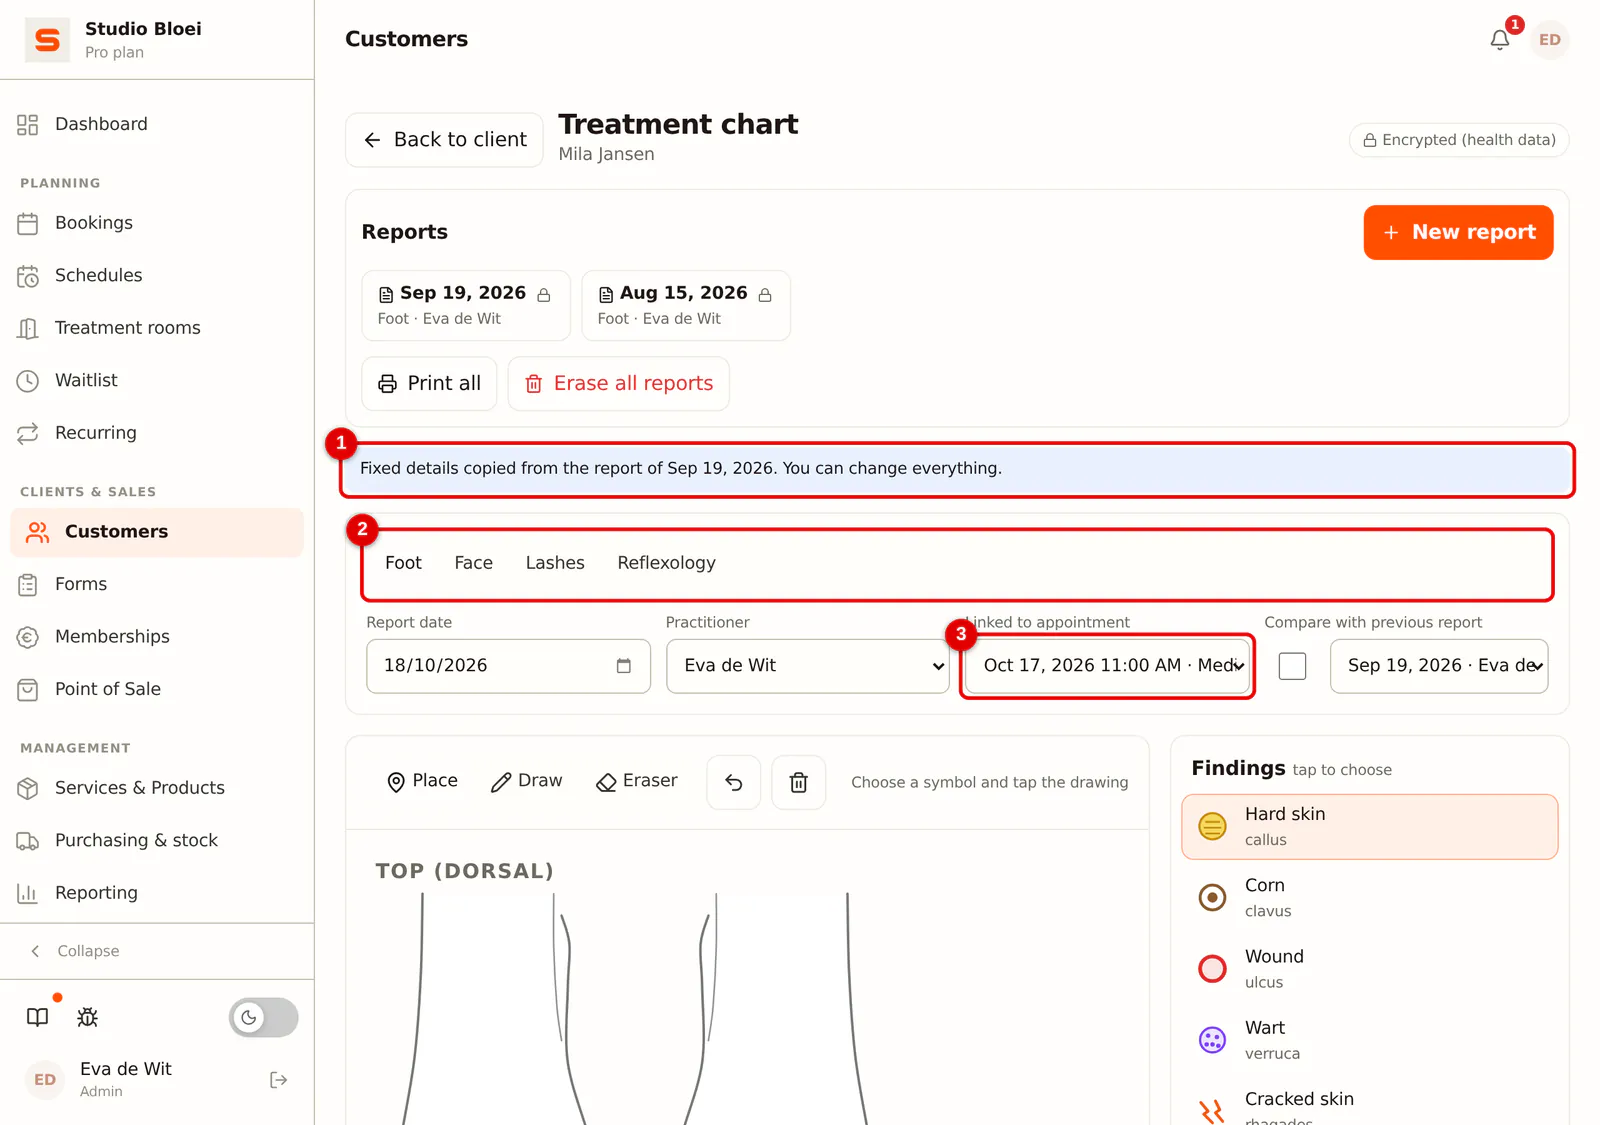
The template, the date, the practitioner and the appointment are already filled in. If the client already had a report with this template, the fixed details are copied from it; you then see Fixed details copied from the report of with the date. You can change everything.
 (Enlarge image)
-
Step 3: Choose a symbol
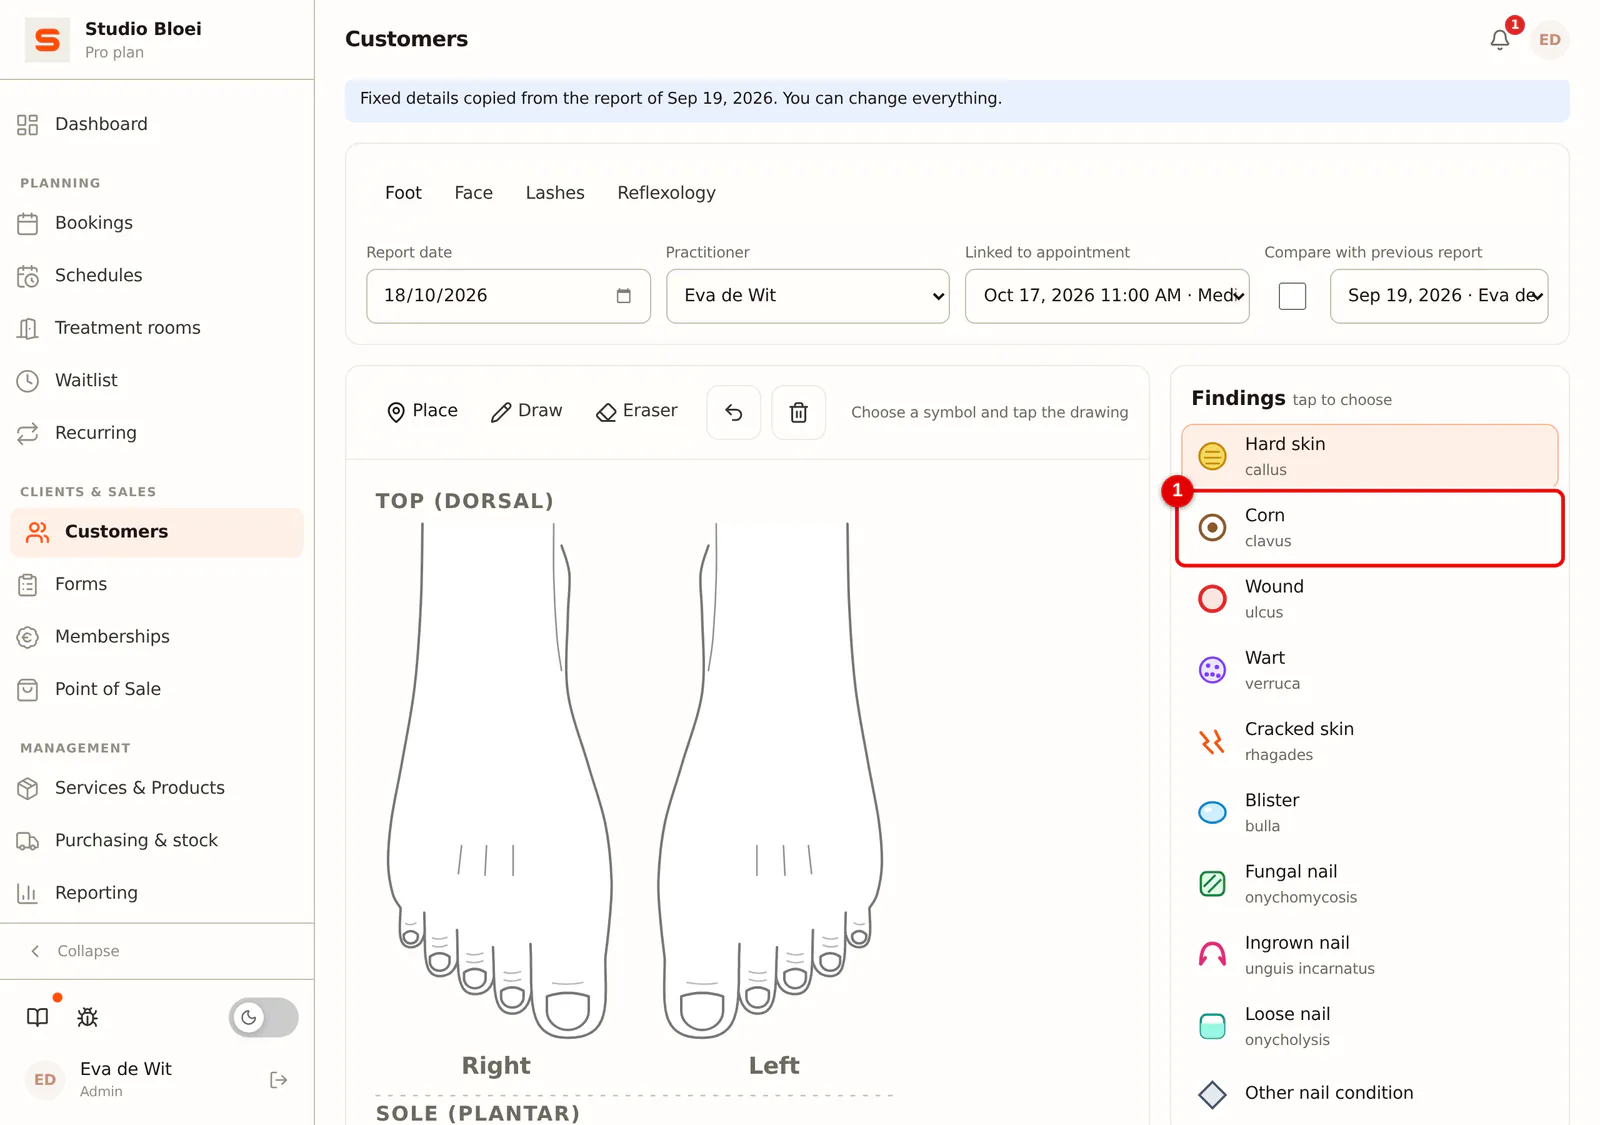
On the right, in the Findings list, choose what you want to record. Each item is shown in plain language with the technical term below it, for example Corn (clavus).
 (Enlarge image)
-
Step 4: Tap the drawing
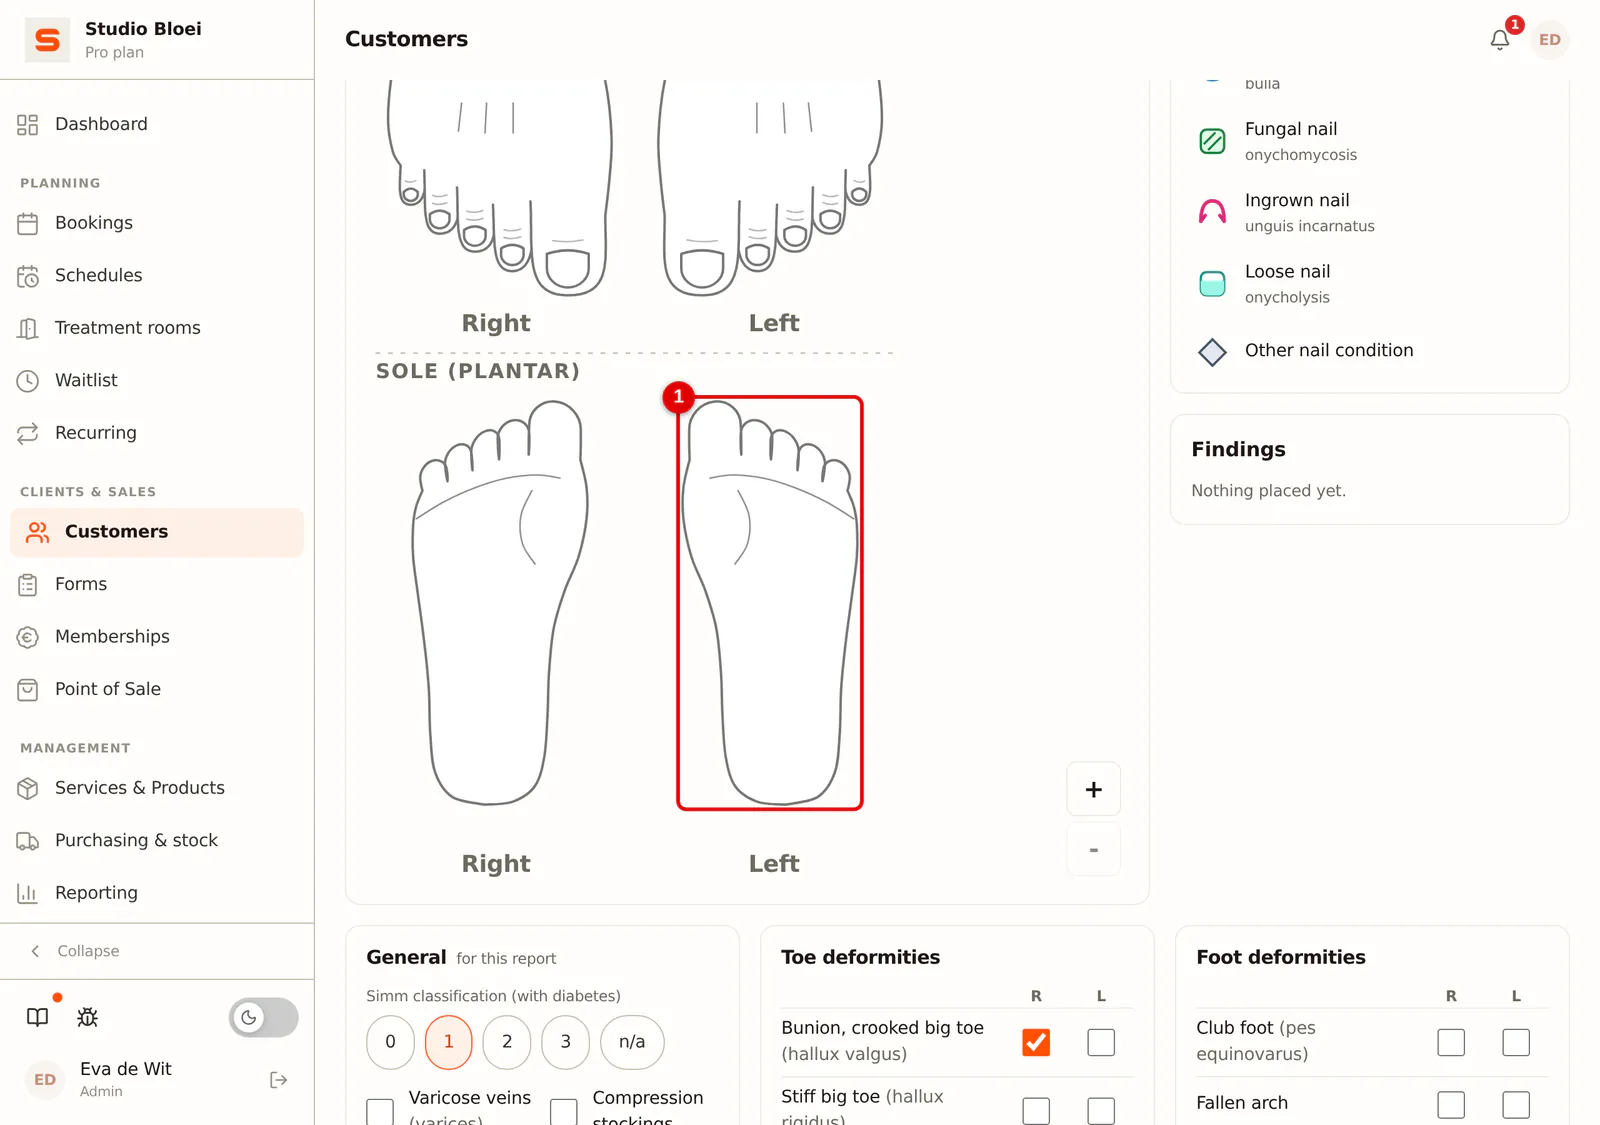
Click or tap the spot on the drawing. A numbered symbol appears and Salonnare records the zone itself, for example "Sole of the foot, left (plantar)".
 (Enlarge image)
-
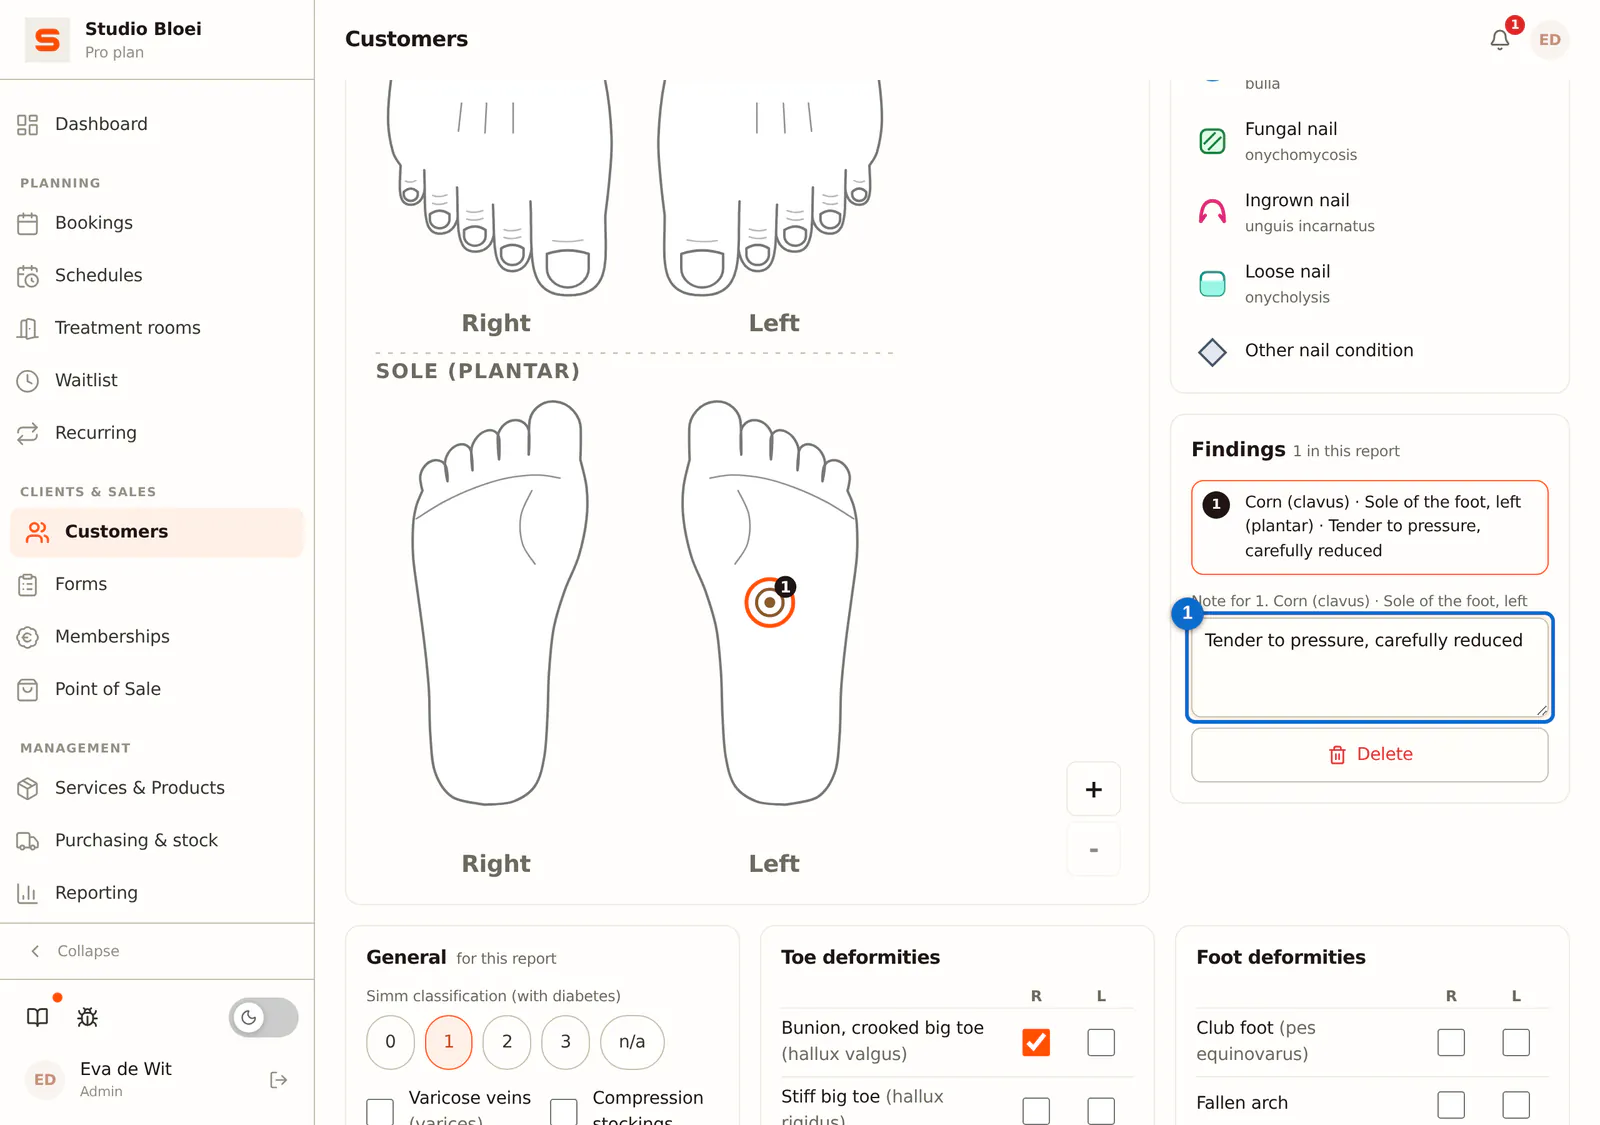
Step 5: Write a note
Your finding is now listed under Findings with its number. Type in the note field what you saw or did, such as size or severity. With Delete you remove the finding.
 (Enlarge image)
-
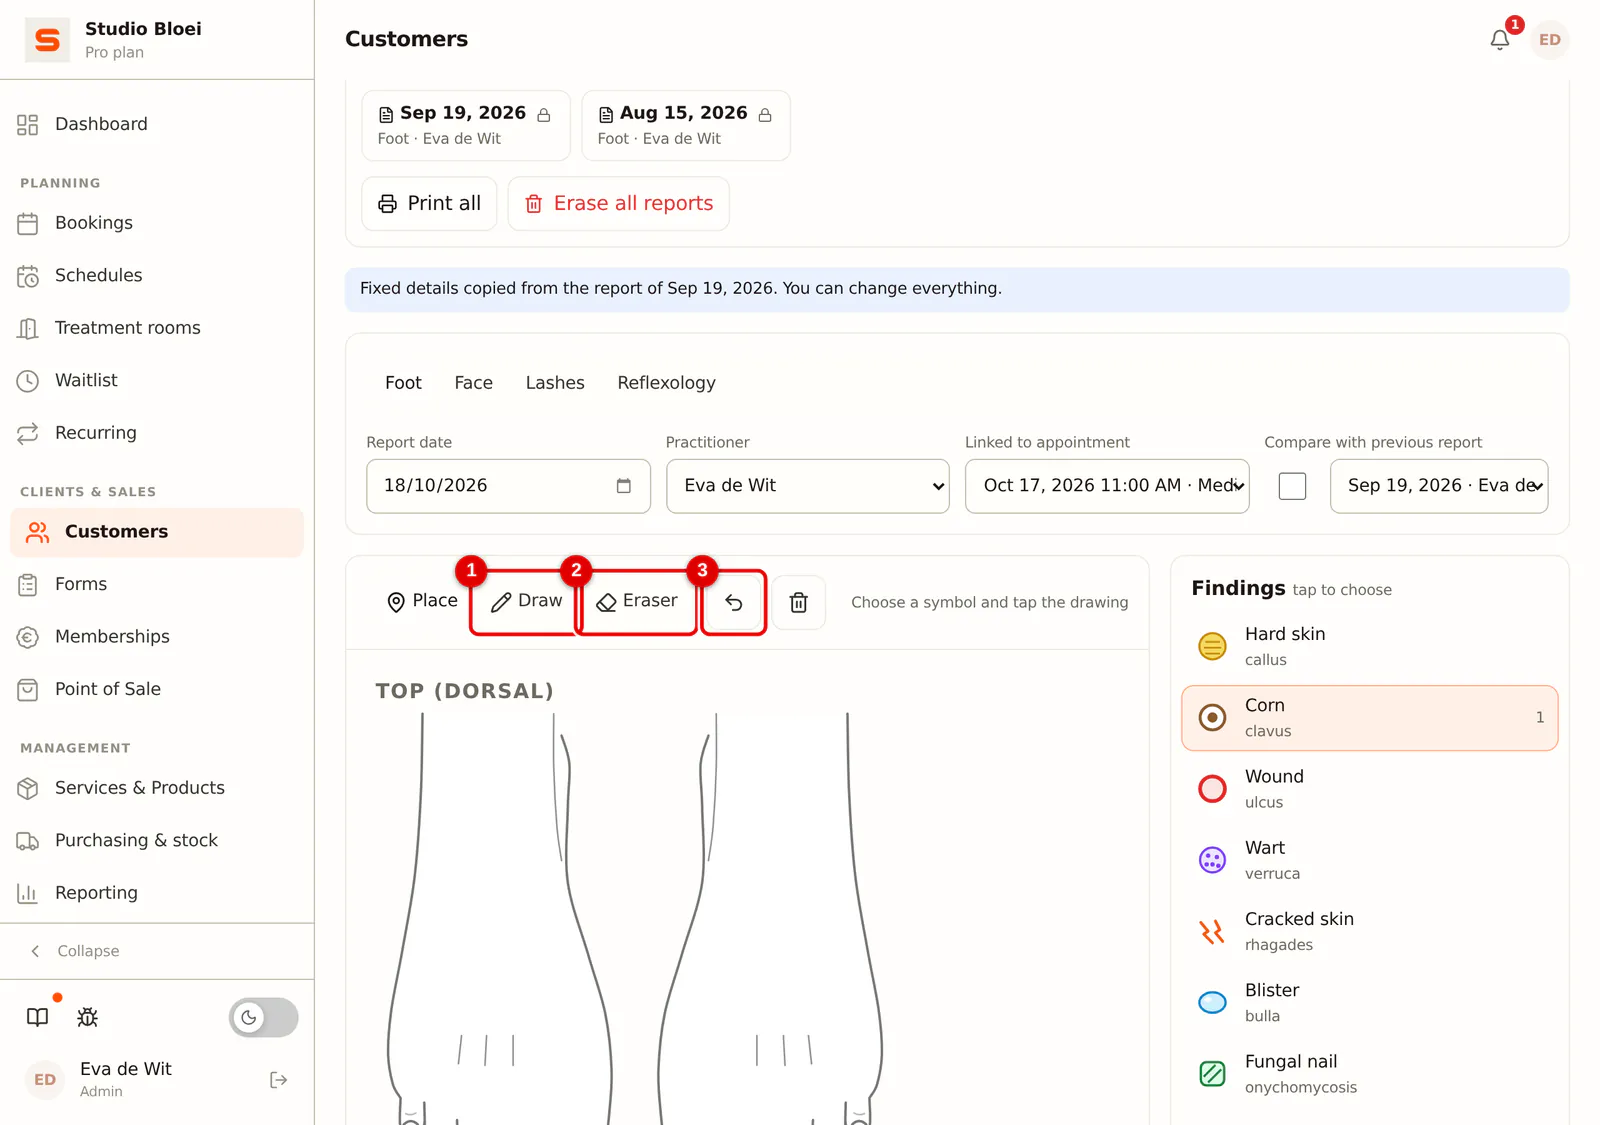
Step 6: Draw or erase
With Draw you draw with the mouse, your finger or a stylus; then choose a pen width and a colour. With Eraser you wipe away a line or symbol, and the arrow undoes the last step. The bin clears all markings and drawings at once; you can undo that too.
 (Enlarge image)
-
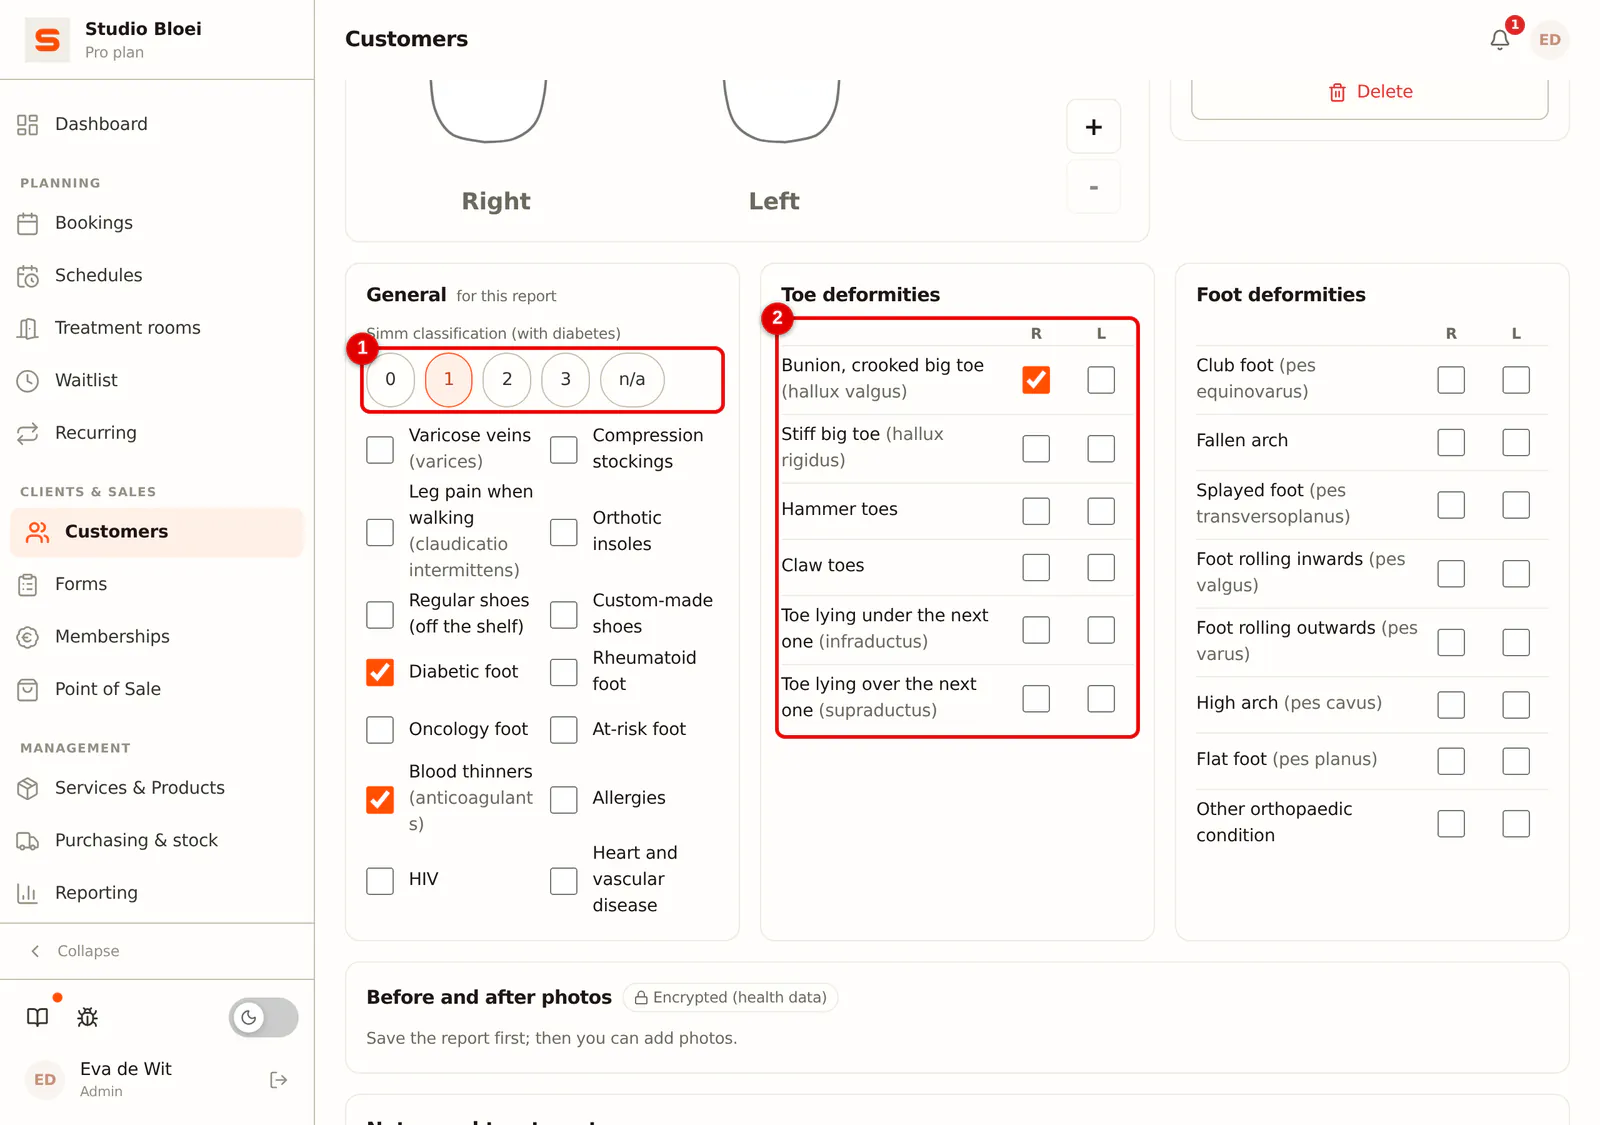
Step 7: Fill in the lists
Below the drawing are the lists of the template. Tick what applies; for the foot you choose R (right) or L (left) per deviation. Here too the plain name comes first, then the technical term.
 (Enlarge image)
-
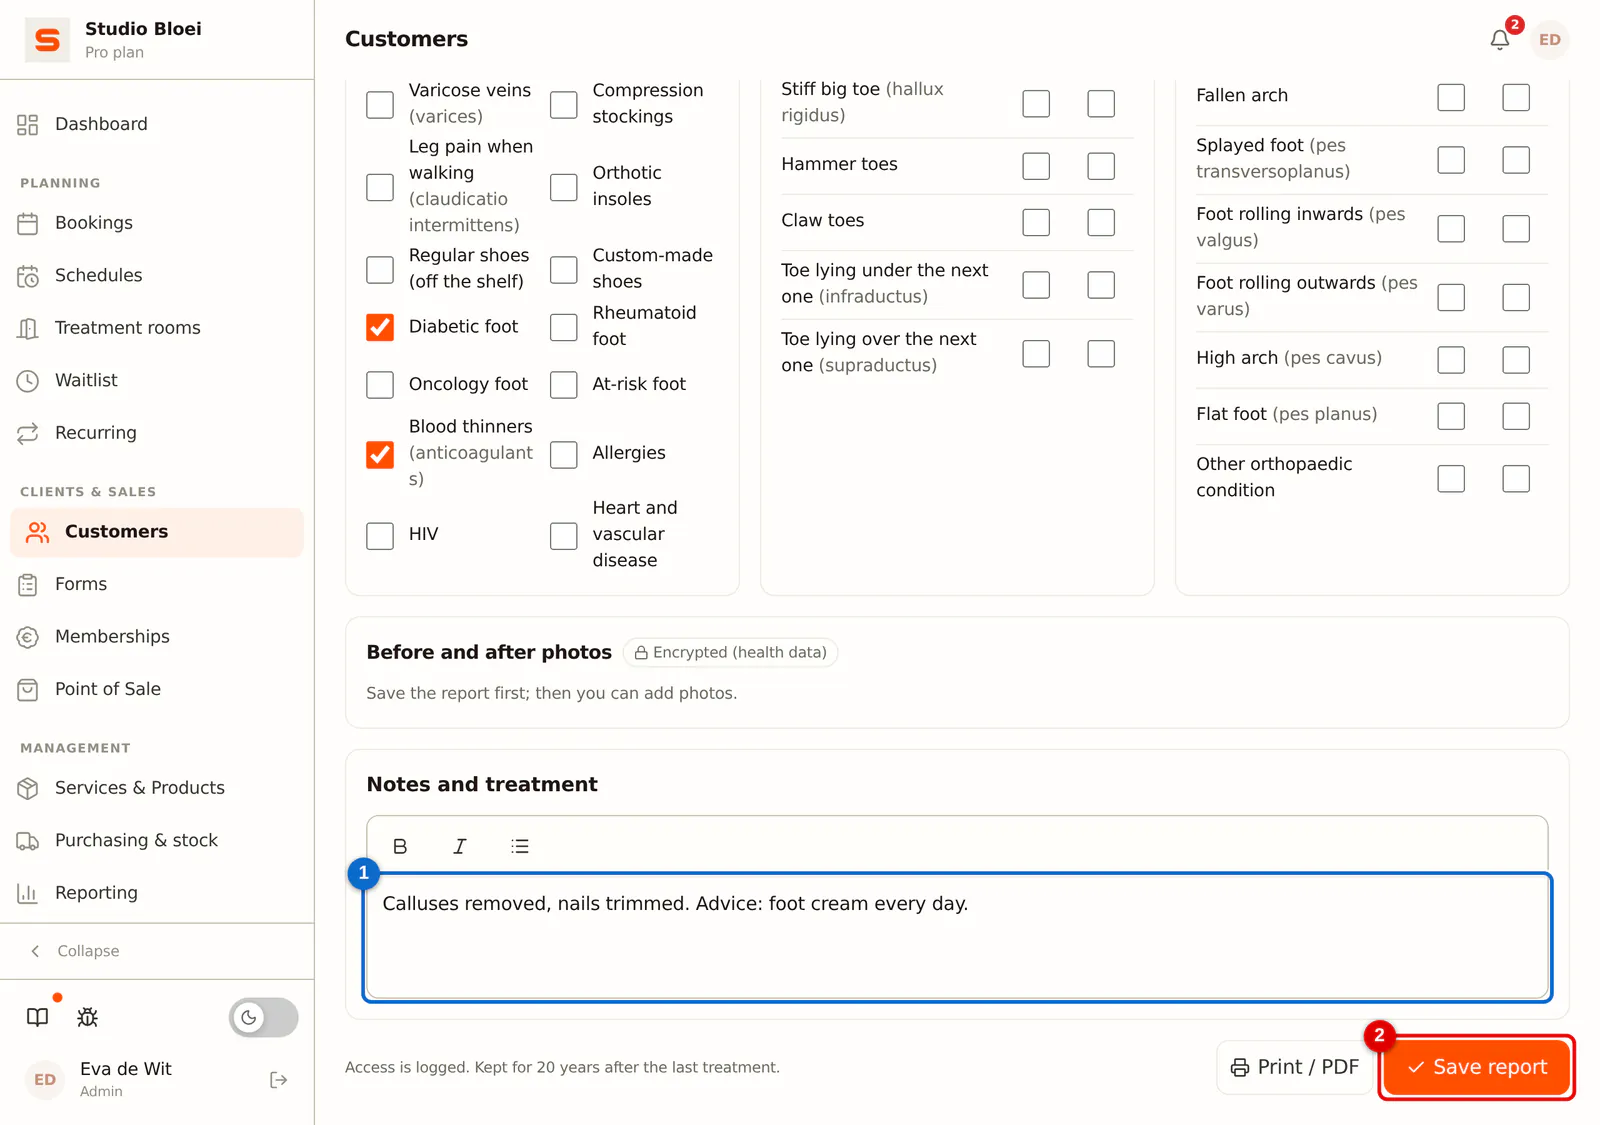
Step 8: Write your notes and save
Type under Notes and treatment what you did and what you advise. With the buttons above it you make text bold, italic or a bullet list. Click Save report.
 (Enlarge image)
-
Step 9: Add before and after photos
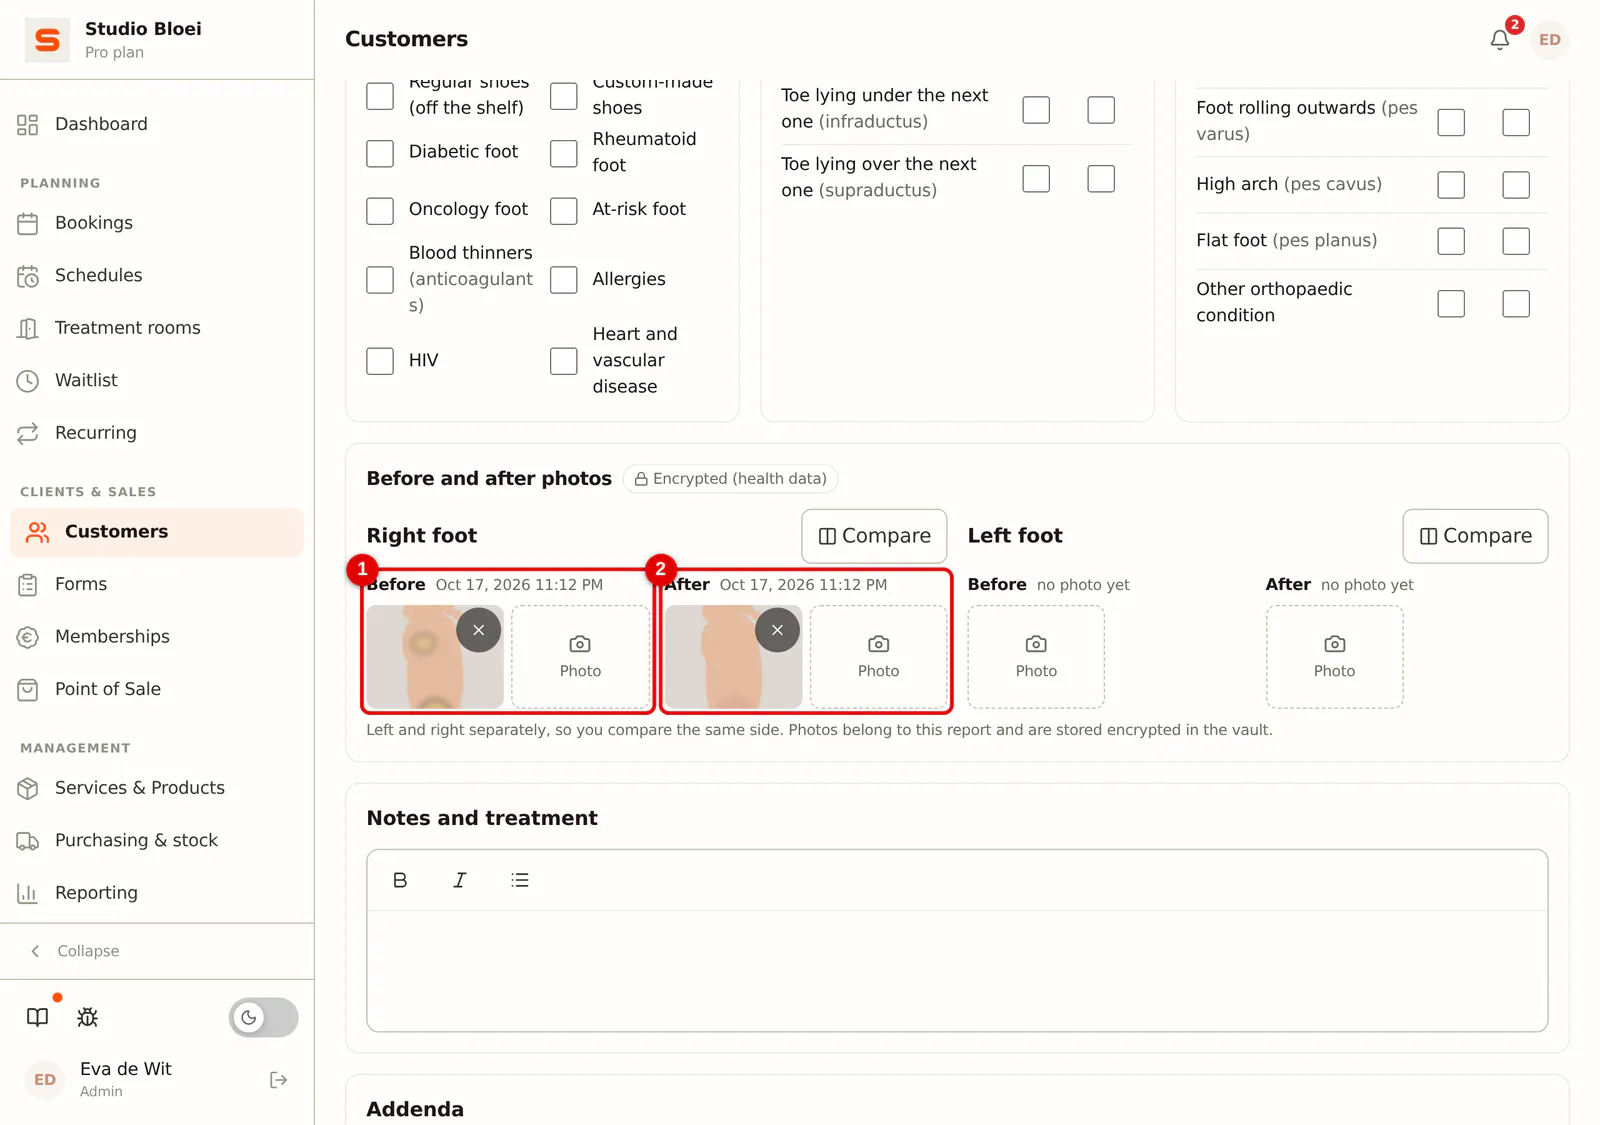
After saving you can add photos. Click Photo in a slot and take or choose a photo. For the foot and the lashes, left and right are separate so you always compare the same side; for the face there are three views. The photos are stored encrypted with the report.
 (Enlarge image)
You can change a report up to 24 hours after creating it. After that it is locked and you can only add an addendum (see Comparing and adding to a report). In the first 24 hours you can also delete a report with Delete report.
From the client card
You can also create a report without an appointment. Open the client via Customers and scroll to the Treatment chart block. There you see how many reports there are and when the last one was. Click Open treatment chart to view the reports, or New report to create one. Then choose the template and, if you like, the appointment yourself at the top.
On your phone
On a phone (also in the app) you see one view at a time and the tools are fixed at the bottom.
-
Step 1: Choose the view
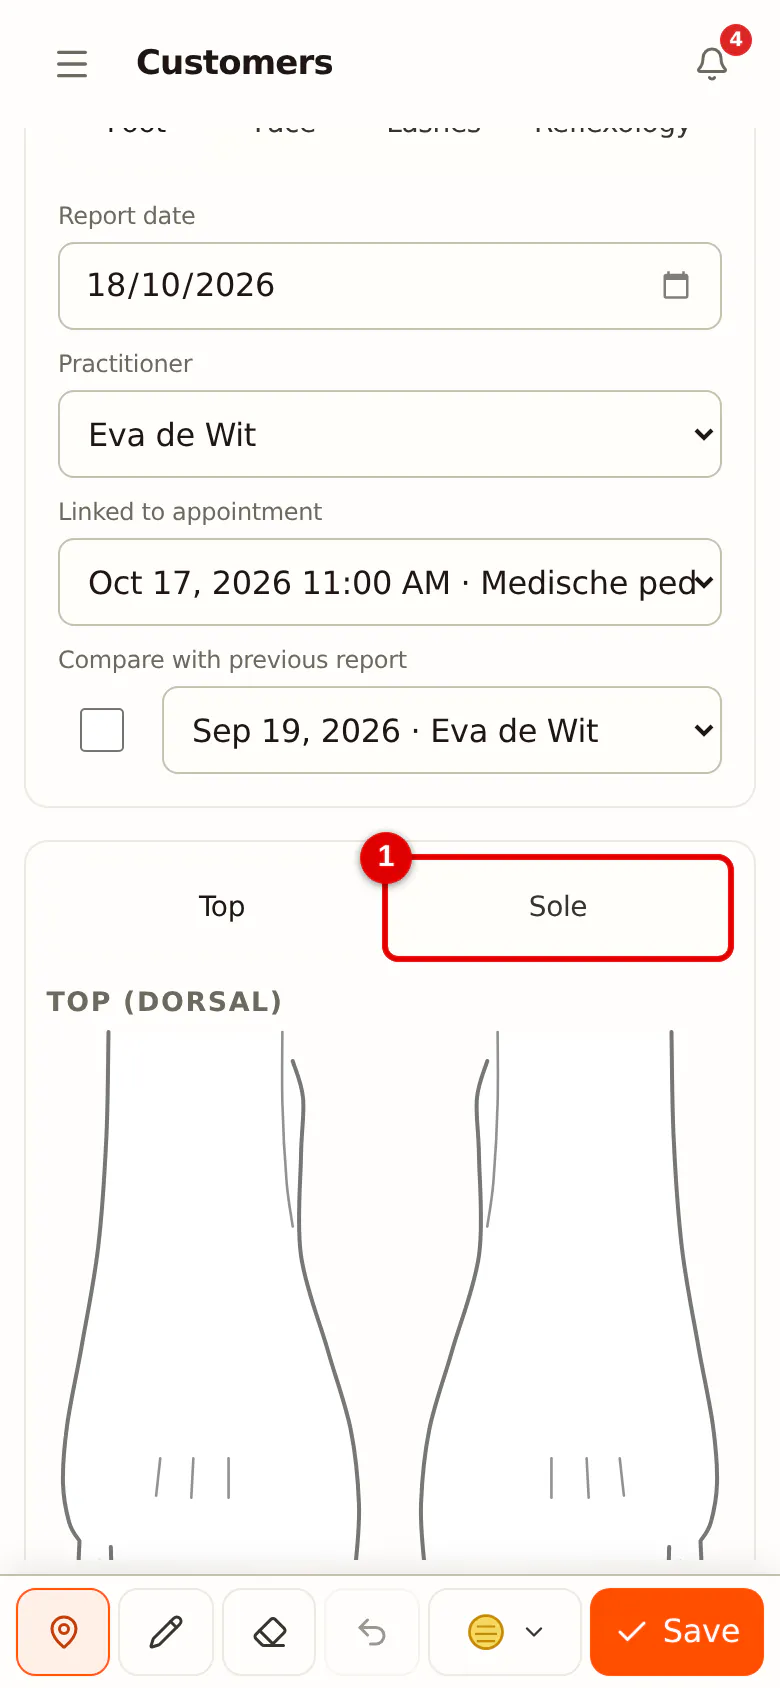
Above the drawing, choose the view, for example Top or Sole of the feet. Zoom with two fingers or with the + and - buttons on the drawing.
 (Enlarge image)
-
Step 2: Use the toolbar at the bottom
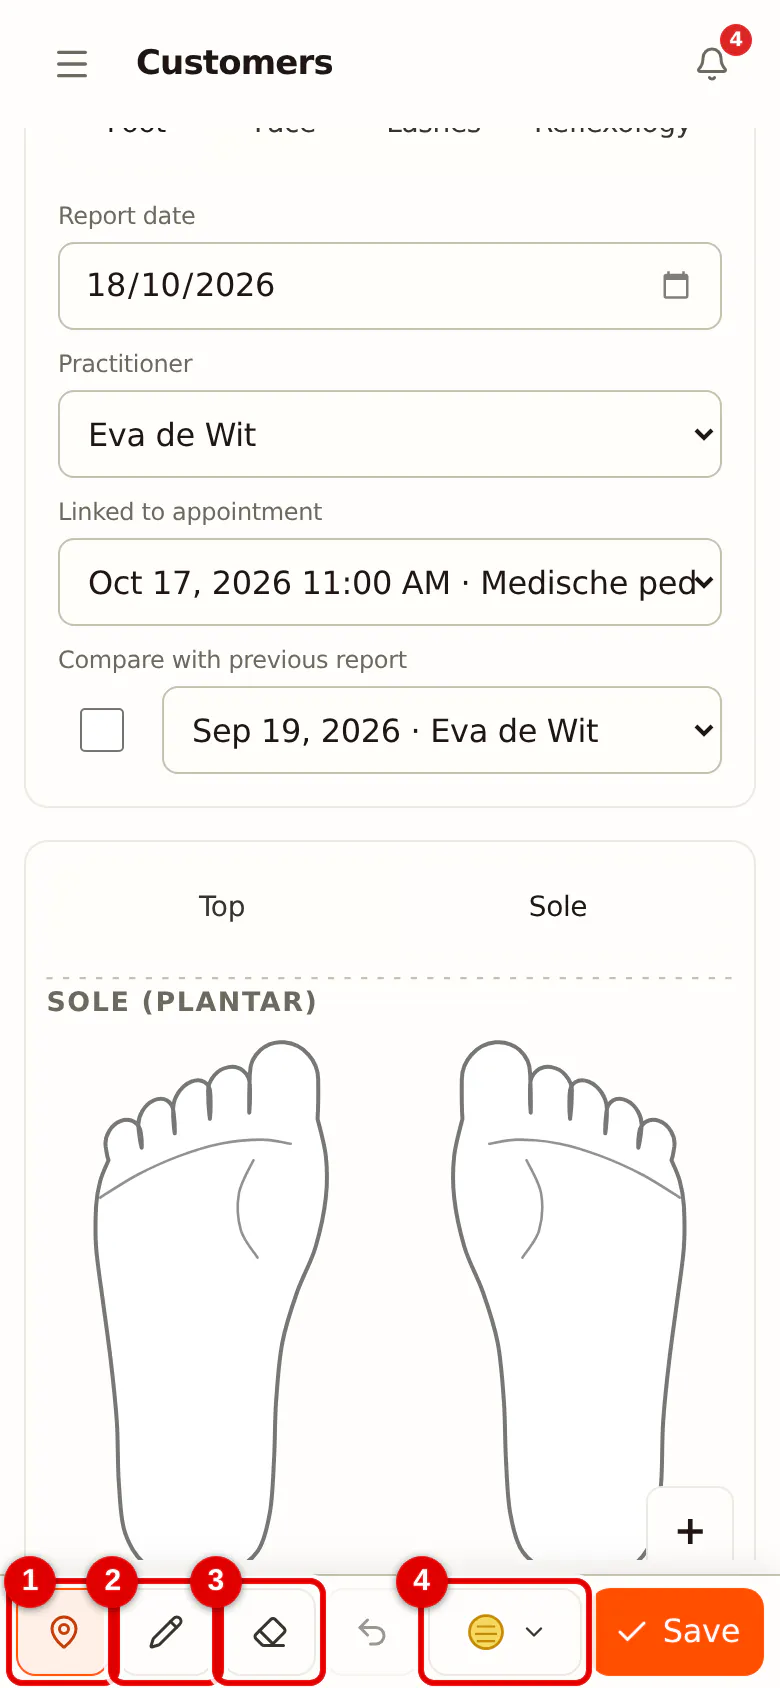
At the bottom are Place, Draw, Eraser, Undo, the symbol picker and Save. Tap the symbol picker.
 (Enlarge image)
-
Step 3: Choose a symbol
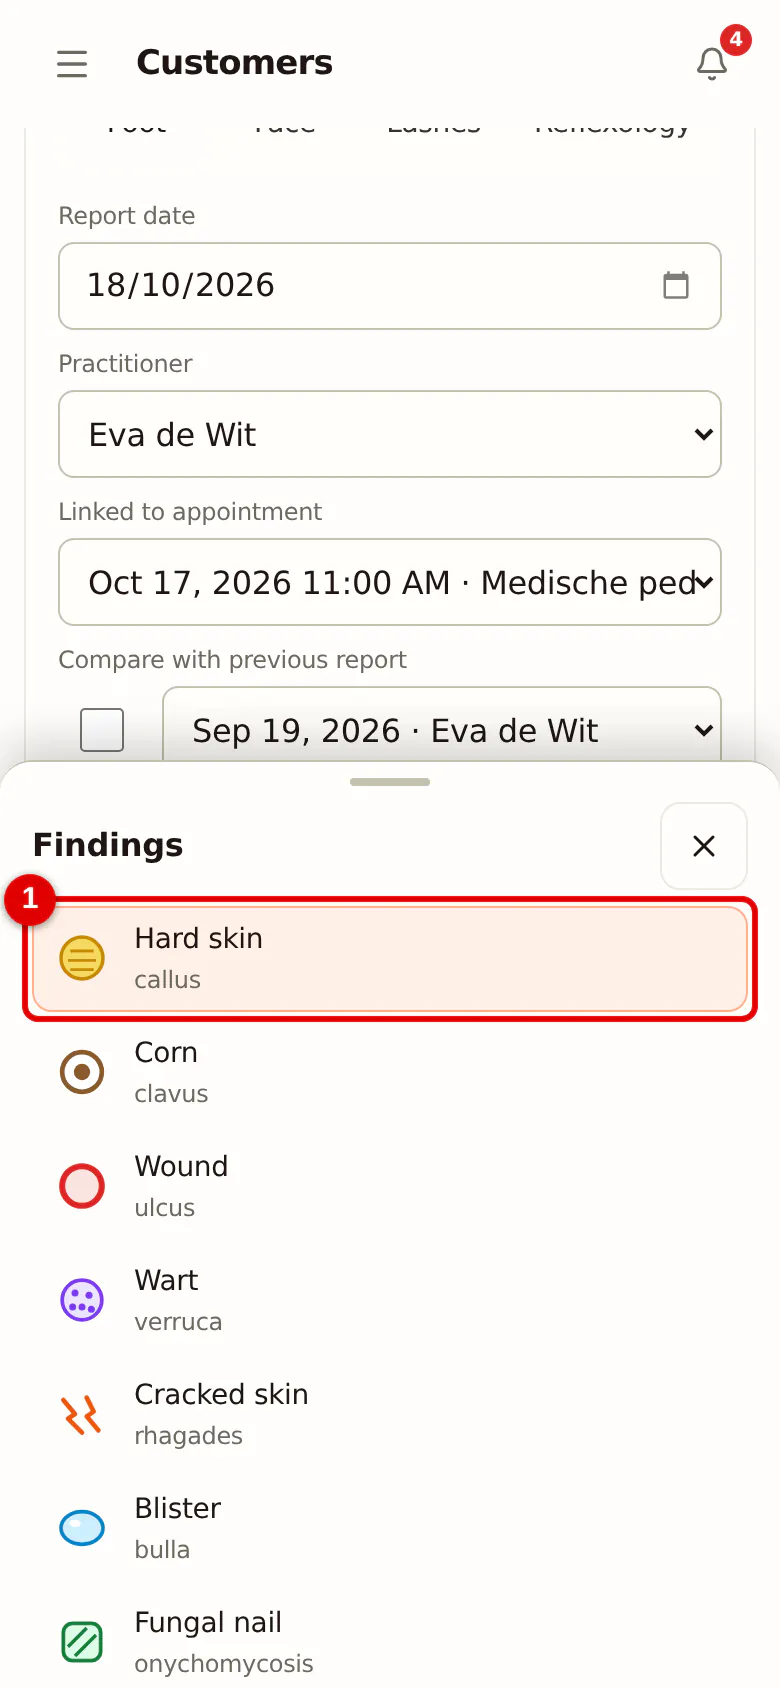
The list of findings slides up. Tap what you want to record; the panel closes by itself.
 (Enlarge image)
-
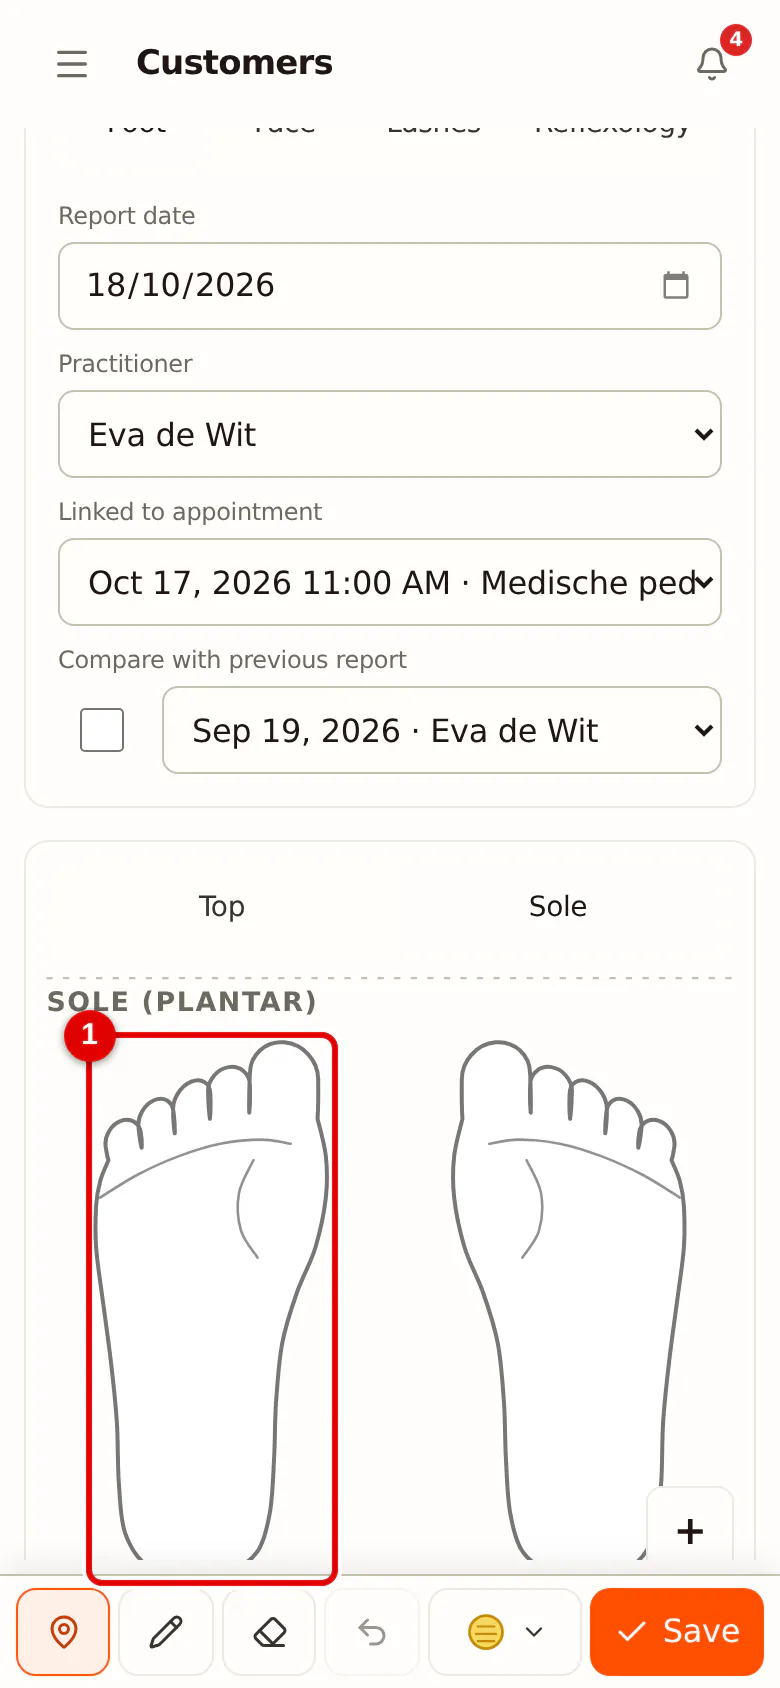
Step 4: Tap the drawing
Tap the spot where you see the finding. The symbol lands exactly under your finger.
 (Enlarge image)
-
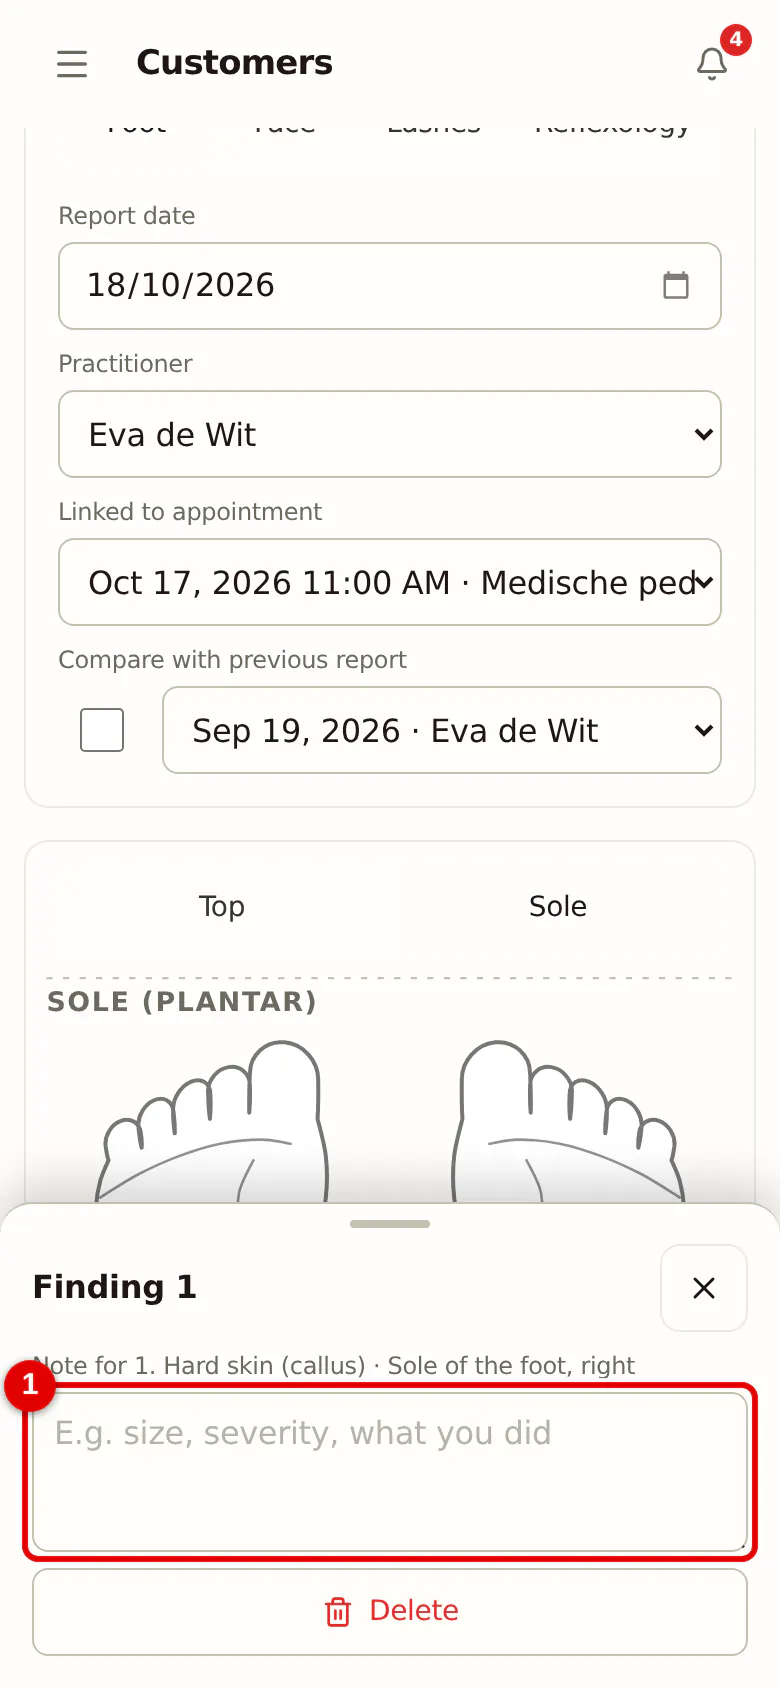
Step 5: Fill in the note
The panel of the finding opens at the bottom while the drawing stays visible. Type your note, close the panel and tap Save when you're done.
 (Enlarge image)