Managing staff
Your team is what makes your salon great. Salonnare helps you manage everyone's account, schedule and permissions -- so the right person is always in the right place at the right time.
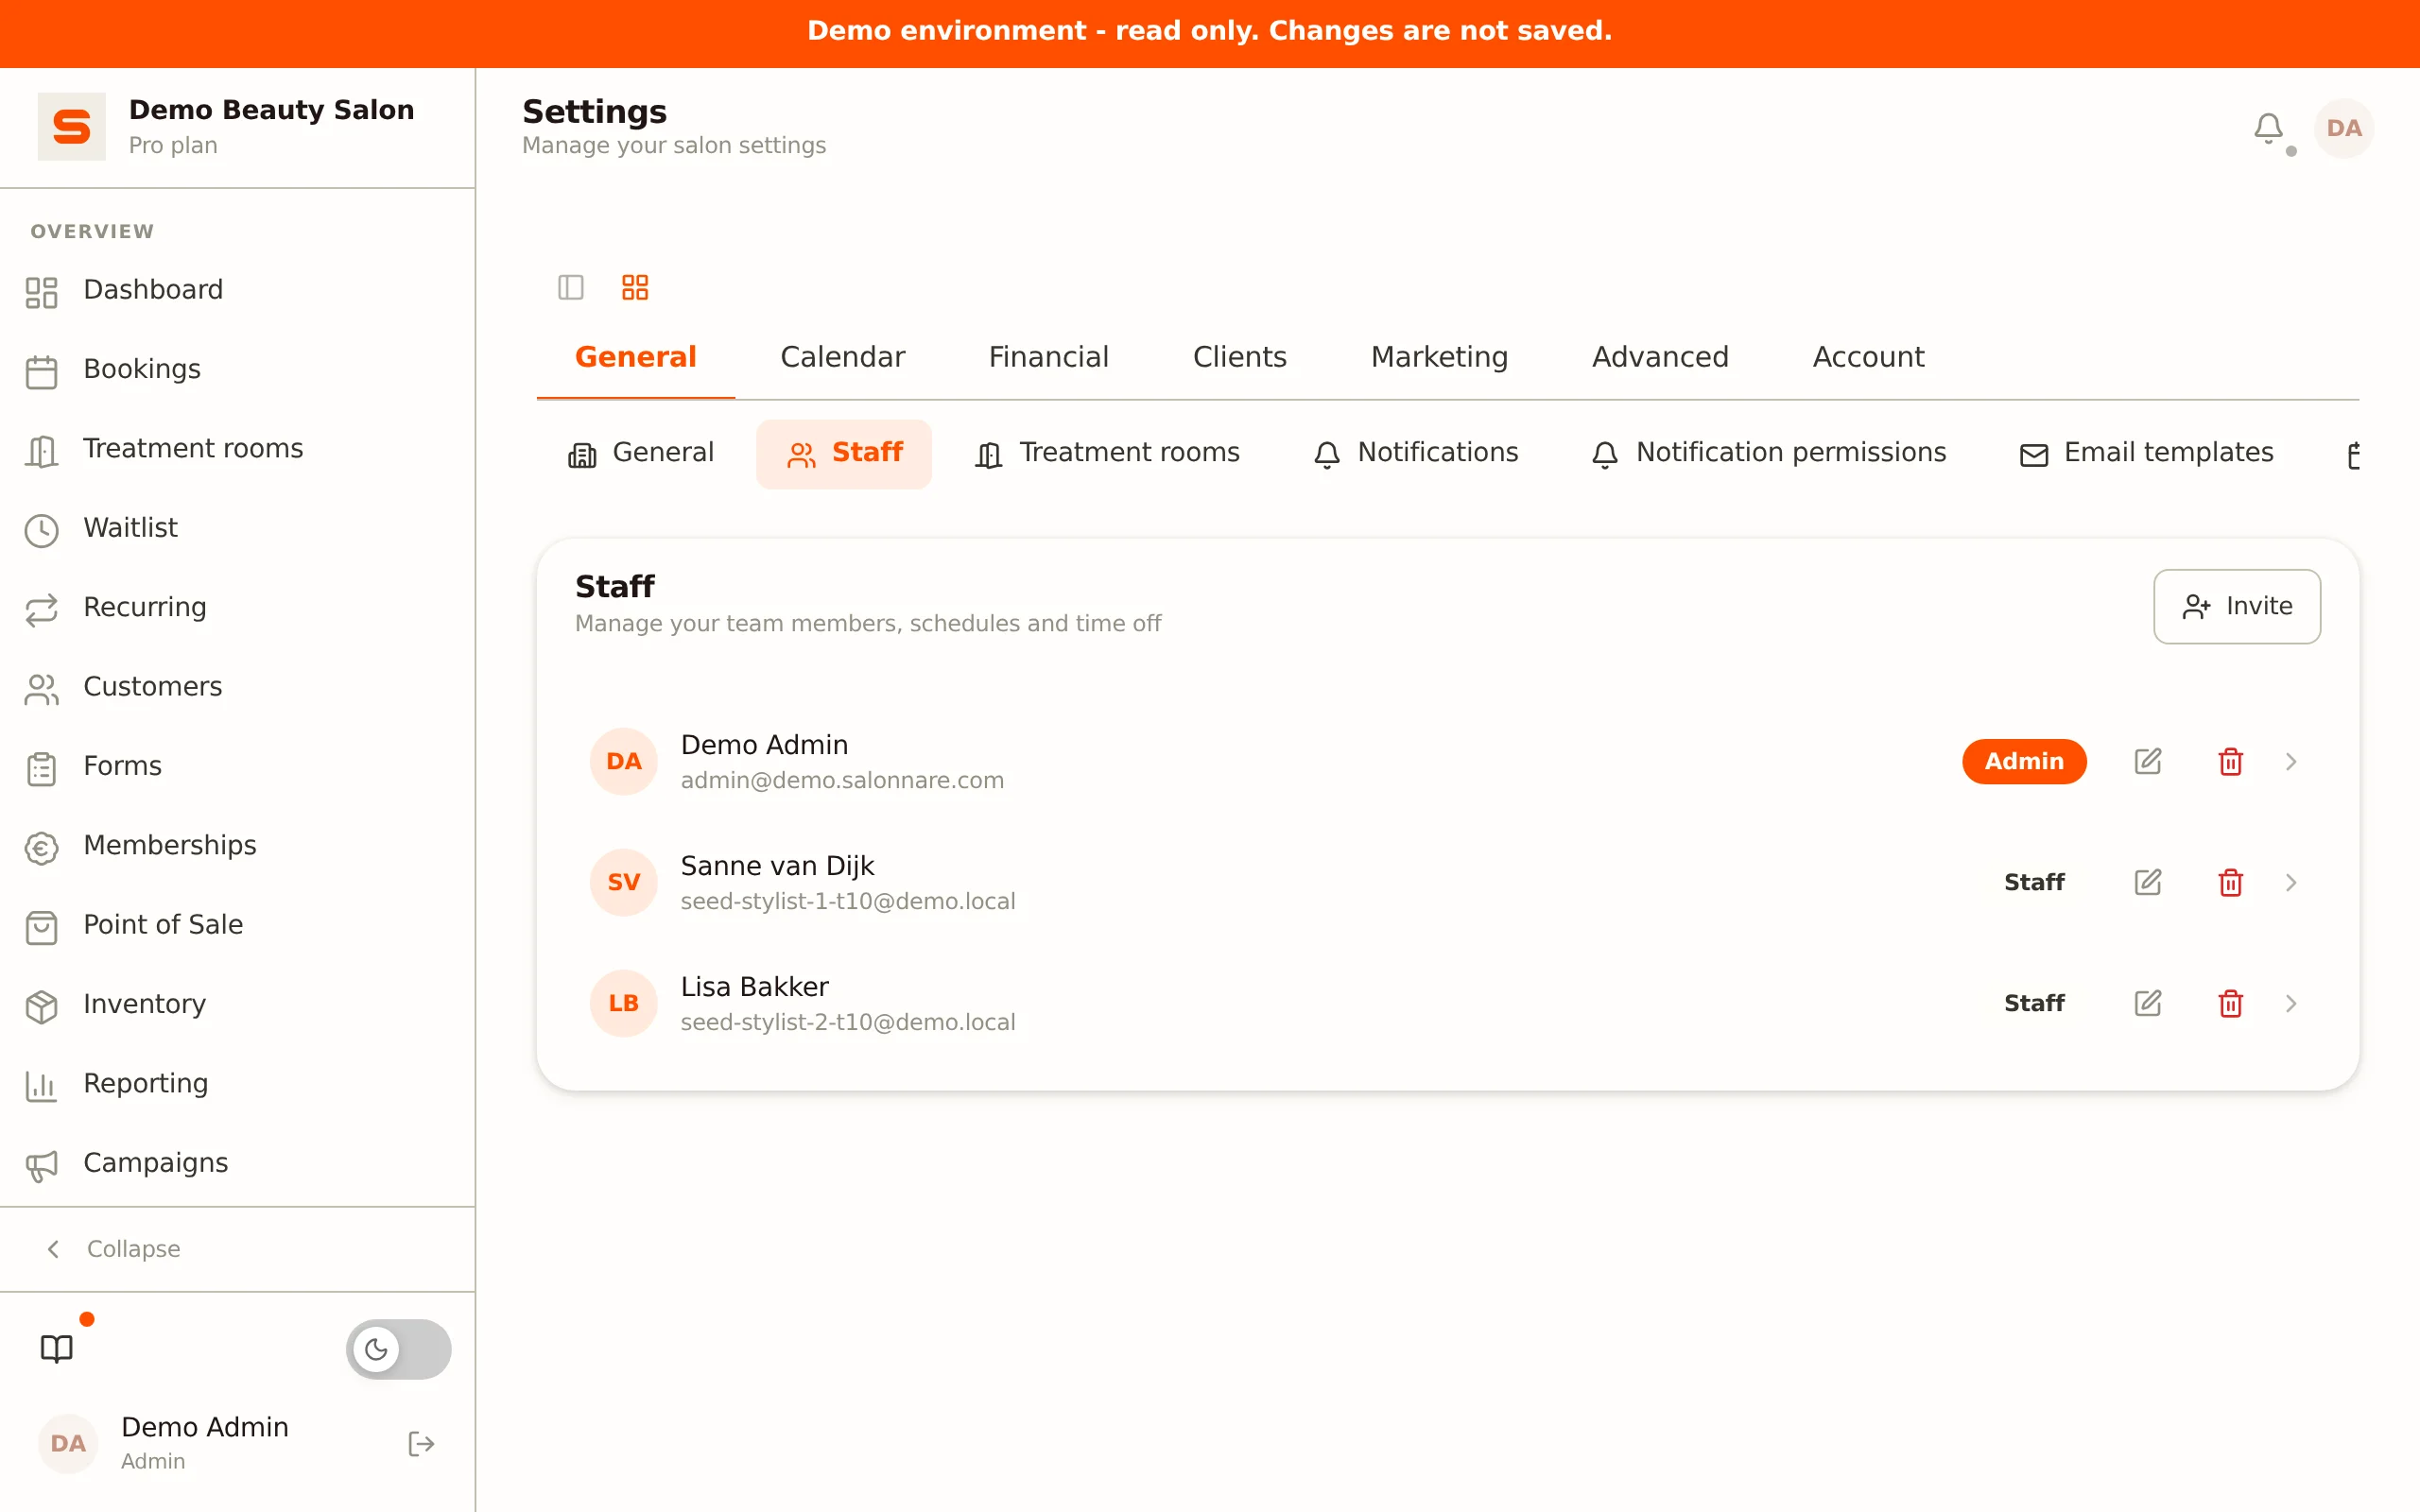
You'll find all staff settings under Settings > General > Staff.
Want to quickly view or adjust your own schedule? Click Schedules in the sidebar (between Bookings and Treatment rooms). That opens Settings > Staff straight away with your row expanded on the Schedule tab.
Inviting a staff member
Salonnare invites team members by their email address. Here's how:
- Go to Settings > General > Staff.
- Click Invite.
- Enter the team member's email address and click Next.
- Salonnare checks the address:
- New user -- Enter the name and pick the role (Admin or Staff). The team member receives an invitation email and creates their own password. The link is valid for 24 hours.
- Existing user -- Does the person already have a Salonnare account (for example at another salon)? Then you only pick the role and add them straight to your salon.
Because invitations work by email address, the same person can work for multiple salons with one account. They switch salons using the switcher at the top right.
Understanding roles
Salonnare has two roles:
Admin
Full access to everything -- bookings, clients, point of sale, reports and all settings. As the salon owner you are an admin. You can also grant admin access to a manager you fully trust.
Staff
By default, access to the day-to-day work: the calendar, clients, the point of sale, forms, stock count, the waitlist and recurring appointments. Settings, reports and the other pages are off by default. You can widen or narrow this per staff member on the Permissions tab (see below).
Keep the number of admins small. Most salons do well with one or two admins (the owner and perhaps a salon manager) and staff accounts for everyone else.
Editing a staff member
Click the pencil icon next to a team member (or right-click the row). In the edit window you can change:
- Name -- How they appear in the calendar and to clients.
- Email -- Their login email address.
- Role -- Admin or Staff.
- IBAN -- The staff member's bank account, intended for SEPA commission payouts. Commissions are not yet available (coming soon); see Commissions.
- Adjust loyalty points -- Whether this staff member may correct a client's points balance.
- Manage everyone's roster -- Whether this staff member may manage the roster and breaks of all staff members, not just their own. Admins always have this right.
- Access to health notes -- Whether this staff member may read and edit clients' medical notes (allergies, medication).
- Submitted answers -- Whether this staff member may view clients' completed intake forms.
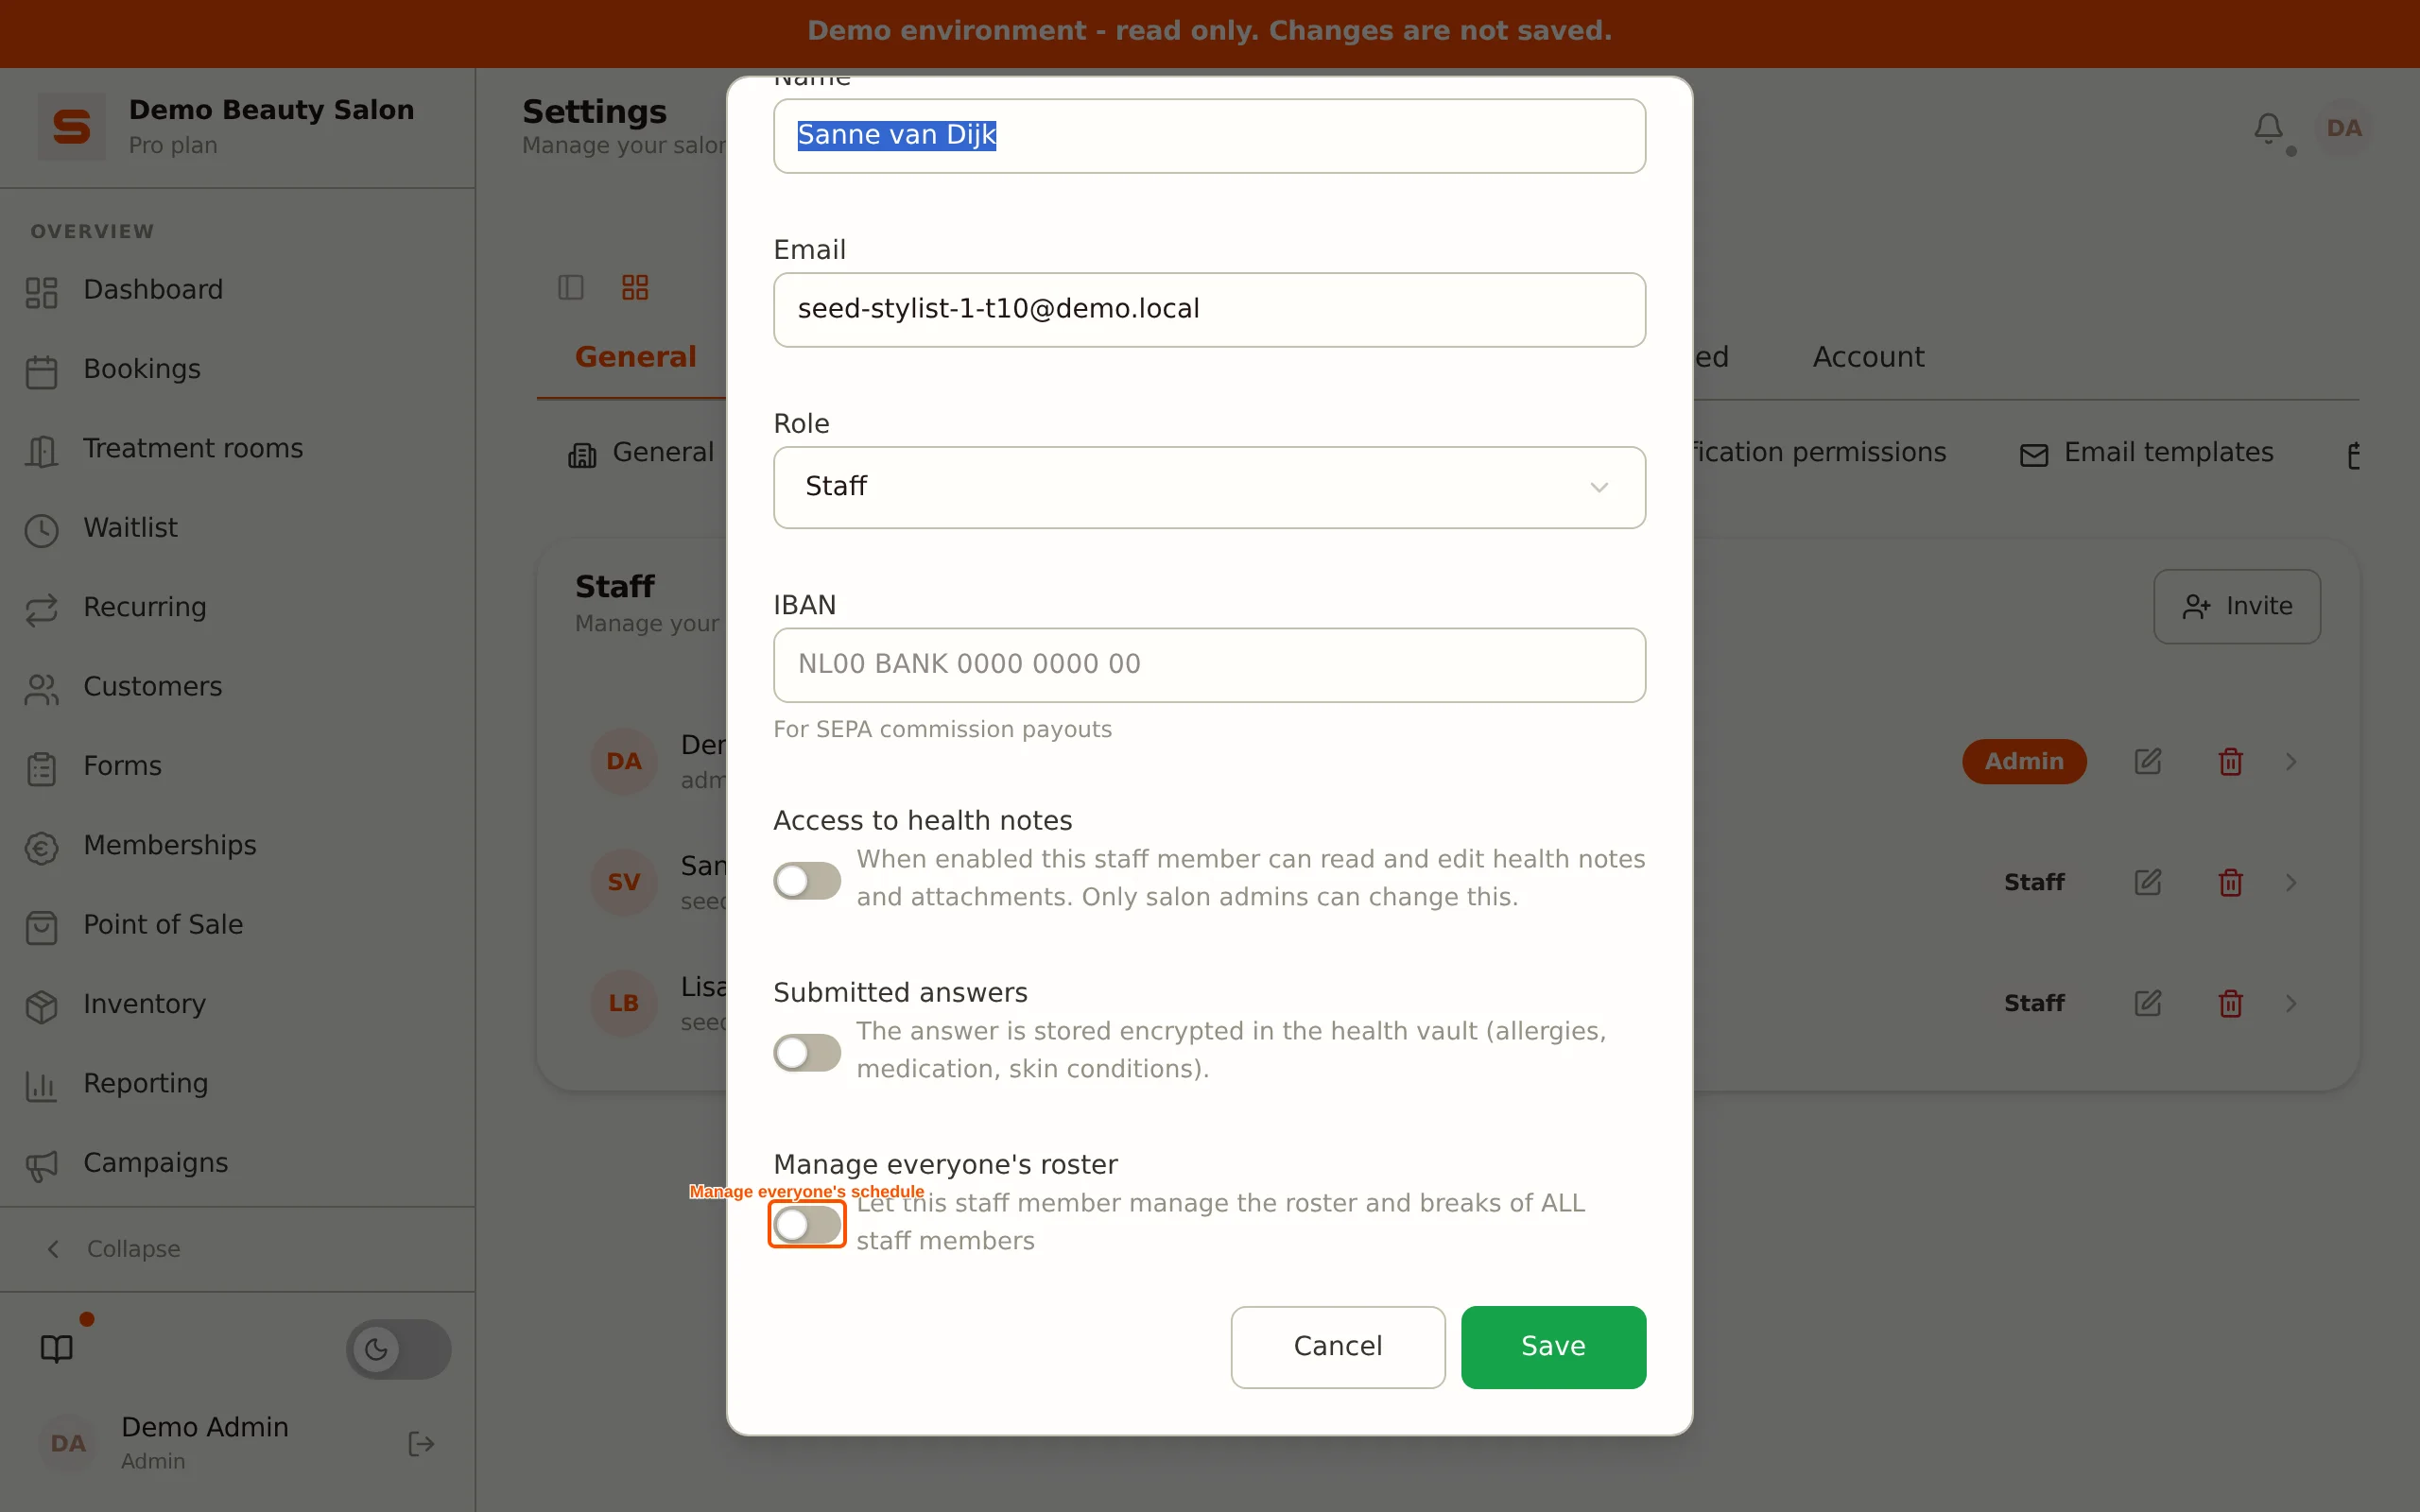
Health notes and intake responses are special-category personal data (GDPR Art. 9). Only grant these permissions to team members who genuinely need them. Admins have this access automatically.
Permissions per page
What a staff member may see and do is set per person. Click a team member to expand the row and open the Permissions tab. For each page (and each settings section) choose None, View or View + edit. Reset to default puts everything back to the default permissions of the role. An admin always has full access; there is nothing to set for them here.
Services and staff
Every active staff member can perform every service -- there is no separate per-staff service assignment. When a client picks a service online, they can choose any staff member who is available at that time according to the schedule.
Setting up work schedules
Every staff member needs a schedule so Salonnare knows when they're available for bookings. Click a team member to expand the row; the Schedule tab opens automatically.
- Navigate to the right week with the arrows (or click the date to pick a week).
- Click a day in the week grid to add or edit a shift. A window opens with the Schedule and Break tabs.
- Stay on the Schedule tab, set the start and end time, and choose how this shift should behave under Repeat:
- One-time -- applies to this single day only.
- Every week / Every 2 weeks / Every 3 weeks / Every 4 weeks -- Salonnare schedules this weekday on a recurring basis, roughly 12 weeks ahead.
- Click Save.
Only time slots within these shifts are available for online bookings.
Pick a repeat of every 1 to 4 weeks and you won't have to re-enter that shift every time -- Salonnare rolls it forward automatically. Want to schedule a shift just once (for example a one-off stand-in)? Choose One-time.
Deleting a recurring shift
Click a recurring (automatically generated) shift and choose Delete, and Salonnare asks what exactly you mean:
- Just this day -- removes only this one shift; the recurring series keeps running.
- Stop entire series -- stops the repeat for this weekday entirely, including all future shifts still to be generated.
A manually created, one-time shift is removed without this choice -- it's just gone right away.
Multiple shifts per day
Does someone work mornings and evenings with a break in between? Just set up multiple shifts on a single day, for example one shift from 09:00 - 12:00 and a second from 13:00 - 17:00.
- Click an empty spot in the day to add a new shift.
- Click an existing shift to change its times or remove it.
Overlapping or exactly adjoining shifts are merged automatically into one shift. If there's a real gap between two shifts -- for example a break from 12:00 to 13:00 -- they stay two separate shifts (a split).
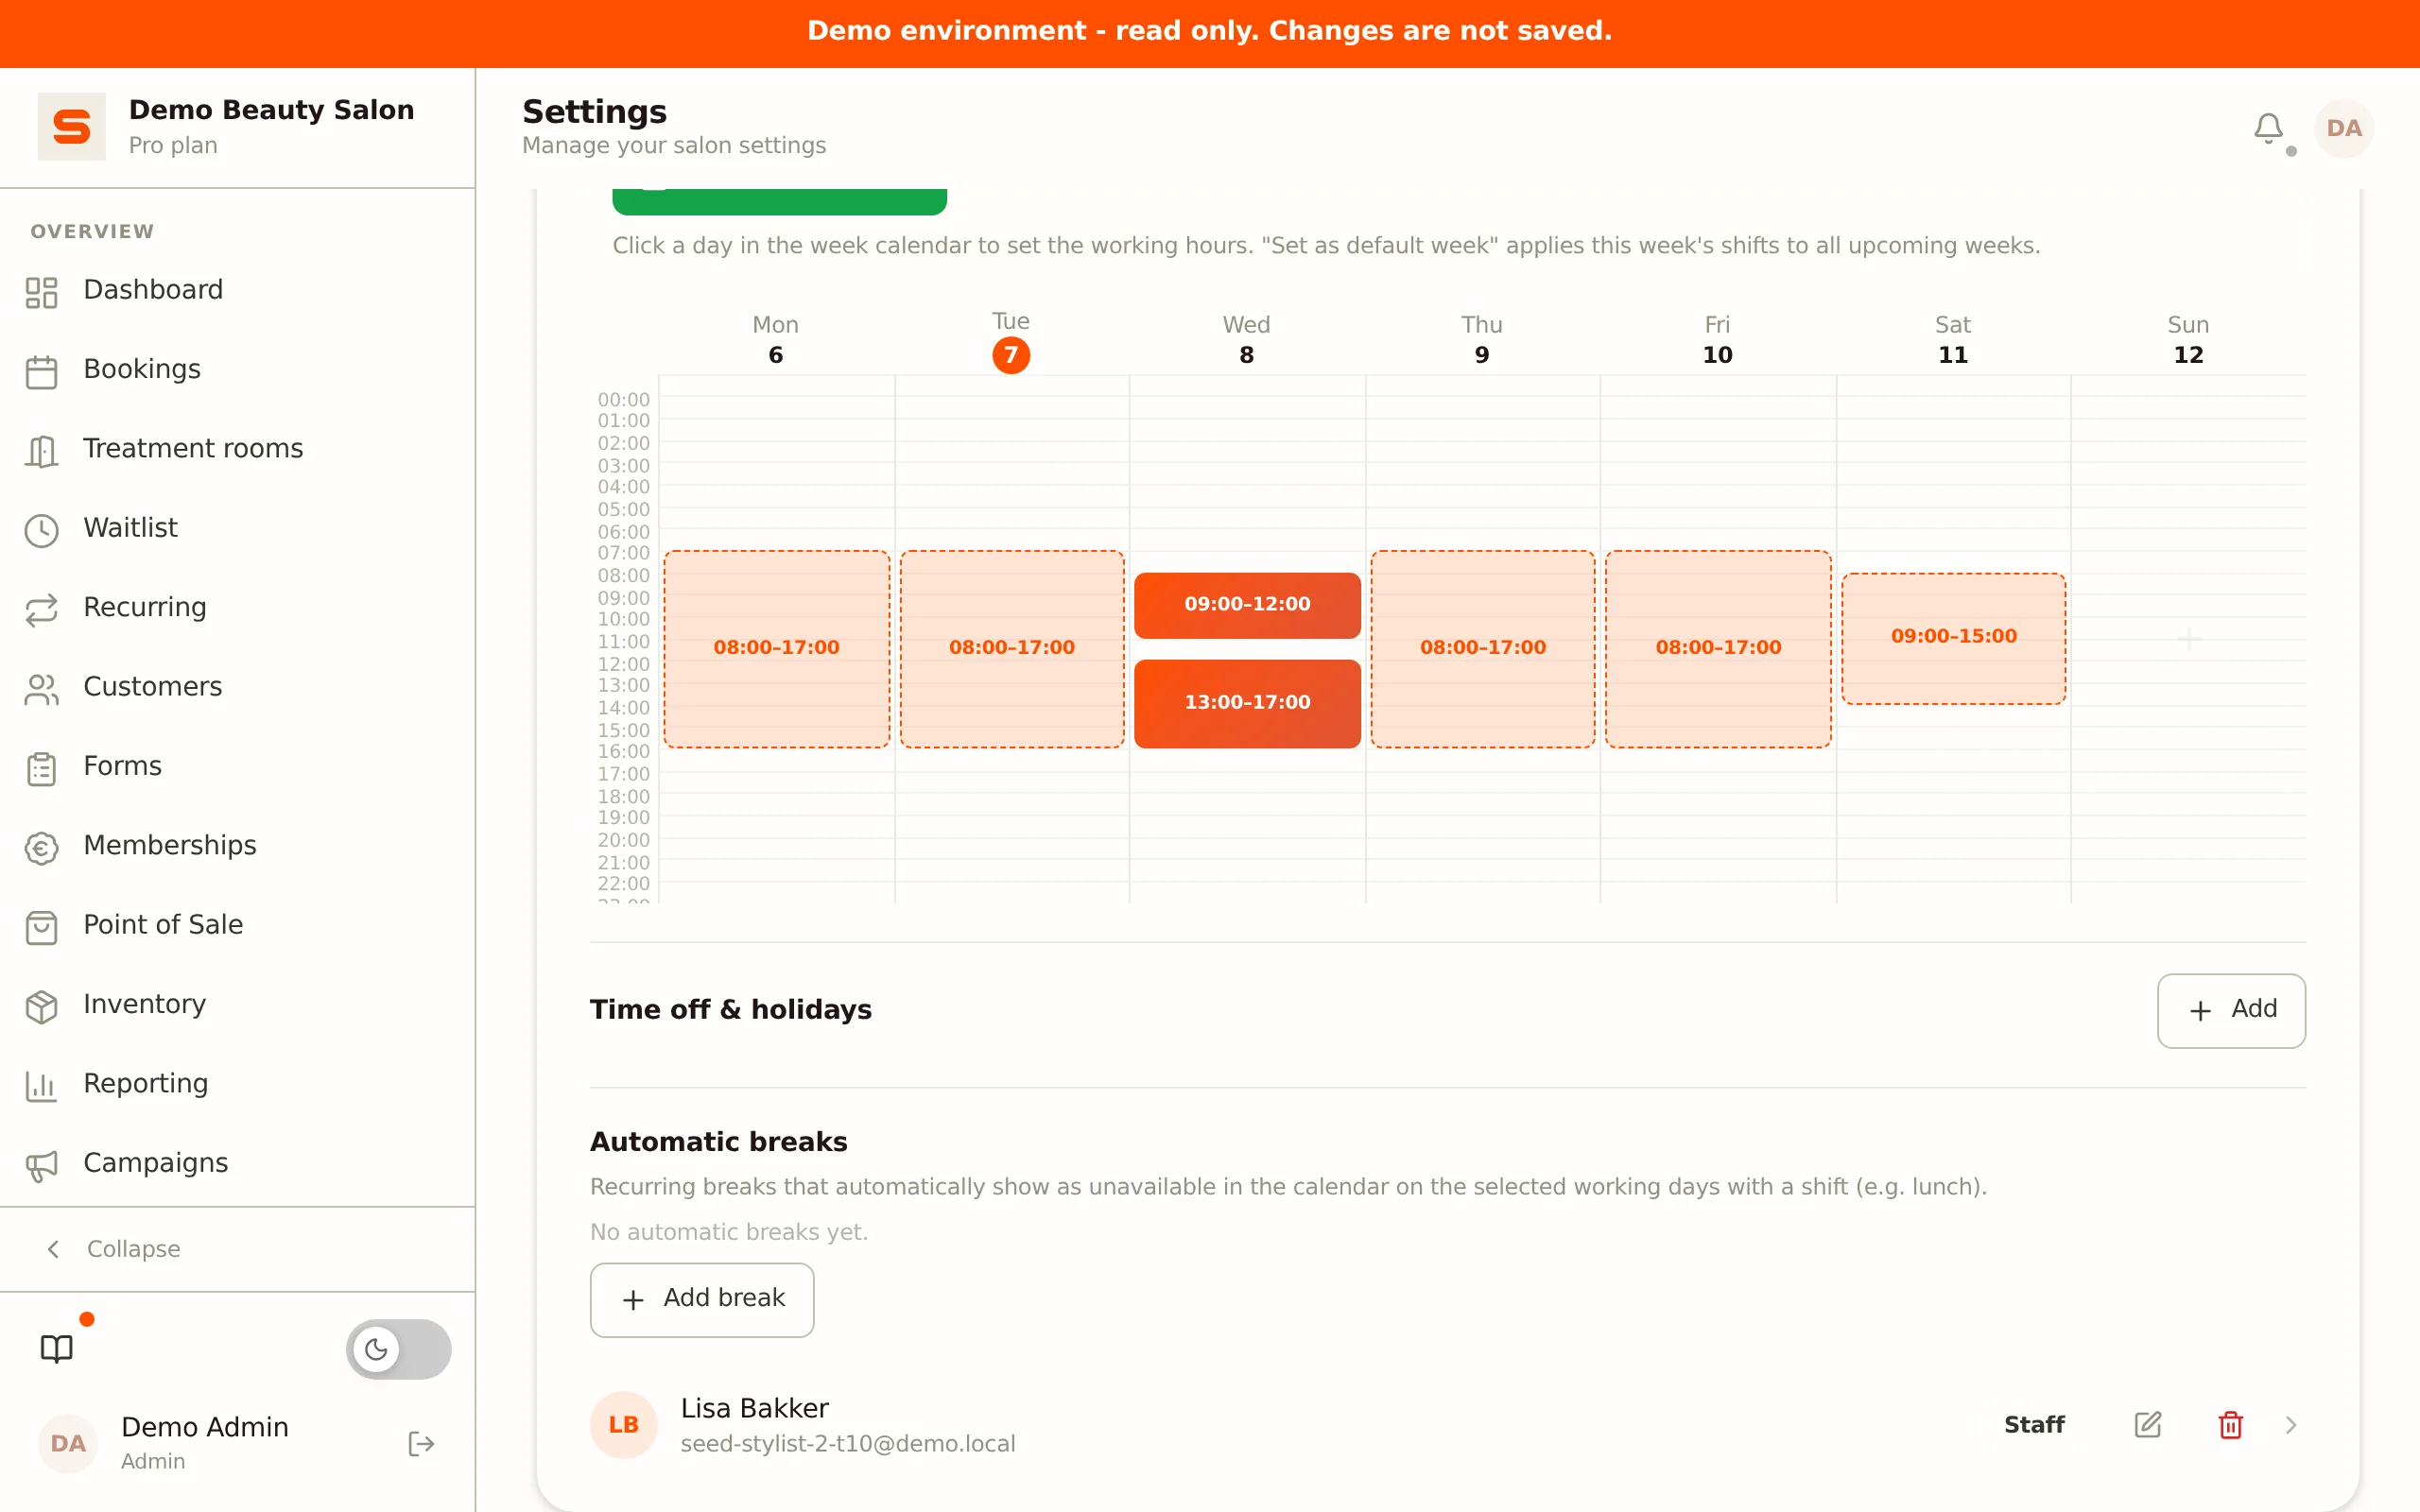
This also works as a fixed weekly schedule: set up the day with the split and then click Set as default week (see below).
Default week
Does someone work the same schedule every week? Then you don't have to enter it again every time:
- Fill in a full week as it normally runs.
- Click Set as default week. Salonnare saves the pattern and applies it automatically to the coming weeks.
- Use Clear default to remove the pattern again.
Set as default week always repeats weekly, for the whole week at once. If you'd previously set a different cadence for a single day (for example every other week via Repeat), setting the default week resets it back to weekly.
Automatically generated shifts are recognisable by a dashed outline. Manual changes always stay and are never overwritten.
Default week and the Repeat choice in the shift window use the same underlying template. Default week is handy to repeat a whole week at once; Repeat is faster when you only want a single day to recur.
Breaks
Every break is either recurring or one-time. Choose which one you need via the Break tab in the shift window (or via the Add break button under Automatic breaks).
Recurring break
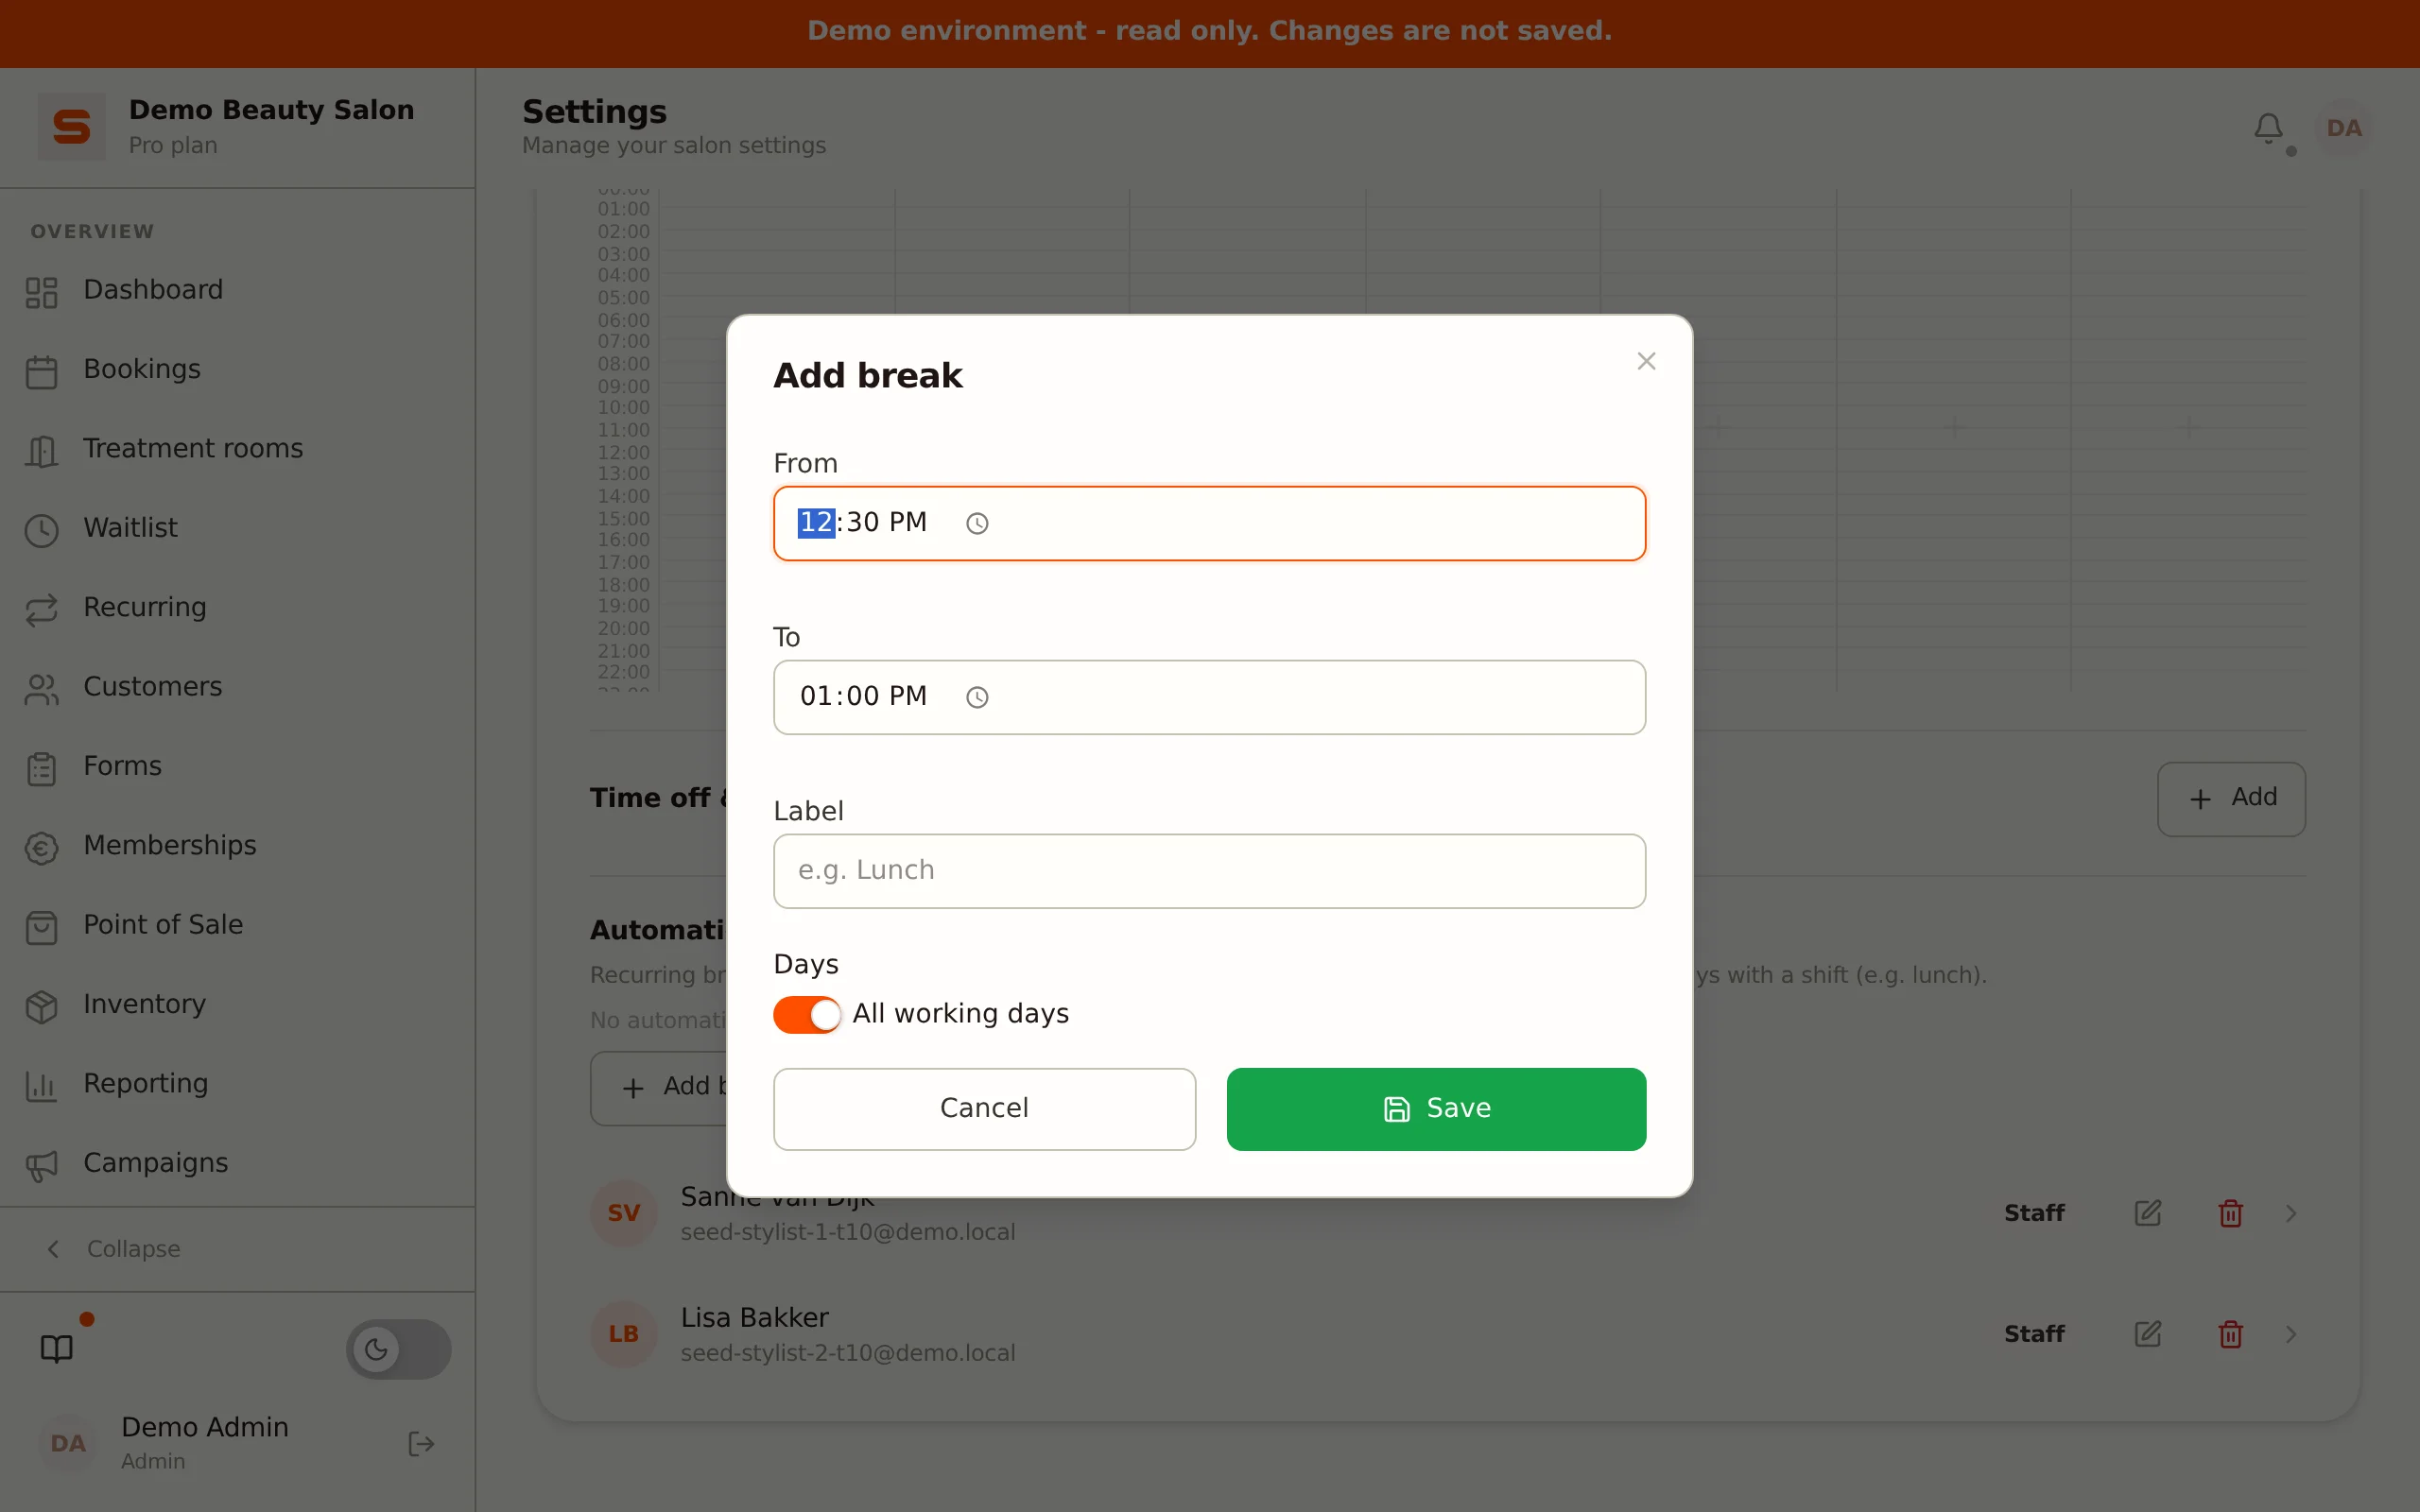
A recurring (automatic) break -- a fixed lunch break, for example -- appears automatically as unavailable in the calendar on the chosen working days, provided there is a shift scheduled that day.
- In a staff member's schedule panel, under Automatic breaks, click Add break (or open the Break tab in the shift window and choose Recurring). A window opens with a start time (From), an end time (To), a label (for example "Lunch") and a day selection.
- By default All working days is on. Turn it off to pick specific weekdays yourself (Monday to Sunday). Leave all days on and the break applies to every working day.
- Click Save.
In the break list you see each break's time and on which days it applies. Click the pencil icon to edit an existing break -- the same window opens pre-filled.
One-time break
Want a break for just one specific day -- for example an exceptionally long lunch during a busy day? Choose One-time in the Break tab and enter the start and end time for that day. This break appears as Partial at the bottom under Time Off & Holidays (see below) and doesn't repeat.
Time off and holidays
Under Time off & holidays (at the bottom of a staff member's schedule):
- Click Add.
- Choose whether it's a full day or part of the day (with start and end time).
- Select the start date and end date.
- Add a reason if you like (for example "Holiday" or "Sick") and click Save.
During time off the staff member is not shown as available in the calendar or on the online booking page.
Portfolio
On the Portfolio tab (in the expanded staff row) you manage photos of a staff member's work. See Portfolio for more.
Payouts
The Payouts tab is intended for linking a payment provider per staff member for direct payouts (for example with booth rental). This feature is not yet available (coming soon): linking does not work yet. See Booth rental and per-stylist payouts.
Unlocking a locked account
If a staff member enters the wrong password too often, the account is temporarily locked. A Locked label then appears next to their name. Click the padlock icon to unlock the account right away.
Removing a staff member
Is someone leaving your team? Click the trash icon (or choose Deactivate via right-click). The account is deactivated: past appointments and history are kept for your records, but the person can no longer log in. If they work for multiple salons, their account stays active there.
Read more about commissions, which are coming soon, in Commissions.