Switching from Salonized
Coming from Salonized? Then you bring your clients, your appointments (the history and the ones still to come), your time off and your products with you. You export them from Salonized as CSV files and put them into Salonnare with the migration wizard. Nothing is saved until you have looked at a dry run.
Rather have us do it? Migration help is free. Email your export files to support@salonnare.com and we will transfer them for you, or take a look with you if something doesn't add up.
What comes along?
| From Salonized | In Salonnare |
|---|---|
| Client file | Clients: name, email, phone, address, date of birth, gender, loyalty points and the number of no-shows. A notes column comes along as a note on the client. |
| Appointments | Appointments with client, staff member, service(s), duration and note. Past appointments come in as completed, future appointments as scheduled. A no-show stays a no-show. |
| Absences | Days off and other blocks in the staff member's calendar. |
| Products | Products. Salonized has no fixed profile with us here: the wizard recognises the columns by their name. So check the mapping extra carefully. |
What can't come along:
- Services. Salonized has no export of your service list. So create your services yourself first (see below).
- Staff. You create those yourself first too; the import links appointments and time off by name.
- Checkout and payments. We never bring over receipts, revenue or payment details, not even if they are in a file.
- Client forms and signed forms from the client profile in Salonized. Salonized has no export for those.
- Deleted appointments. Salonized has a separate export for those; you don't upload it.
Treatment reports and other health data can come along, but only into the client's secure health vault and only if you confirm that your clients gave consent for this in Salonized. How that works is explained in Switching from other software. If it doesn't work with your Salonized file, email it to us.
Preparing in Salonnare
Do this before you import, so everything lands in the right place straight away:
- Create your staff under Settings > General > Staff, with the same name as in Salonized. An appointment or absence of a staff member the import can't find is skipped. If you have only one staff member, everything goes to that staff member.
- Create your services under Services & Products, with exactly the same name as in Salonized, and with the right price and duration. The import links every appointment by that name. If it can't find a name, it creates a new service priced €0 in the category Geïmporteerd ("Imported"); you can check and adjust those afterwards. Such a service is not bookable online until you enter the price and turn on online booking.
Exporting from Salonized
In Salonized you need an account with the full access level: only that level is allowed to export data.
- In Salonized, go to Settings > General > Export data (the exact name may differ in your Salonized language).
- Open the Lifetime exports tab.
- For each of these exports, choose CSV and click Export:
- Client file
- Appointments
- Absences
- Products (if you sell products)
- Salonized prepares the exports in the background. After a few minutes you get an email with a download link, and they appear in the export table at the bottom of the same page. Download them there.
The files stay available at Salonized for 14 days and are then deleted automatically. Import them within that time, or make a new export.
If you have several locations in Salonized, choose Whole company or Per location when exporting.
These steps come from the Salonized help centre (exporting data, user accounts). Salonized may change the names of menus and buttons; if you see something different, email us.
Importing into Salonnare
-
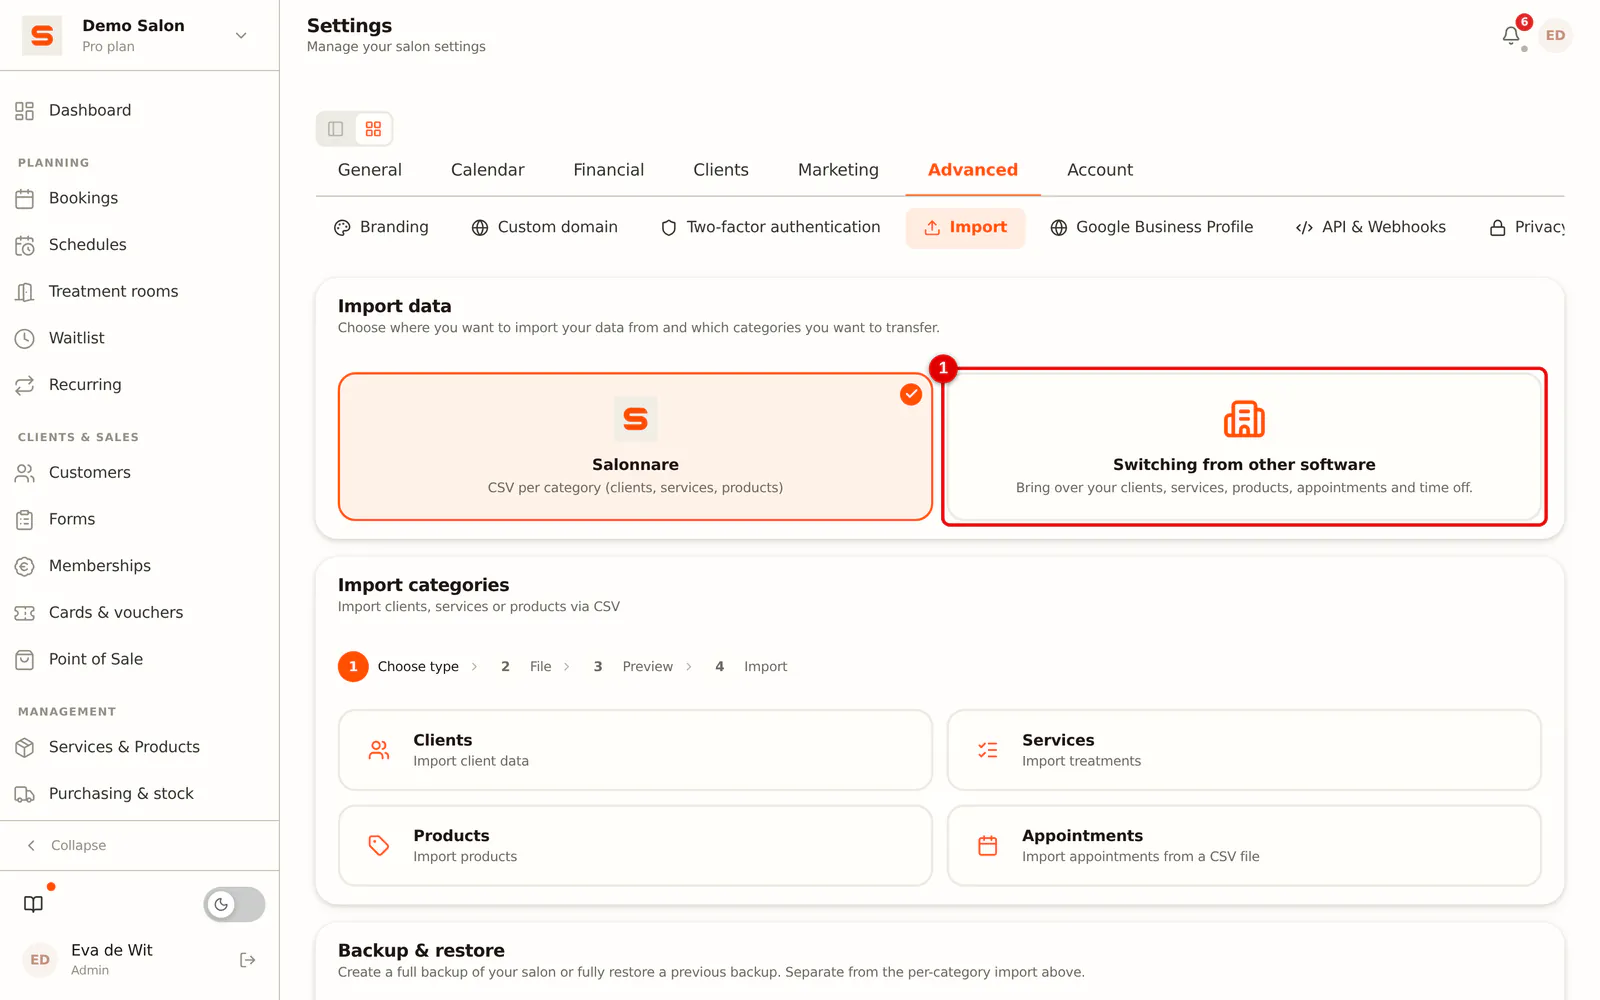
Step 1: Open the migration wizard
Go to Settings > Advanced > Import and choose Switching from other software. Only an admin can do this.
 (Enlarge image)
-
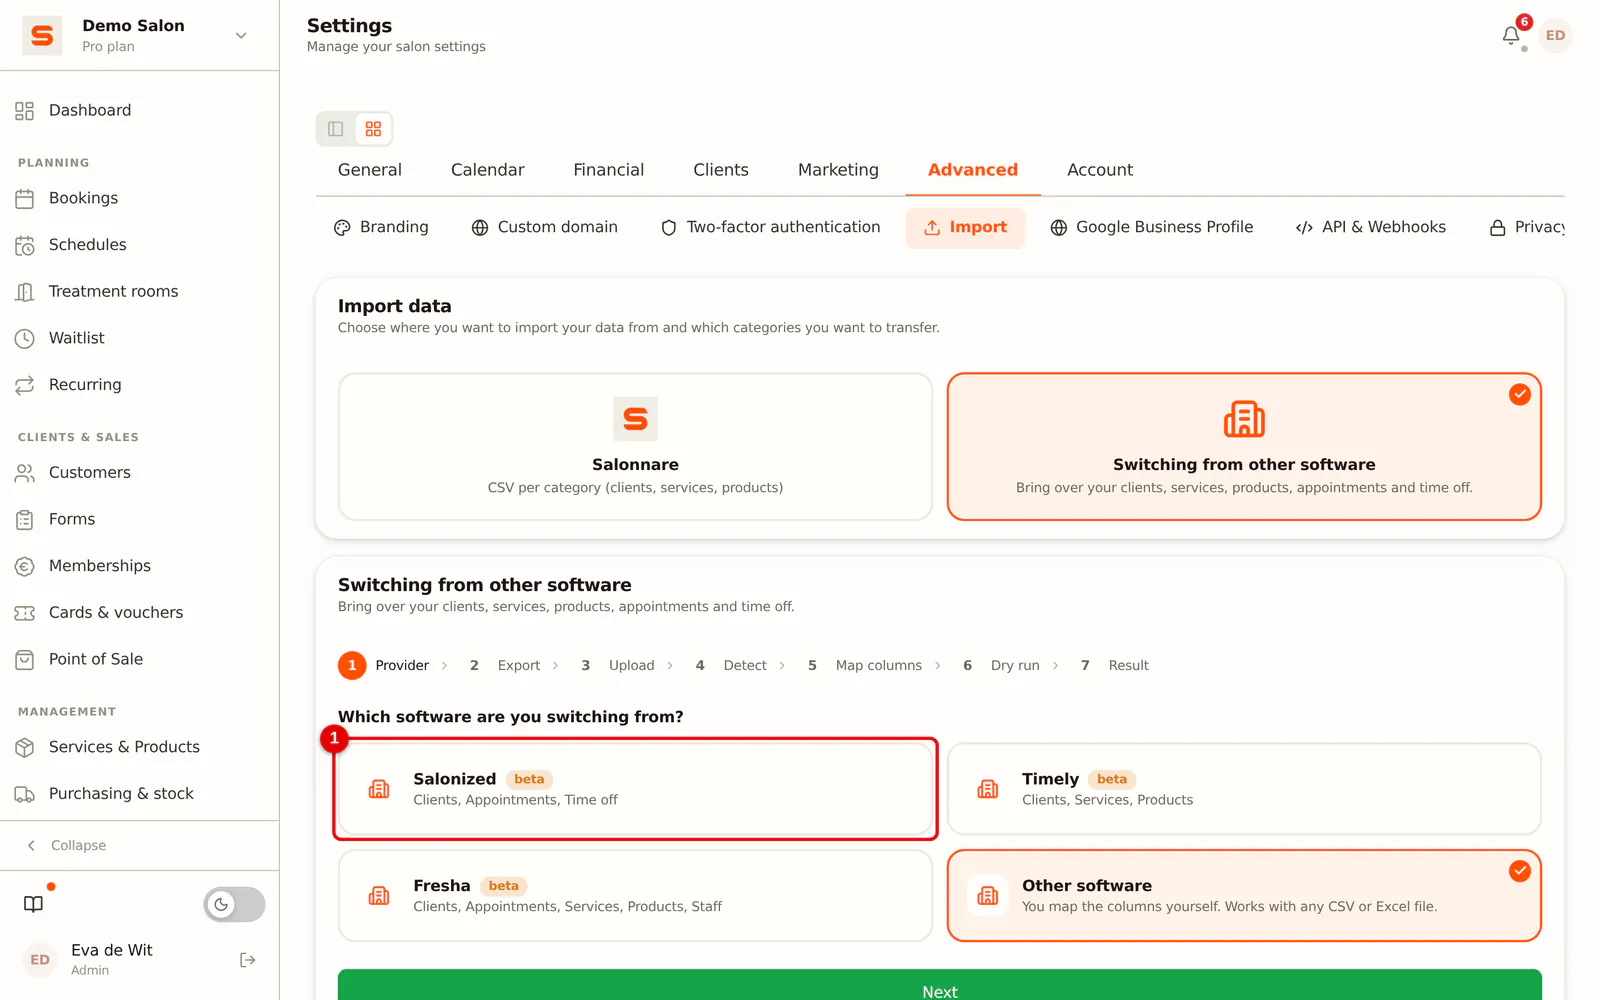
Step 2: Choose Salonized
Click Salonized.
 (Enlarge image)
-
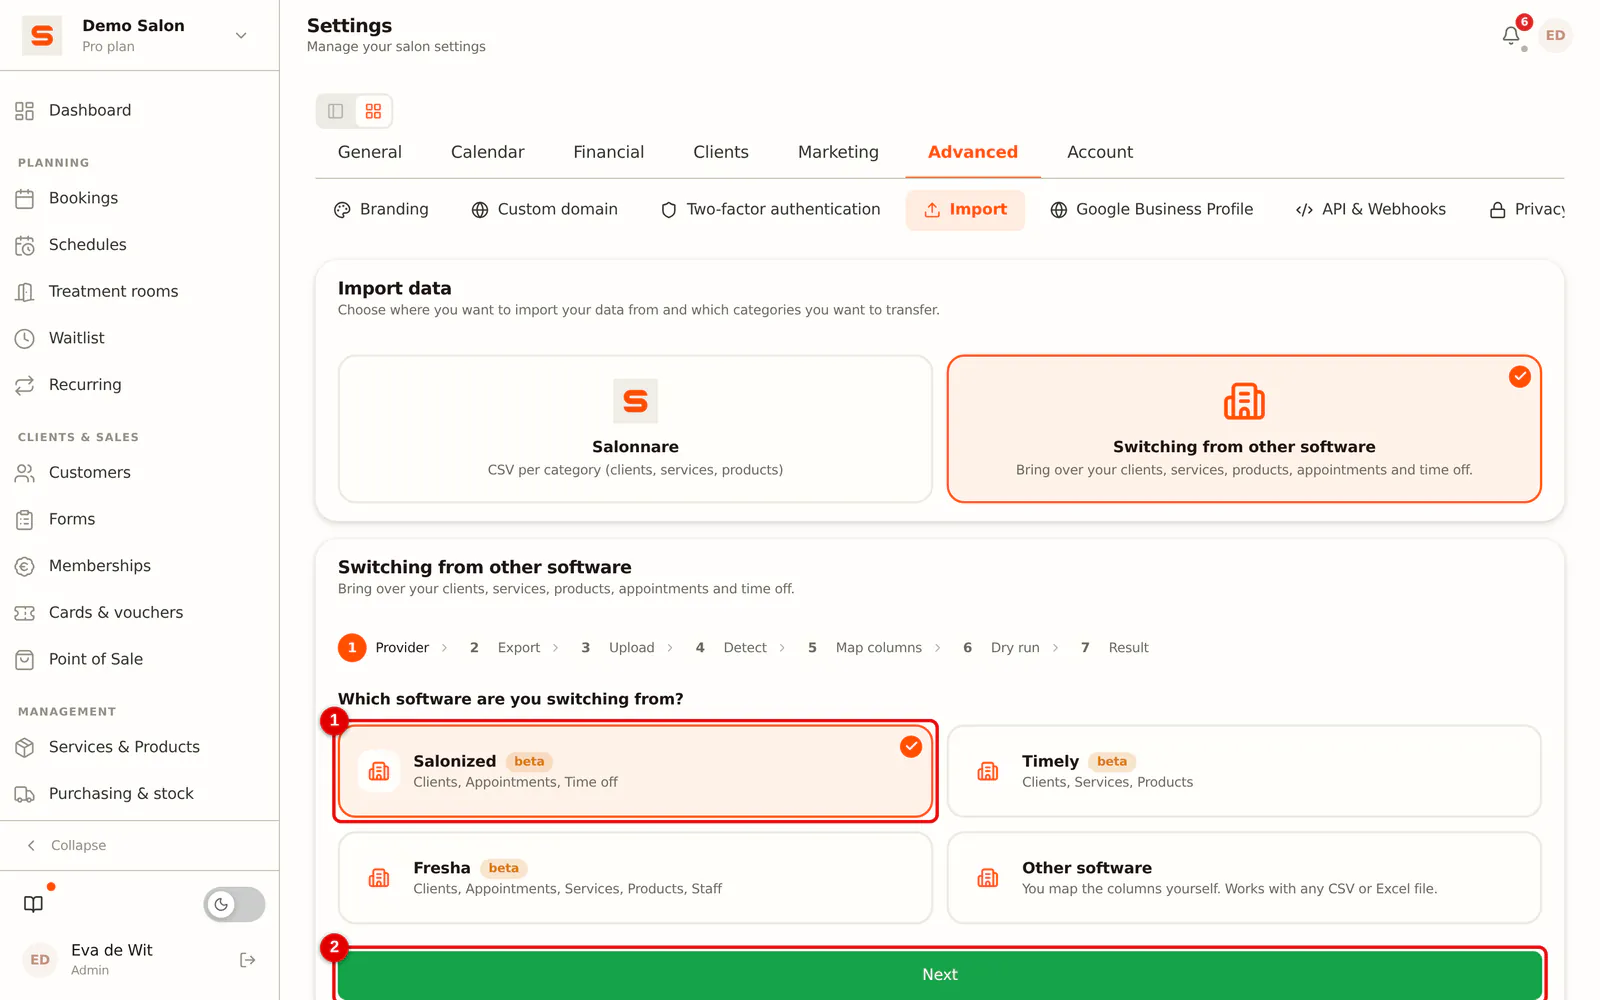
Step 3: Continue
The chosen provider gets an orange border and a check mark (1). Click Next (2).
 (Enlarge image)
-
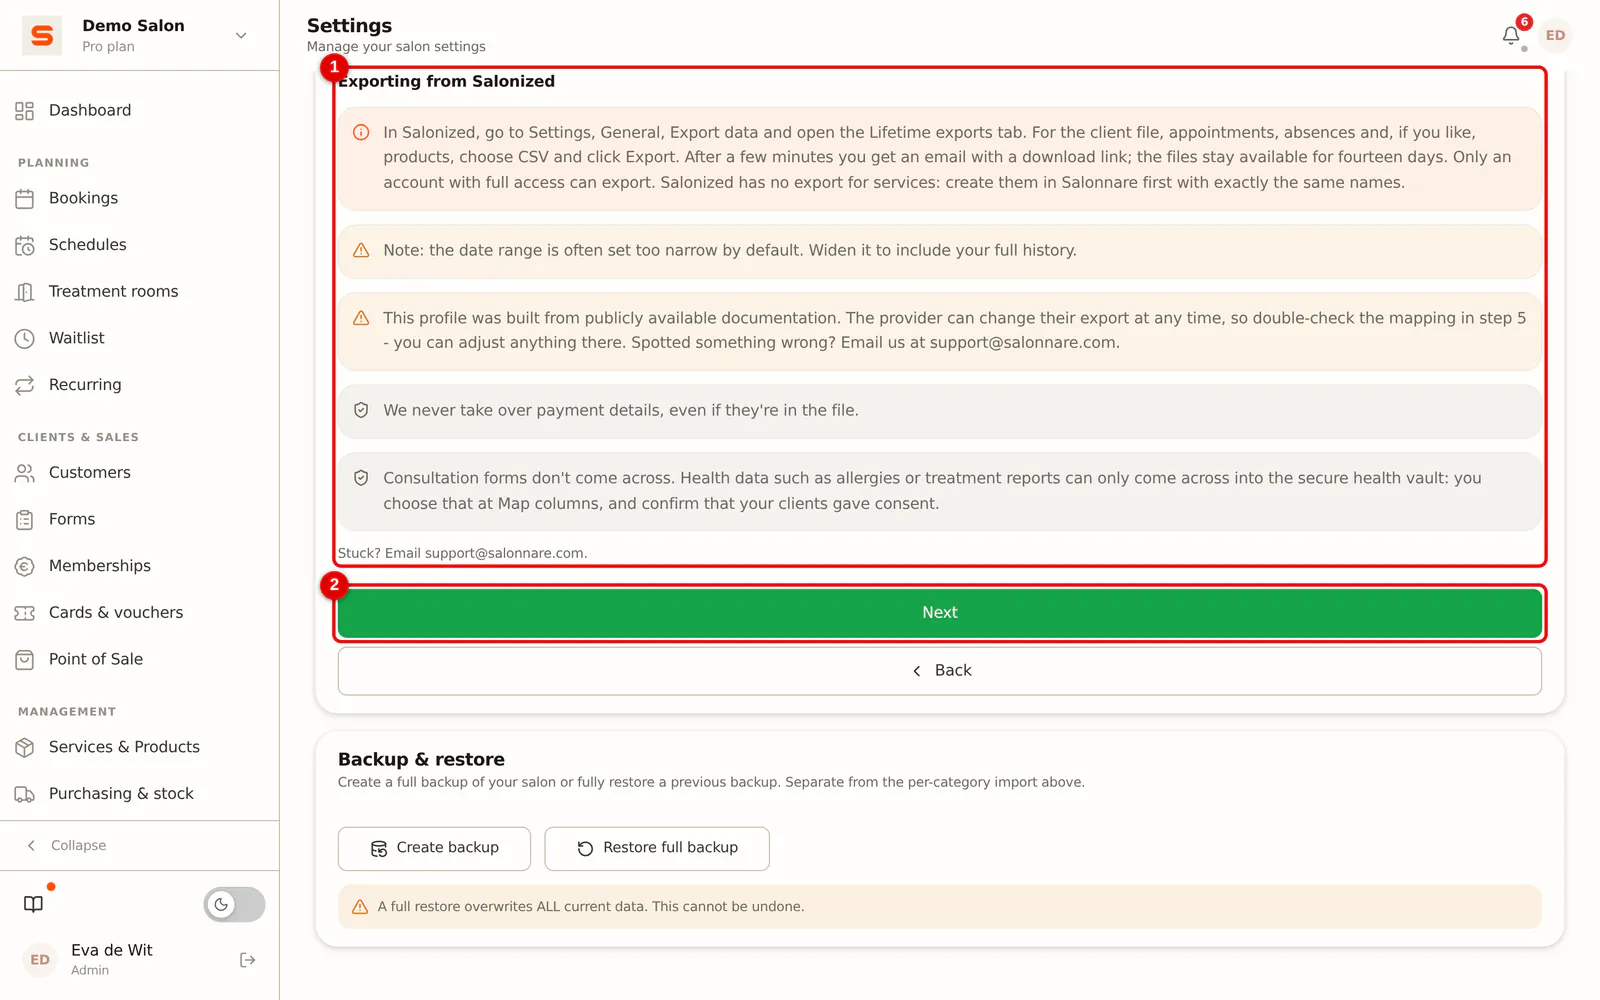
Step 4: Read the export instructions
The wizard sums up once more how to make the export in Salonized (1). If you have already downloaded the files, click Next (2).
 (Enlarge image)
-
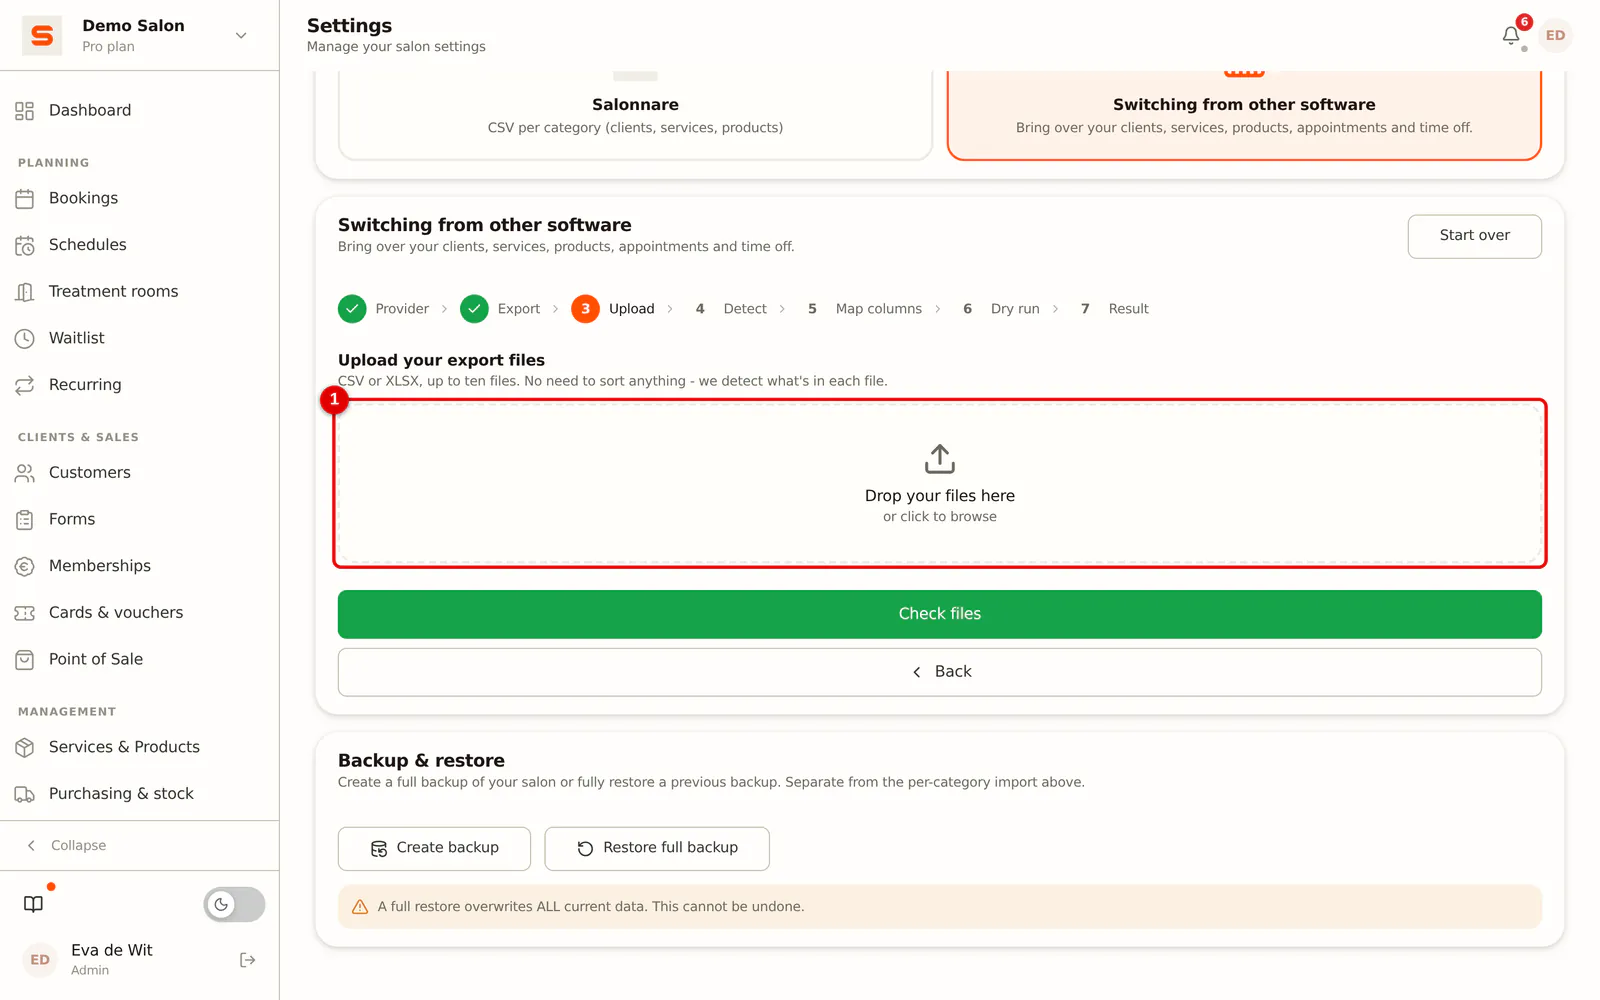
Step 5: Choose your export files
Drag the files into the box or click to choose them. You can upload them all at once (up to ten files); no need to sort them.
 (Enlarge image)
-
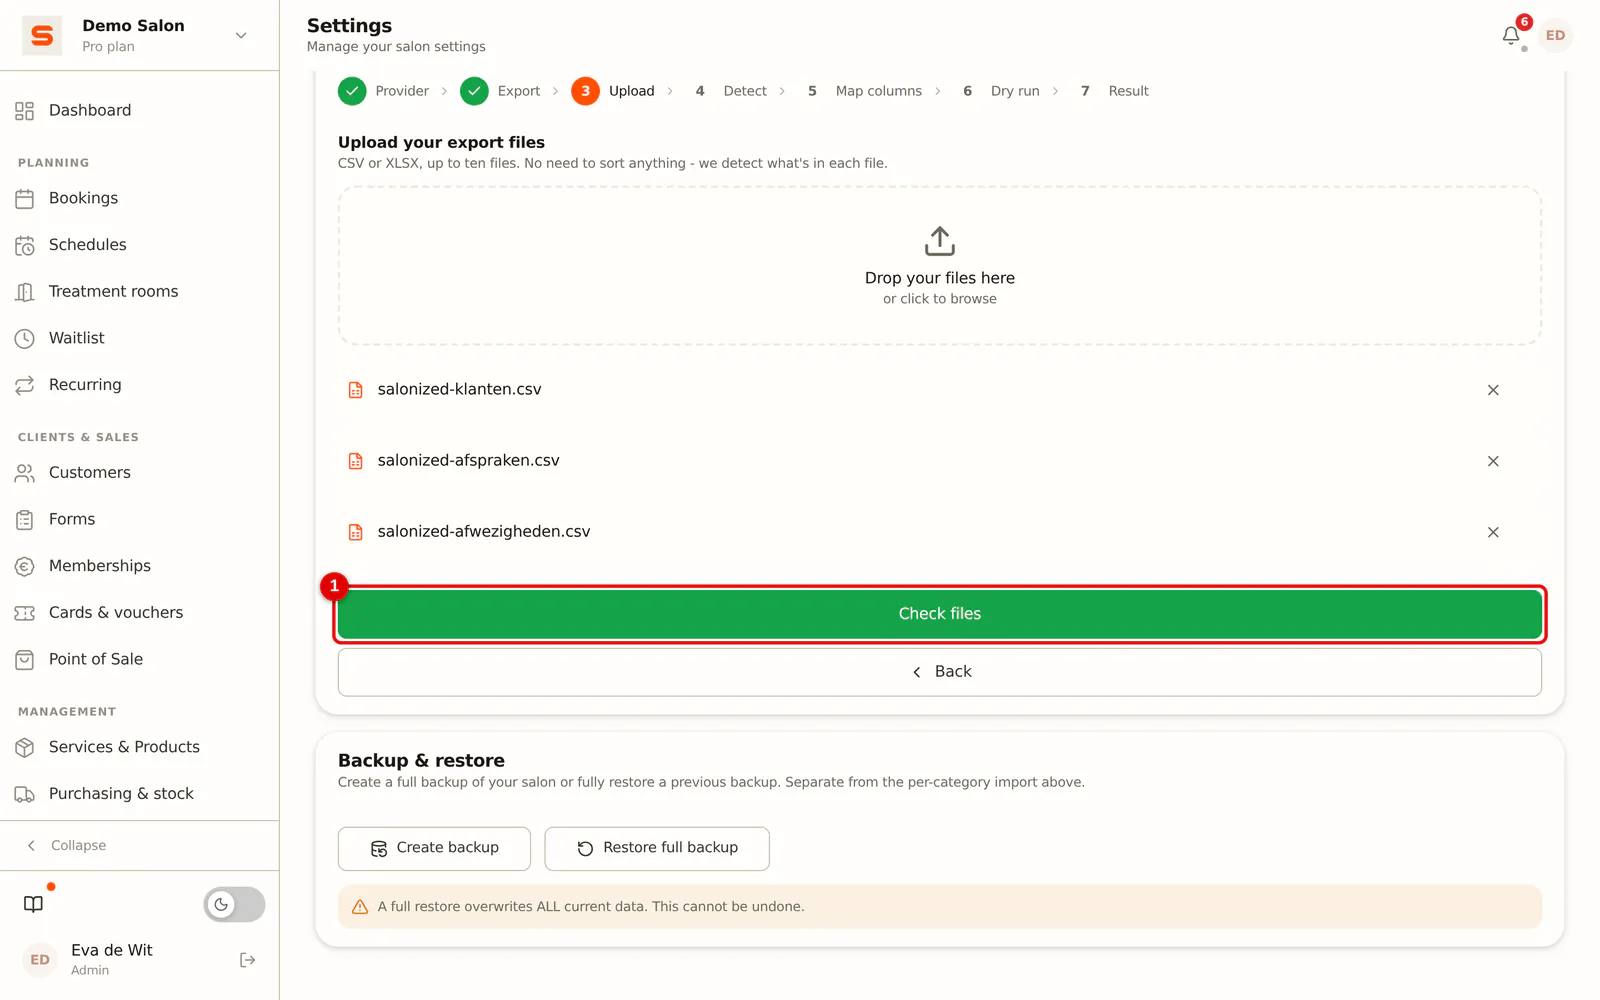
Step 6: Have the files checked
Click Check files.
 (Enlarge image)
-
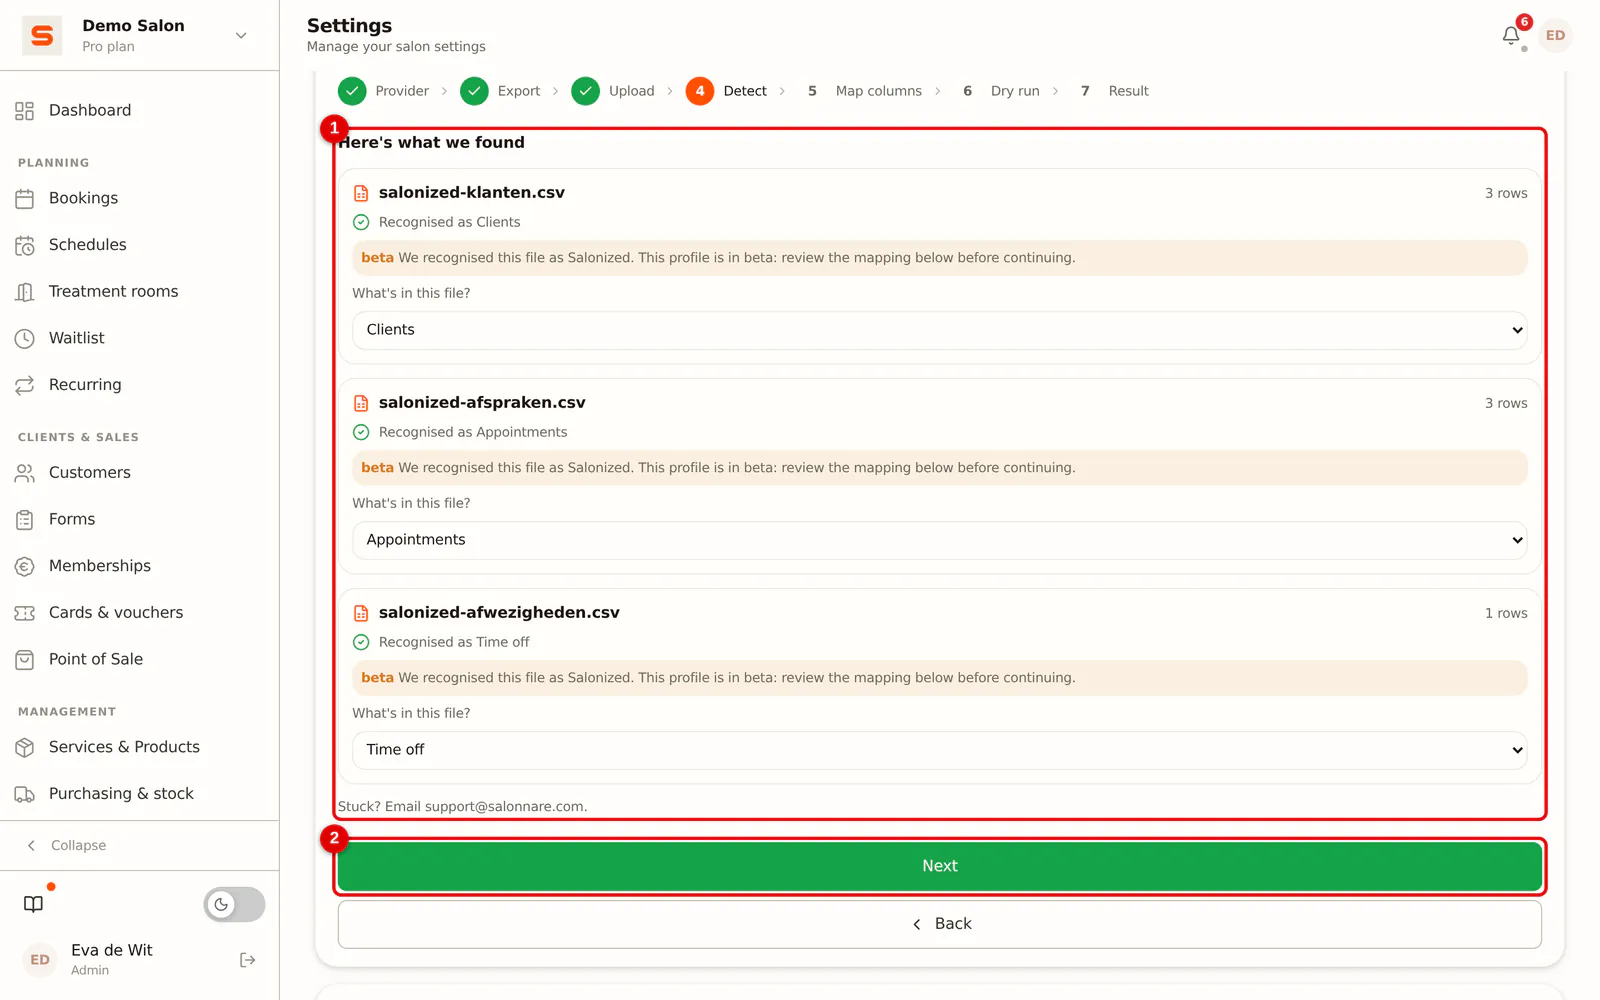
Step 7: Check what was detected
For each file you see that it was recognised as Salonized and as which type of data: clients, appointments or absences (1). If the type is wrong, choose the right one yourself. Click Next (2).
 (Enlarge image)
-
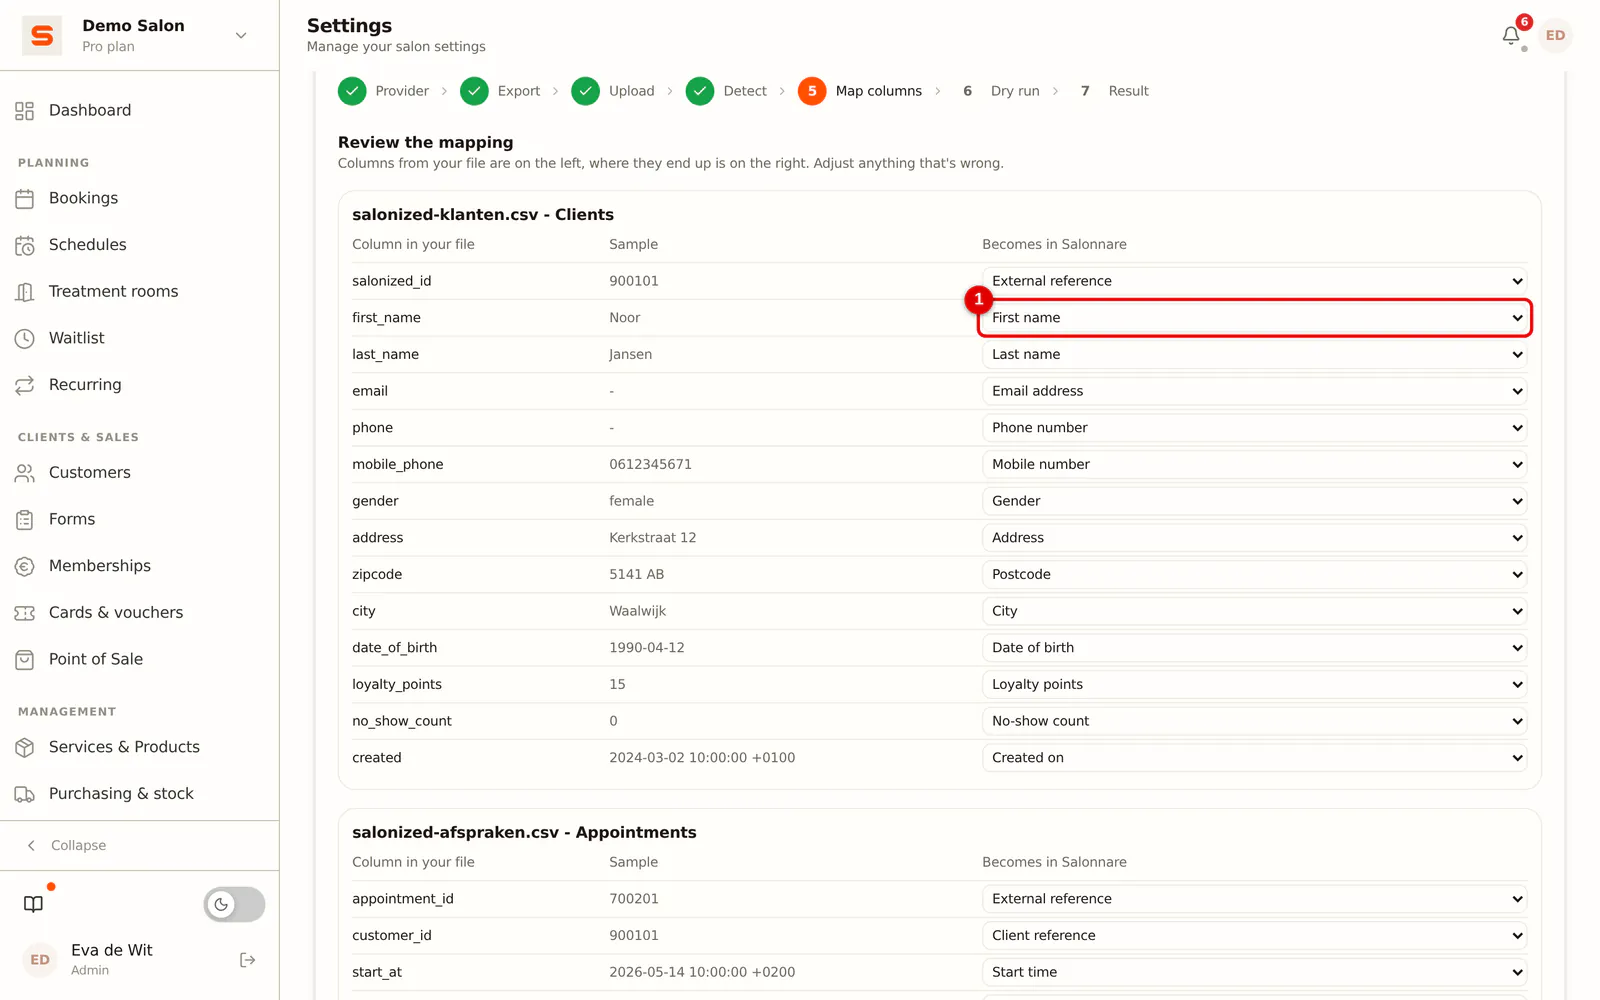
Step 8: Check the mapping
For each file, the Salonized columns with a sample value are on the left, and the Salonnare field they end up in is on the right. For Salonized this is usually already correct; still, check it quickly, especially for products. Then click Next at the bottom.
 (Enlarge image)
-
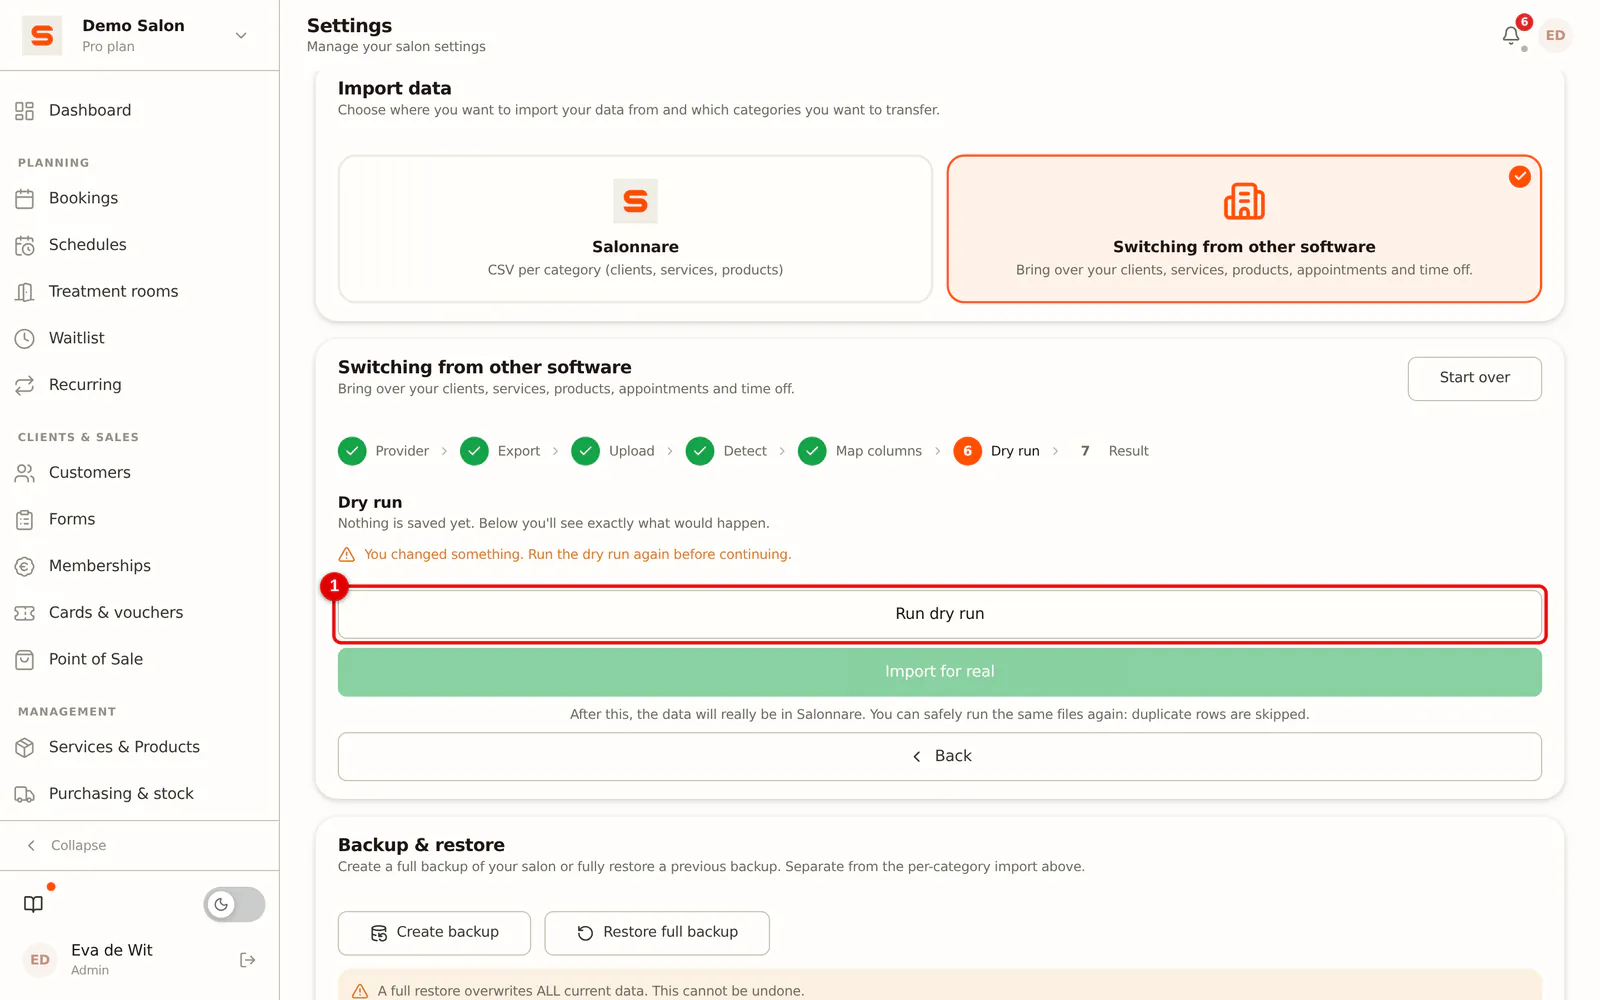
Step 9: Run a dry run first
Click Run dry run. Nothing is saved yet.
 (Enlarge image)
-
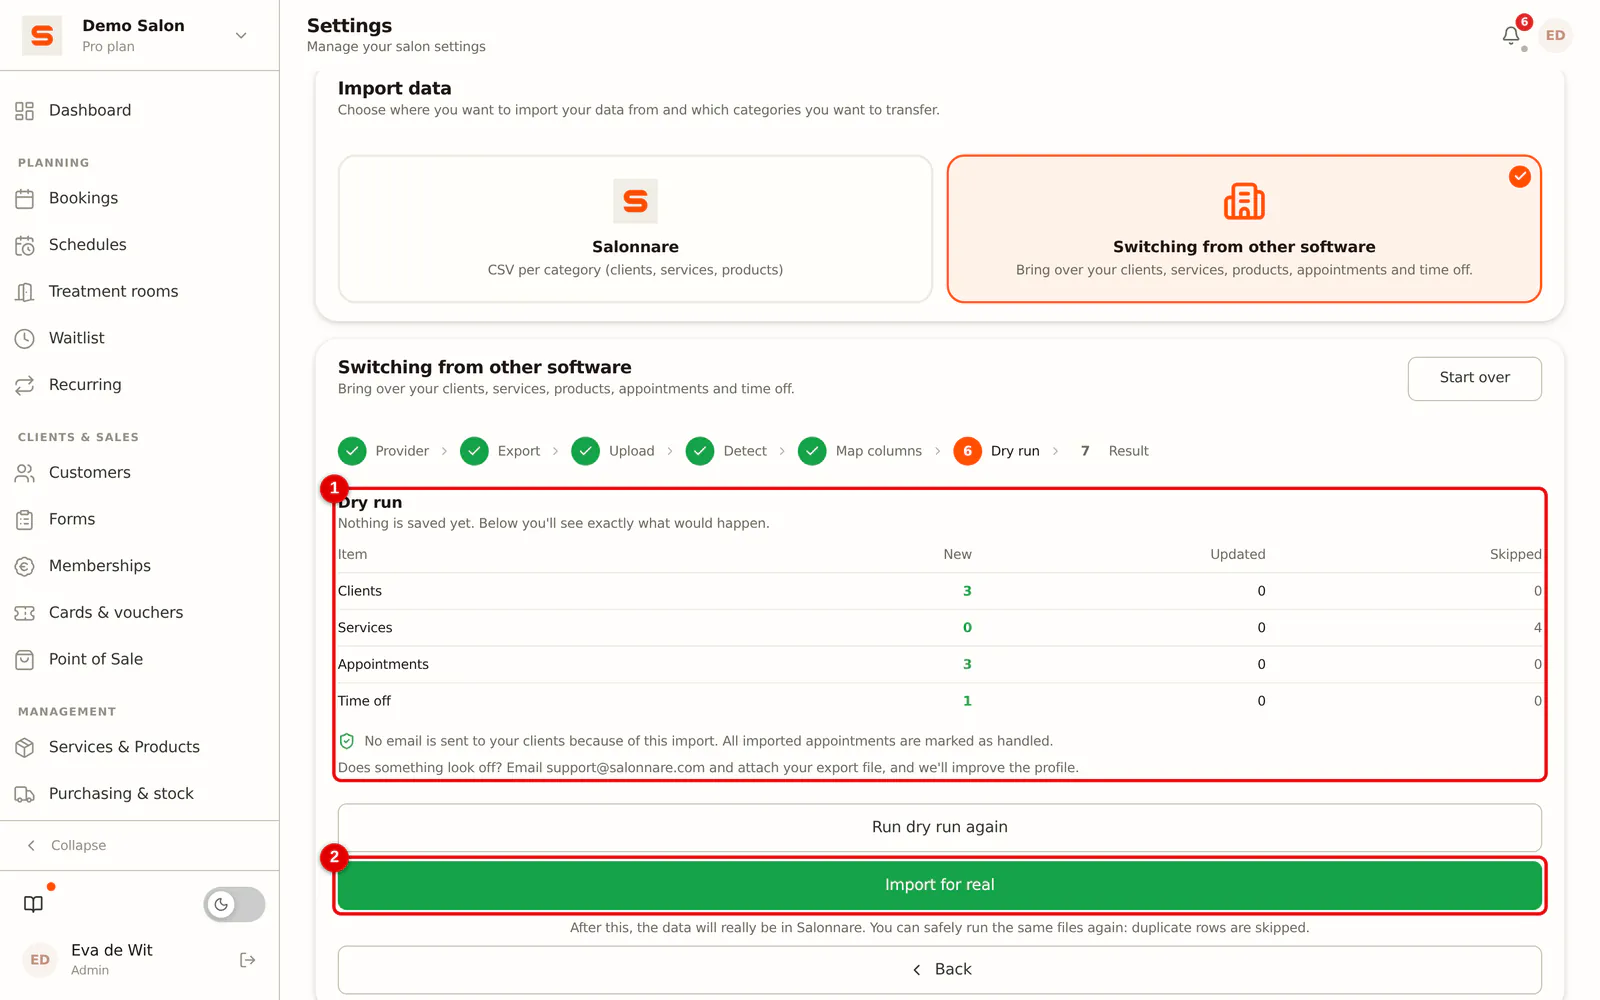
Step 10: Review the dry run and import for real
You see how many clients, appointments and absences are new or will be skipped, and which services the import would create (1). If a service is listed that you already have, adjust the name in Salonnare and run the dry run again. If everything is right, click Import for real (2).
 (Enlarge image)
After the import
- Your clients don't get a confirmation. No welcome email or review request for imported appointments either. With Send reminders for upcoming appointments (on by default, in the Dry run step) clients do get the usual reminder before an appointment that is still to come. Turn it off and no email goes out at all.
- Check the new services in the category Geïmporteerd. They are priced €0.00 and not bookable online, so nobody can book them for free; after the import they are also listed in the import report. Give them the right price and then turn on online booking yourself, or delete them if they are duplicates.
- Importing again is safe. Clients and appointments that already exist are recognised and not created twice. Handy if you keep working in Salonized for a few more days: export again on your switch day and import once more.
Frequently asked questions
Do the appointments still to come also come along? Yes. Everything in the Salonized appointments file comes along; appointments after today are then simply scheduled in your calendar.
An appointment was skipped with "staff member not found". The staff member's name in Salonized doesn't match a staff member in Salonnare. Adjust the name (or create the staff member) and import again; what is already in won't be created twice.
I got an .xls file. Choose CSV when exporting in Salonized. We can also read a newer .xlsx file, but not an old .xls.
I'm stuck. Email your files to support@salonnare.com. We help you with the switch for free.