Welcome to Salonnare
Congratulations on setting up Salonnare! Whether you run a cozy one-person studio or a busy salon with a whole team, you now have everything you need to manage your business in one place. Let's get started.
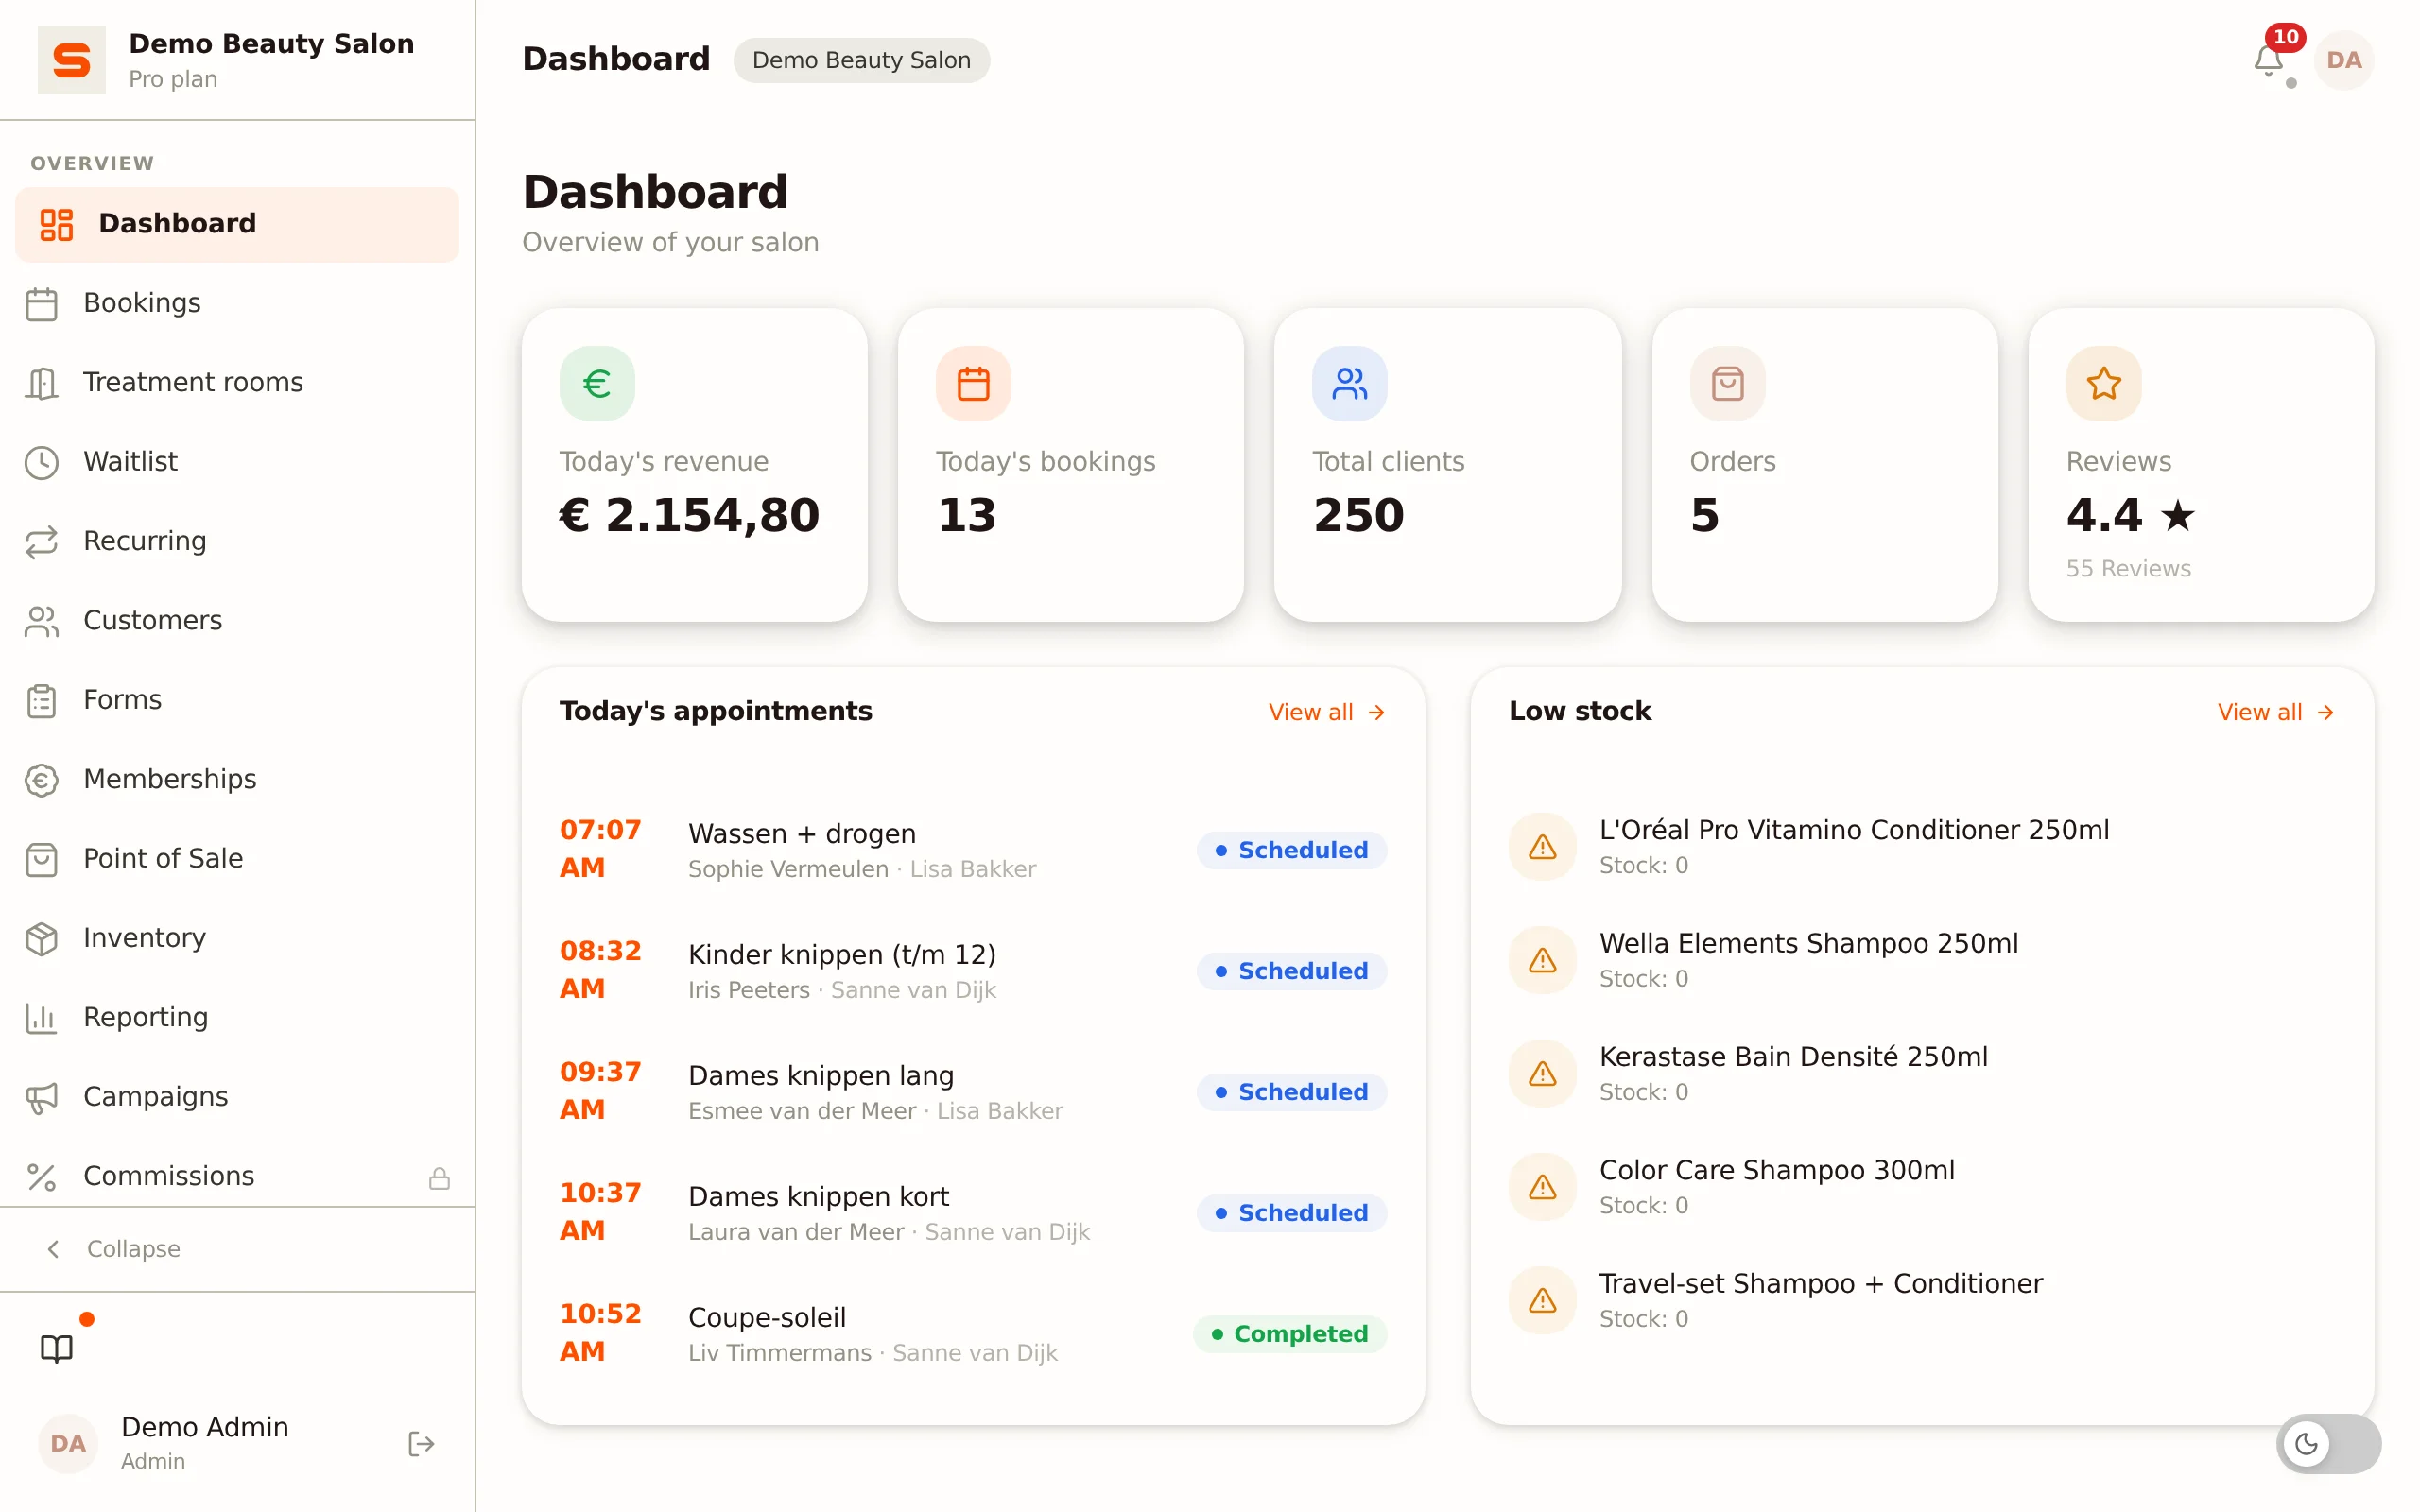
Set up your salon in eight steps
With these steps your salon is ready for its first appointment and its first payment at the POS. You do not have to do them all at once or in this order. If your salon was created less than 30 days ago, a window after logging in points you to this guide. Only the owner and admins see that window, not staff members. Choose Later and it comes back in your next session; choose Don't show again and it is gone for good. The guide itself stays available under Support > Getting started guide.
1. Logo and colours for your booking page
Your logo and your colour are the first things a customer sees on your booking page.
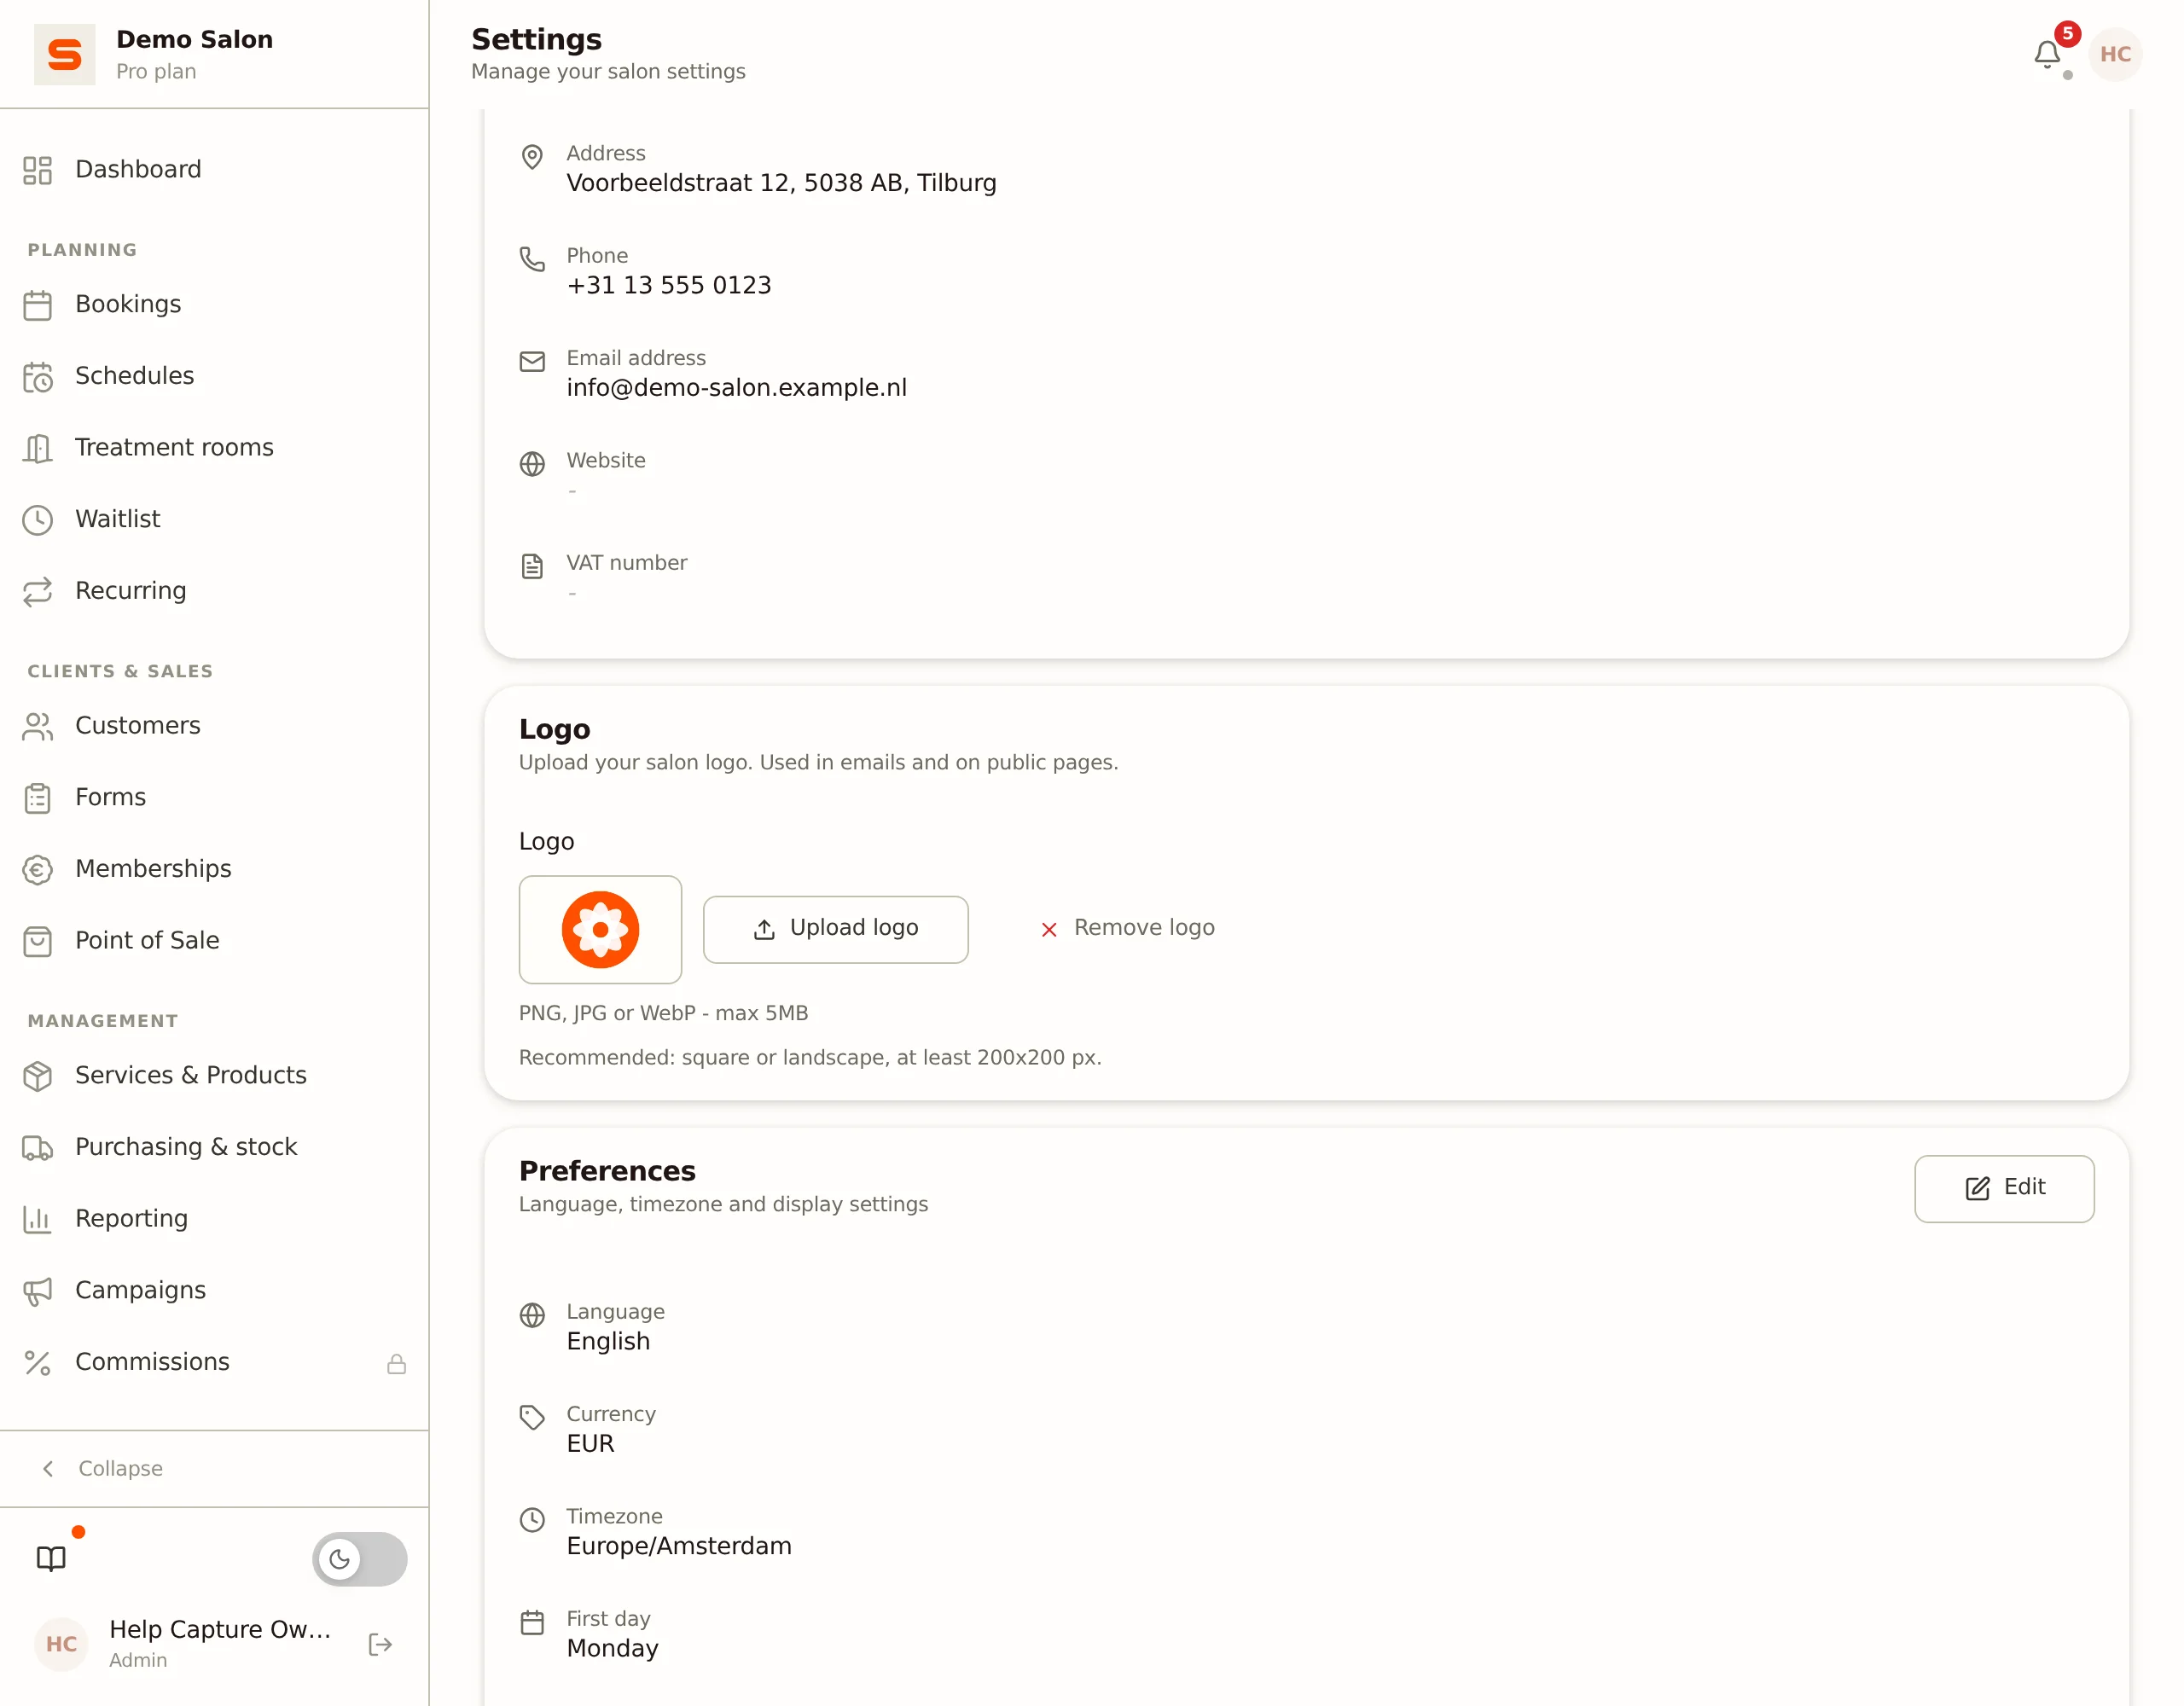
- Go to Settings > General > General.
- In the Logo block, click Upload logo and choose your logo (PNG, JPG or WebP, up to 5 MB). The logo appears in your emails and on your public pages.
- Go to Settings > Calendar > Booking link & widget.
- Under Primary color (card Booking page colors), pick your salon colour with the colour picker or type the hex code, then click Save.
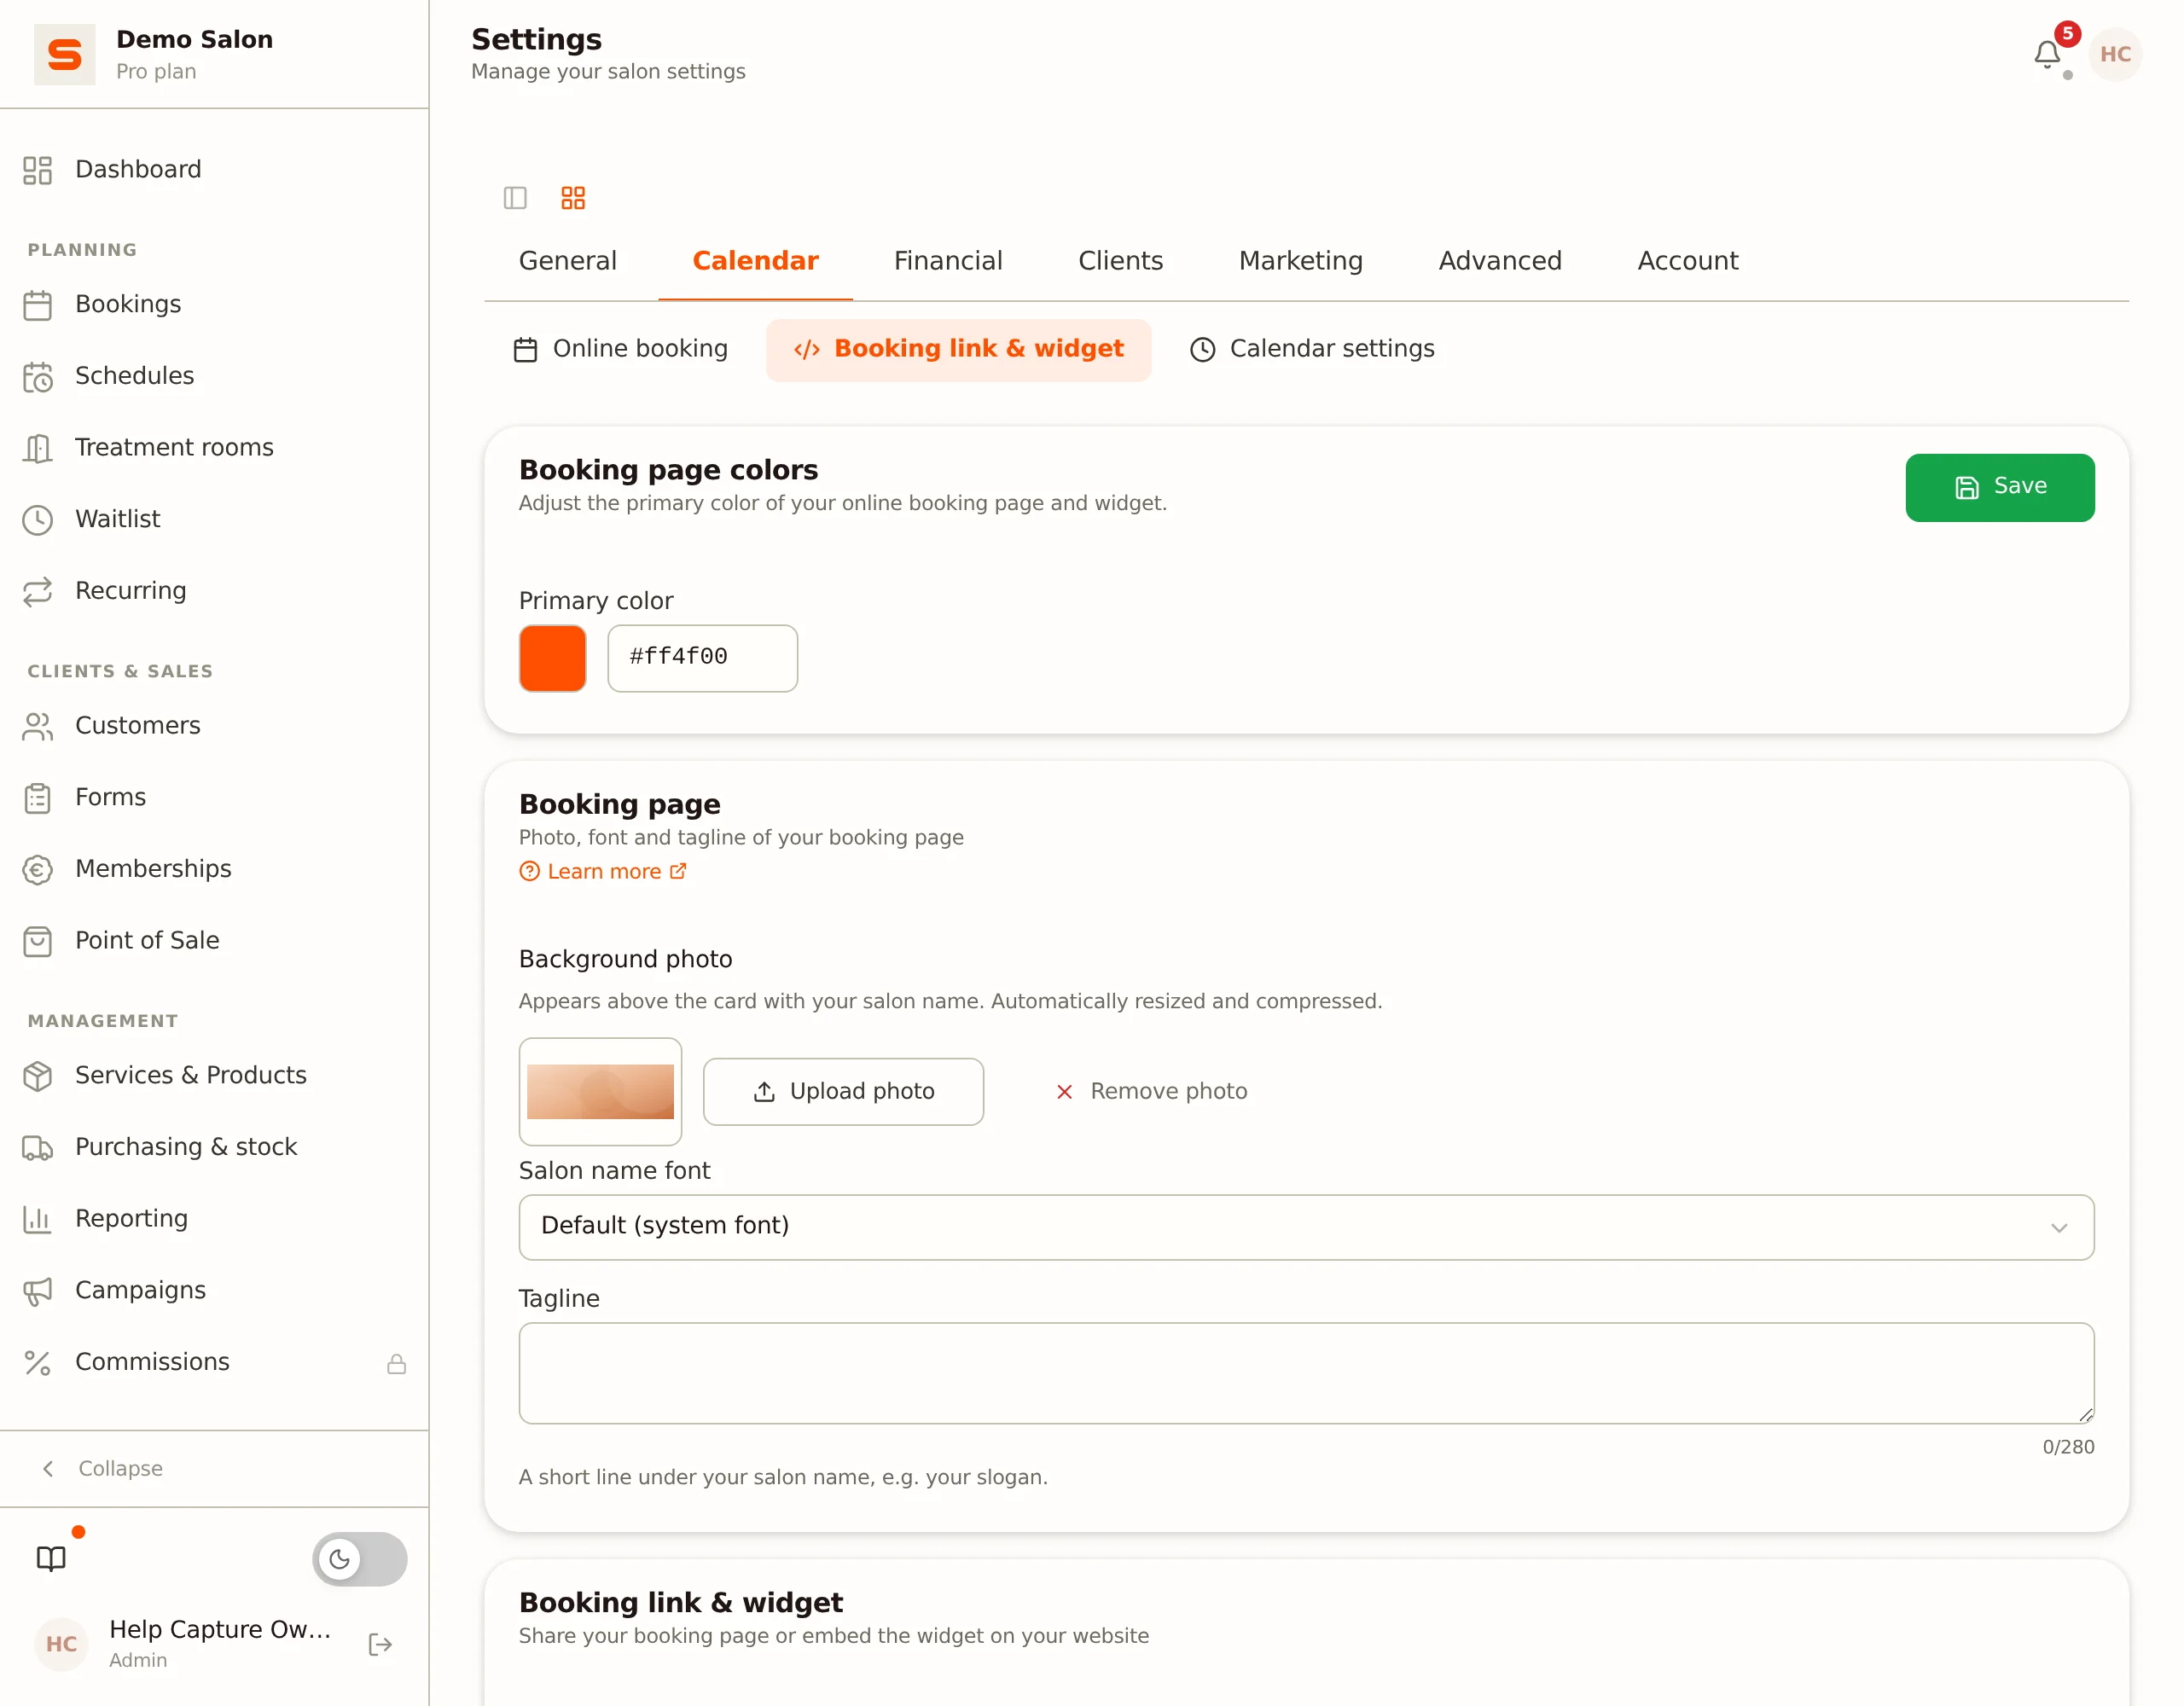
On the same page you can also set a header photo, font and tagline (Pro). See Online Bookings.
2. Fill in your schedule
Customers can only book at times when a staff member is scheduled.
- Click Schedules in the sidebar, or go to Settings > General > Staff and click your own name. The Schedule tab opens.
- Click a day in the weekly grid.
- Fill in Start time and End time, choose for example Every week under Repeat, and click Save.
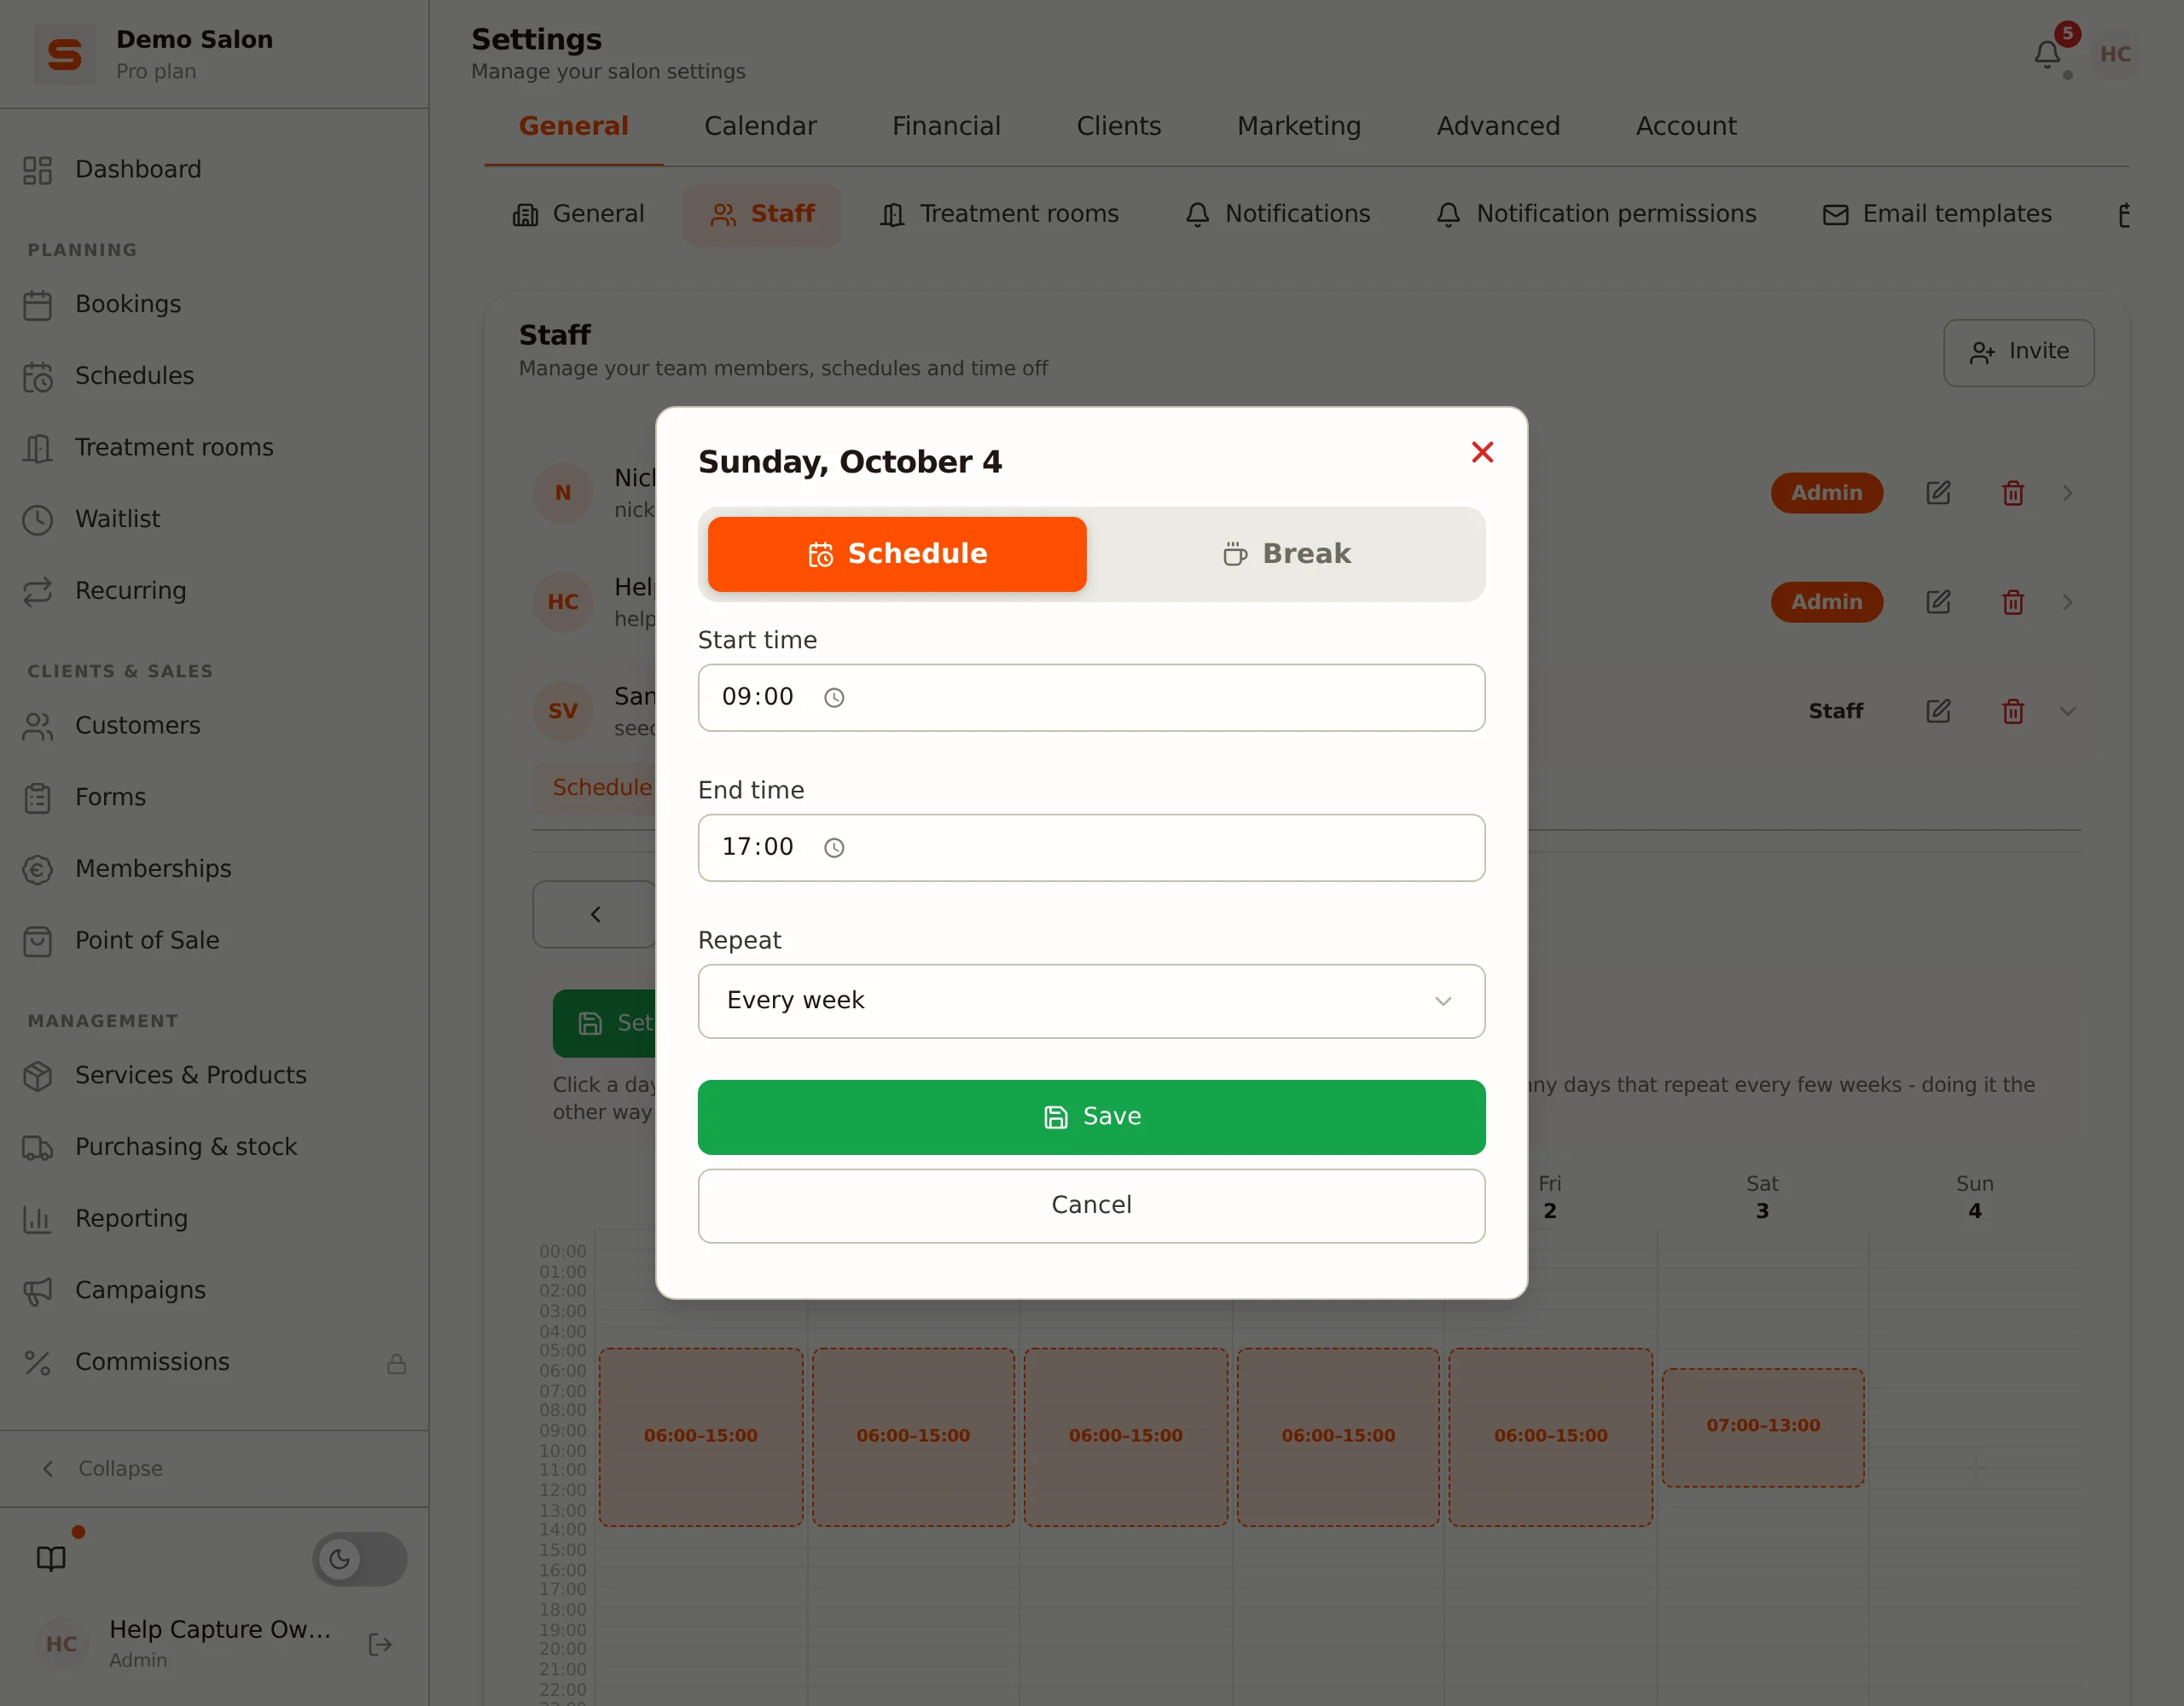
Repeat this for every working day. See Managing staff for breaks, several shifts per day and inviting colleagues.
3. Create your first customer
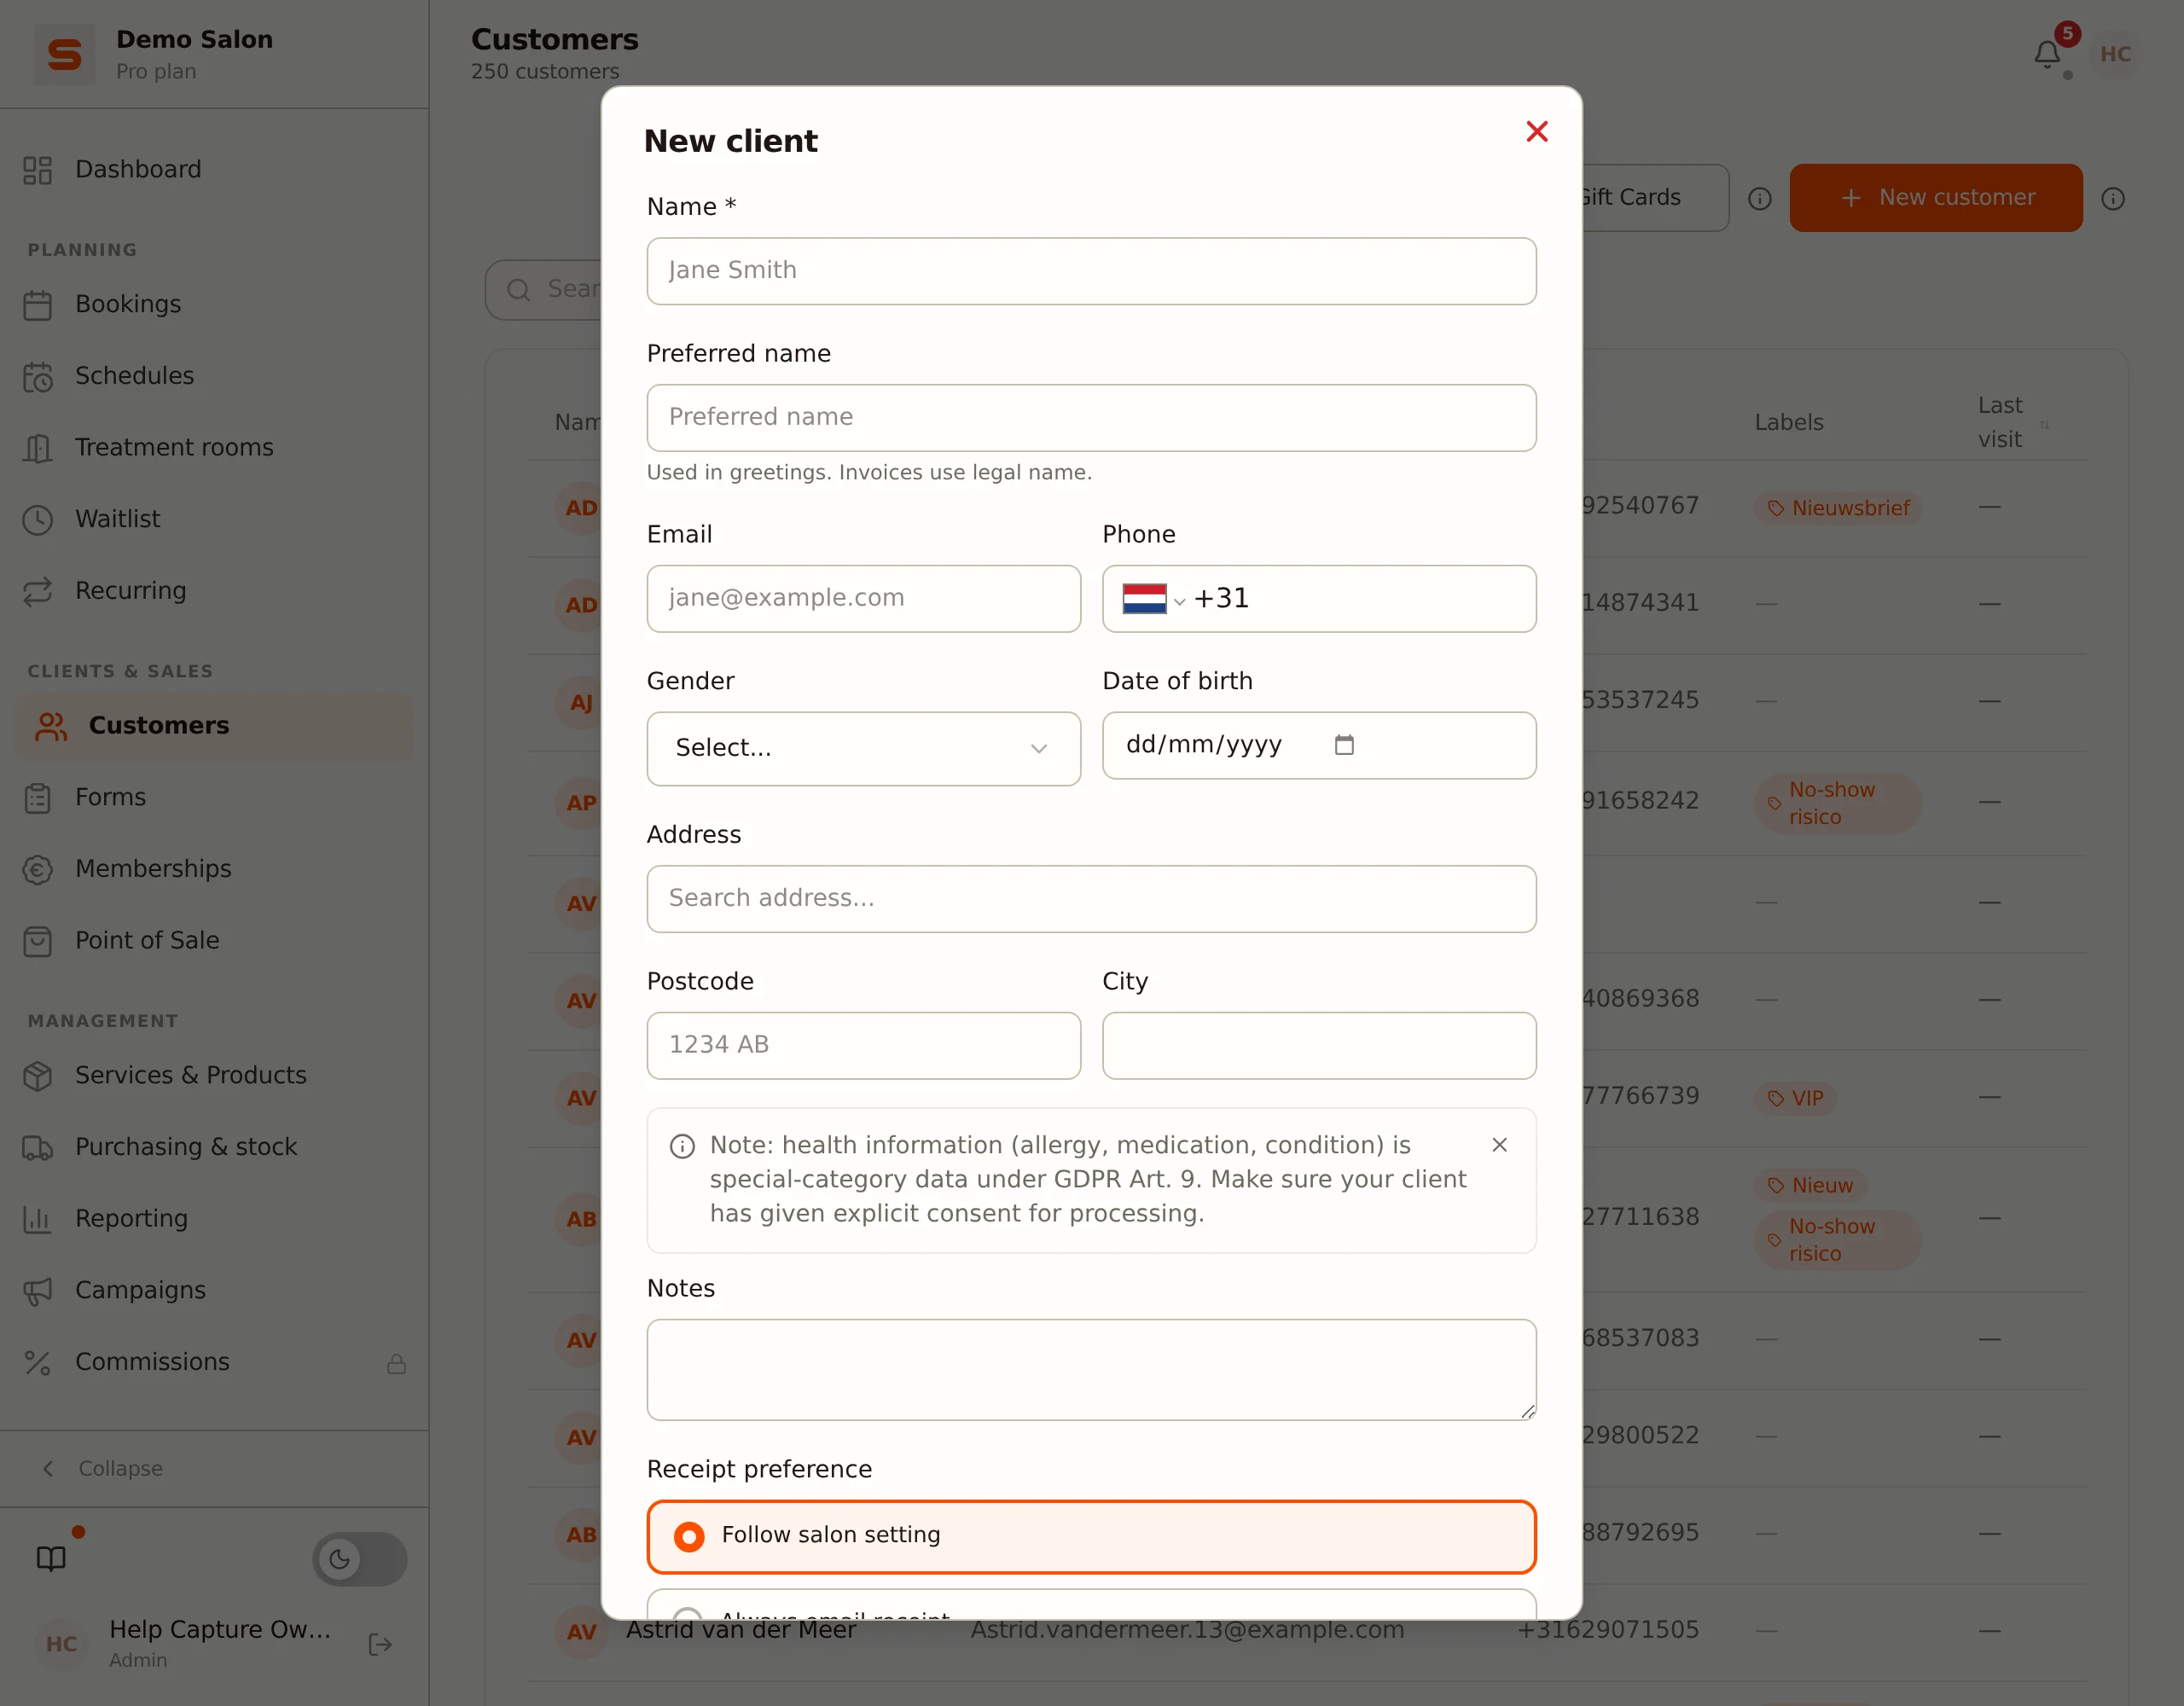
- Go to Customers and click New customer.
- Fill in at least the name, and preferably an email address or phone number.
- Click Save.
Already have a customer list in another system? You can import it. See Importing data.
4. Create a supplier
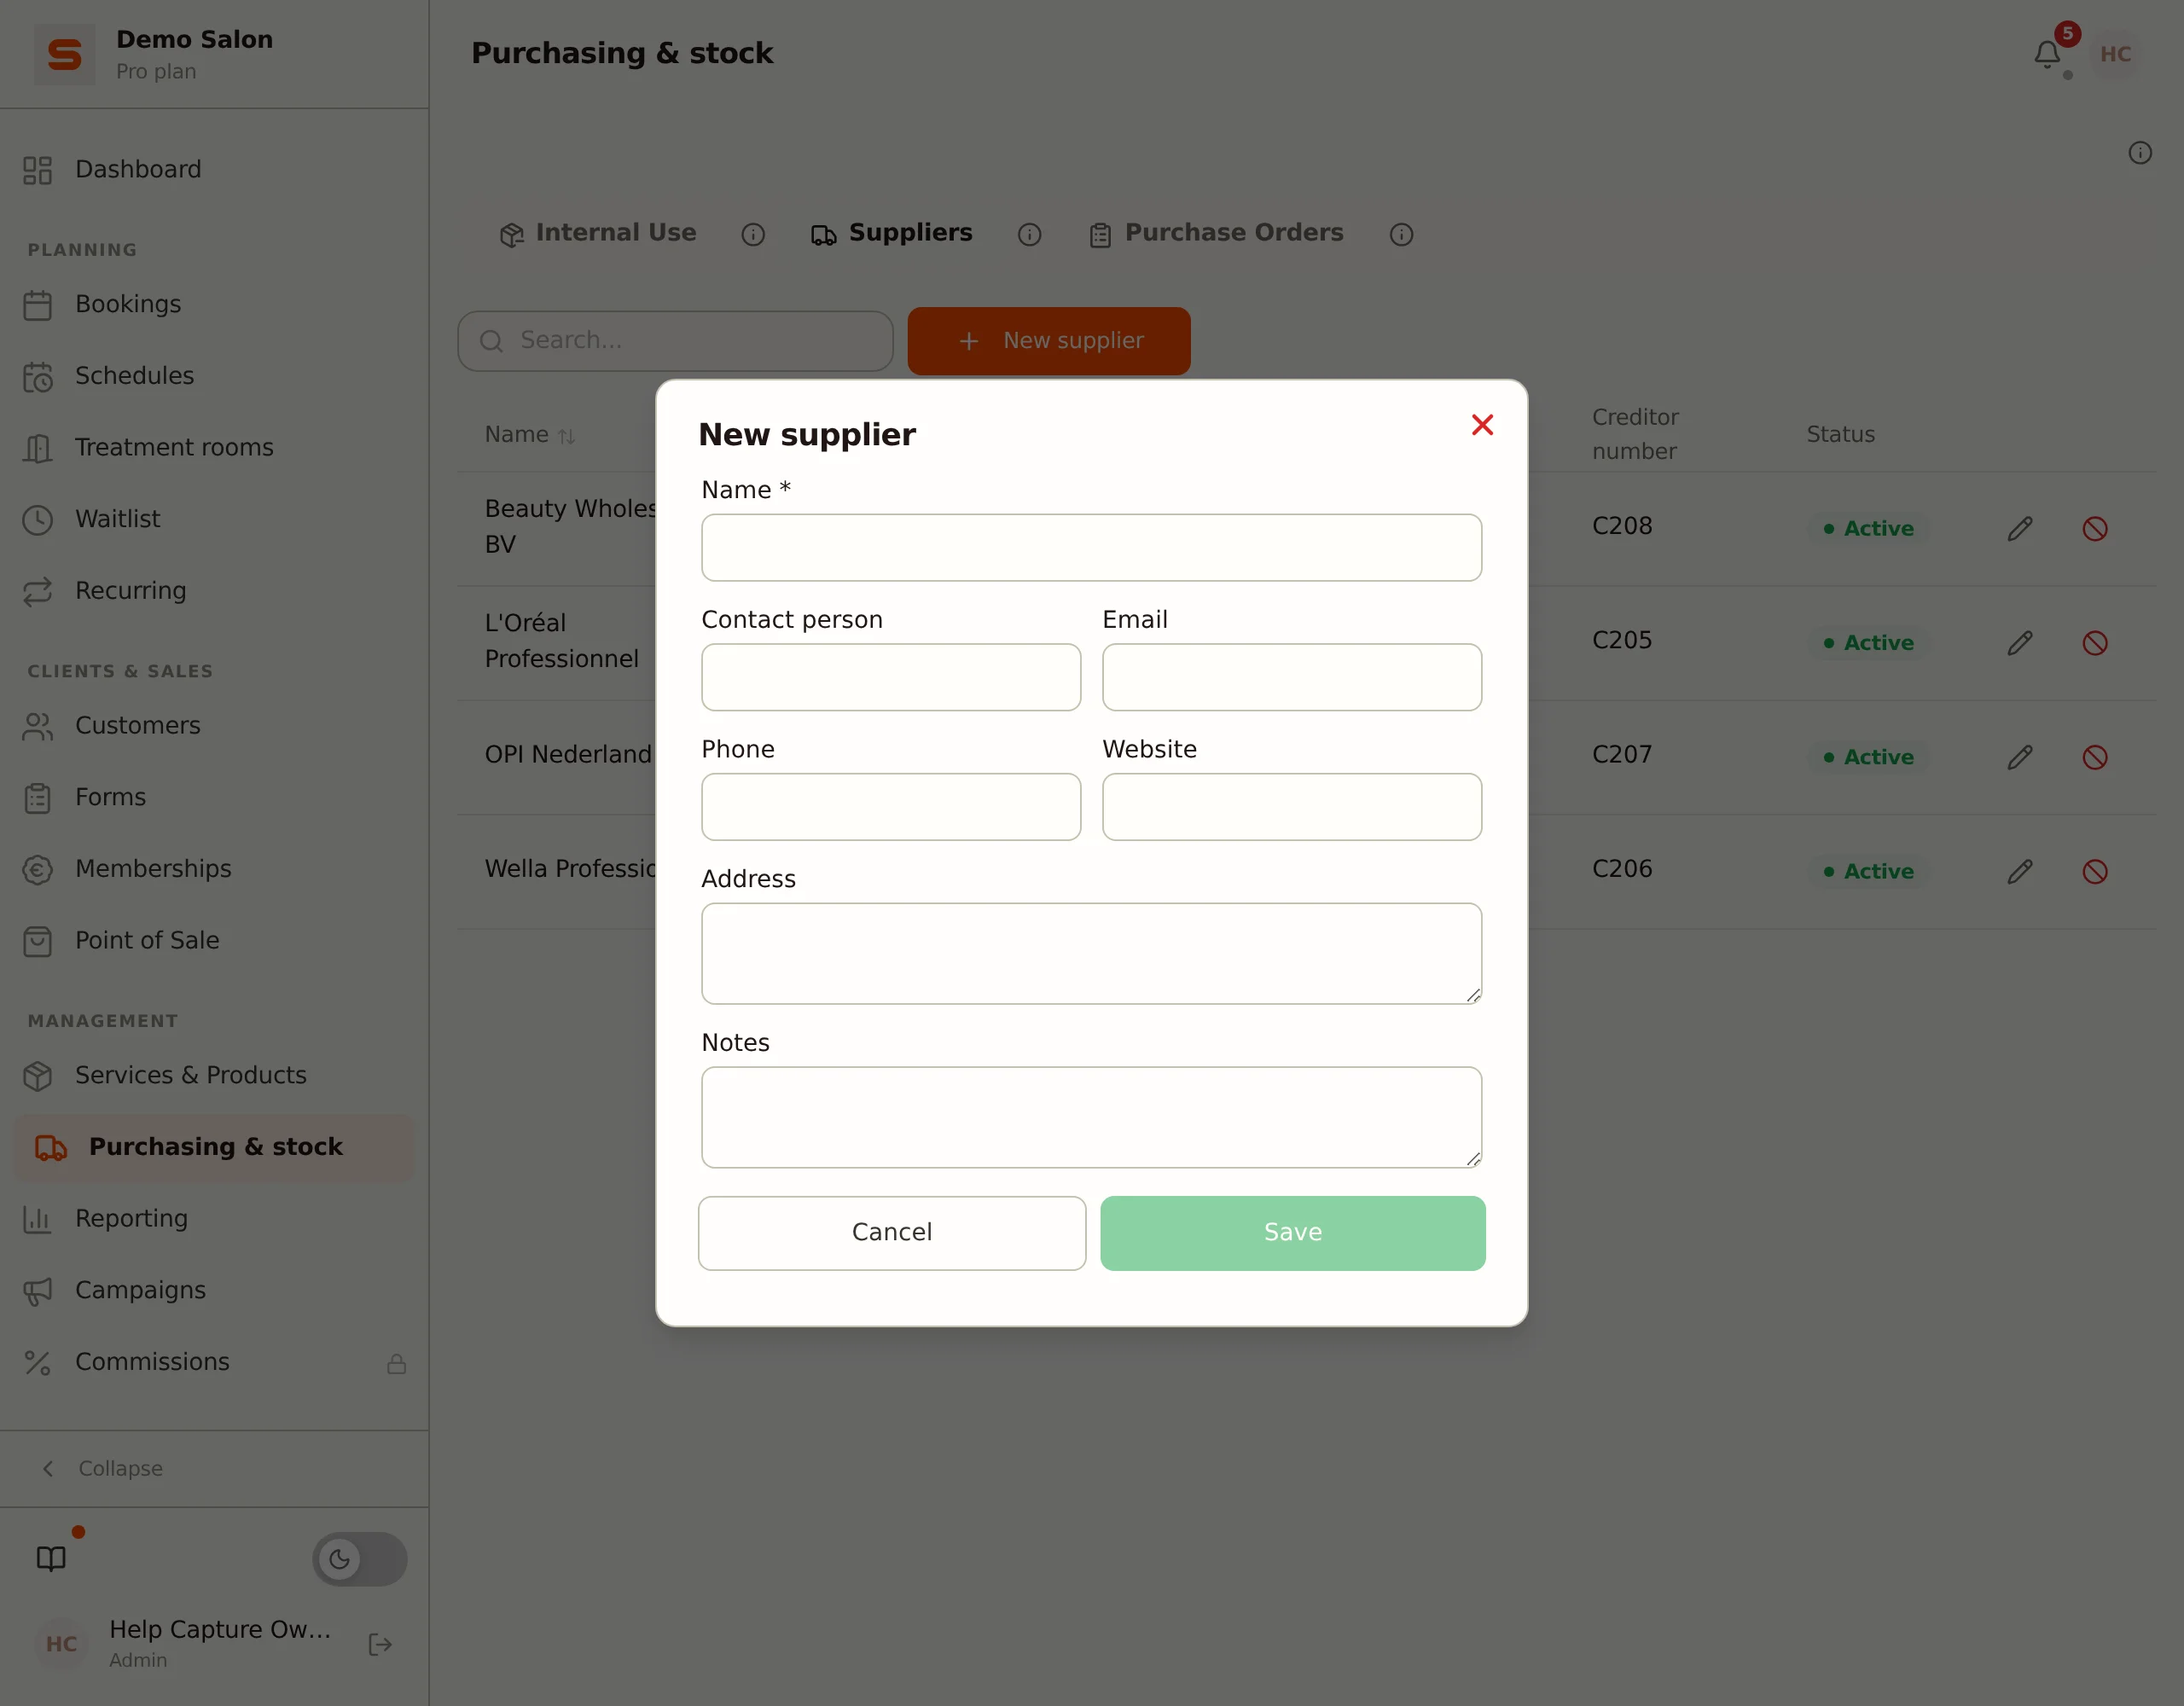
- Go to Purchasing & stock and open the Suppliers tab.
- Click New supplier, fill in the name (everything else is optional) and click Save.
If Purchasing & stock is not in your sidebar, turn on Purchase orders under Settings > Advanced > Features. See Suppliers & Purchase Orders.
5. Products for sale and for internal use
You organise products by category. Whether a category is for sale or for your own internal use is set with the Visible in POS switch.
- Go to Services & Products and open the Products tab.
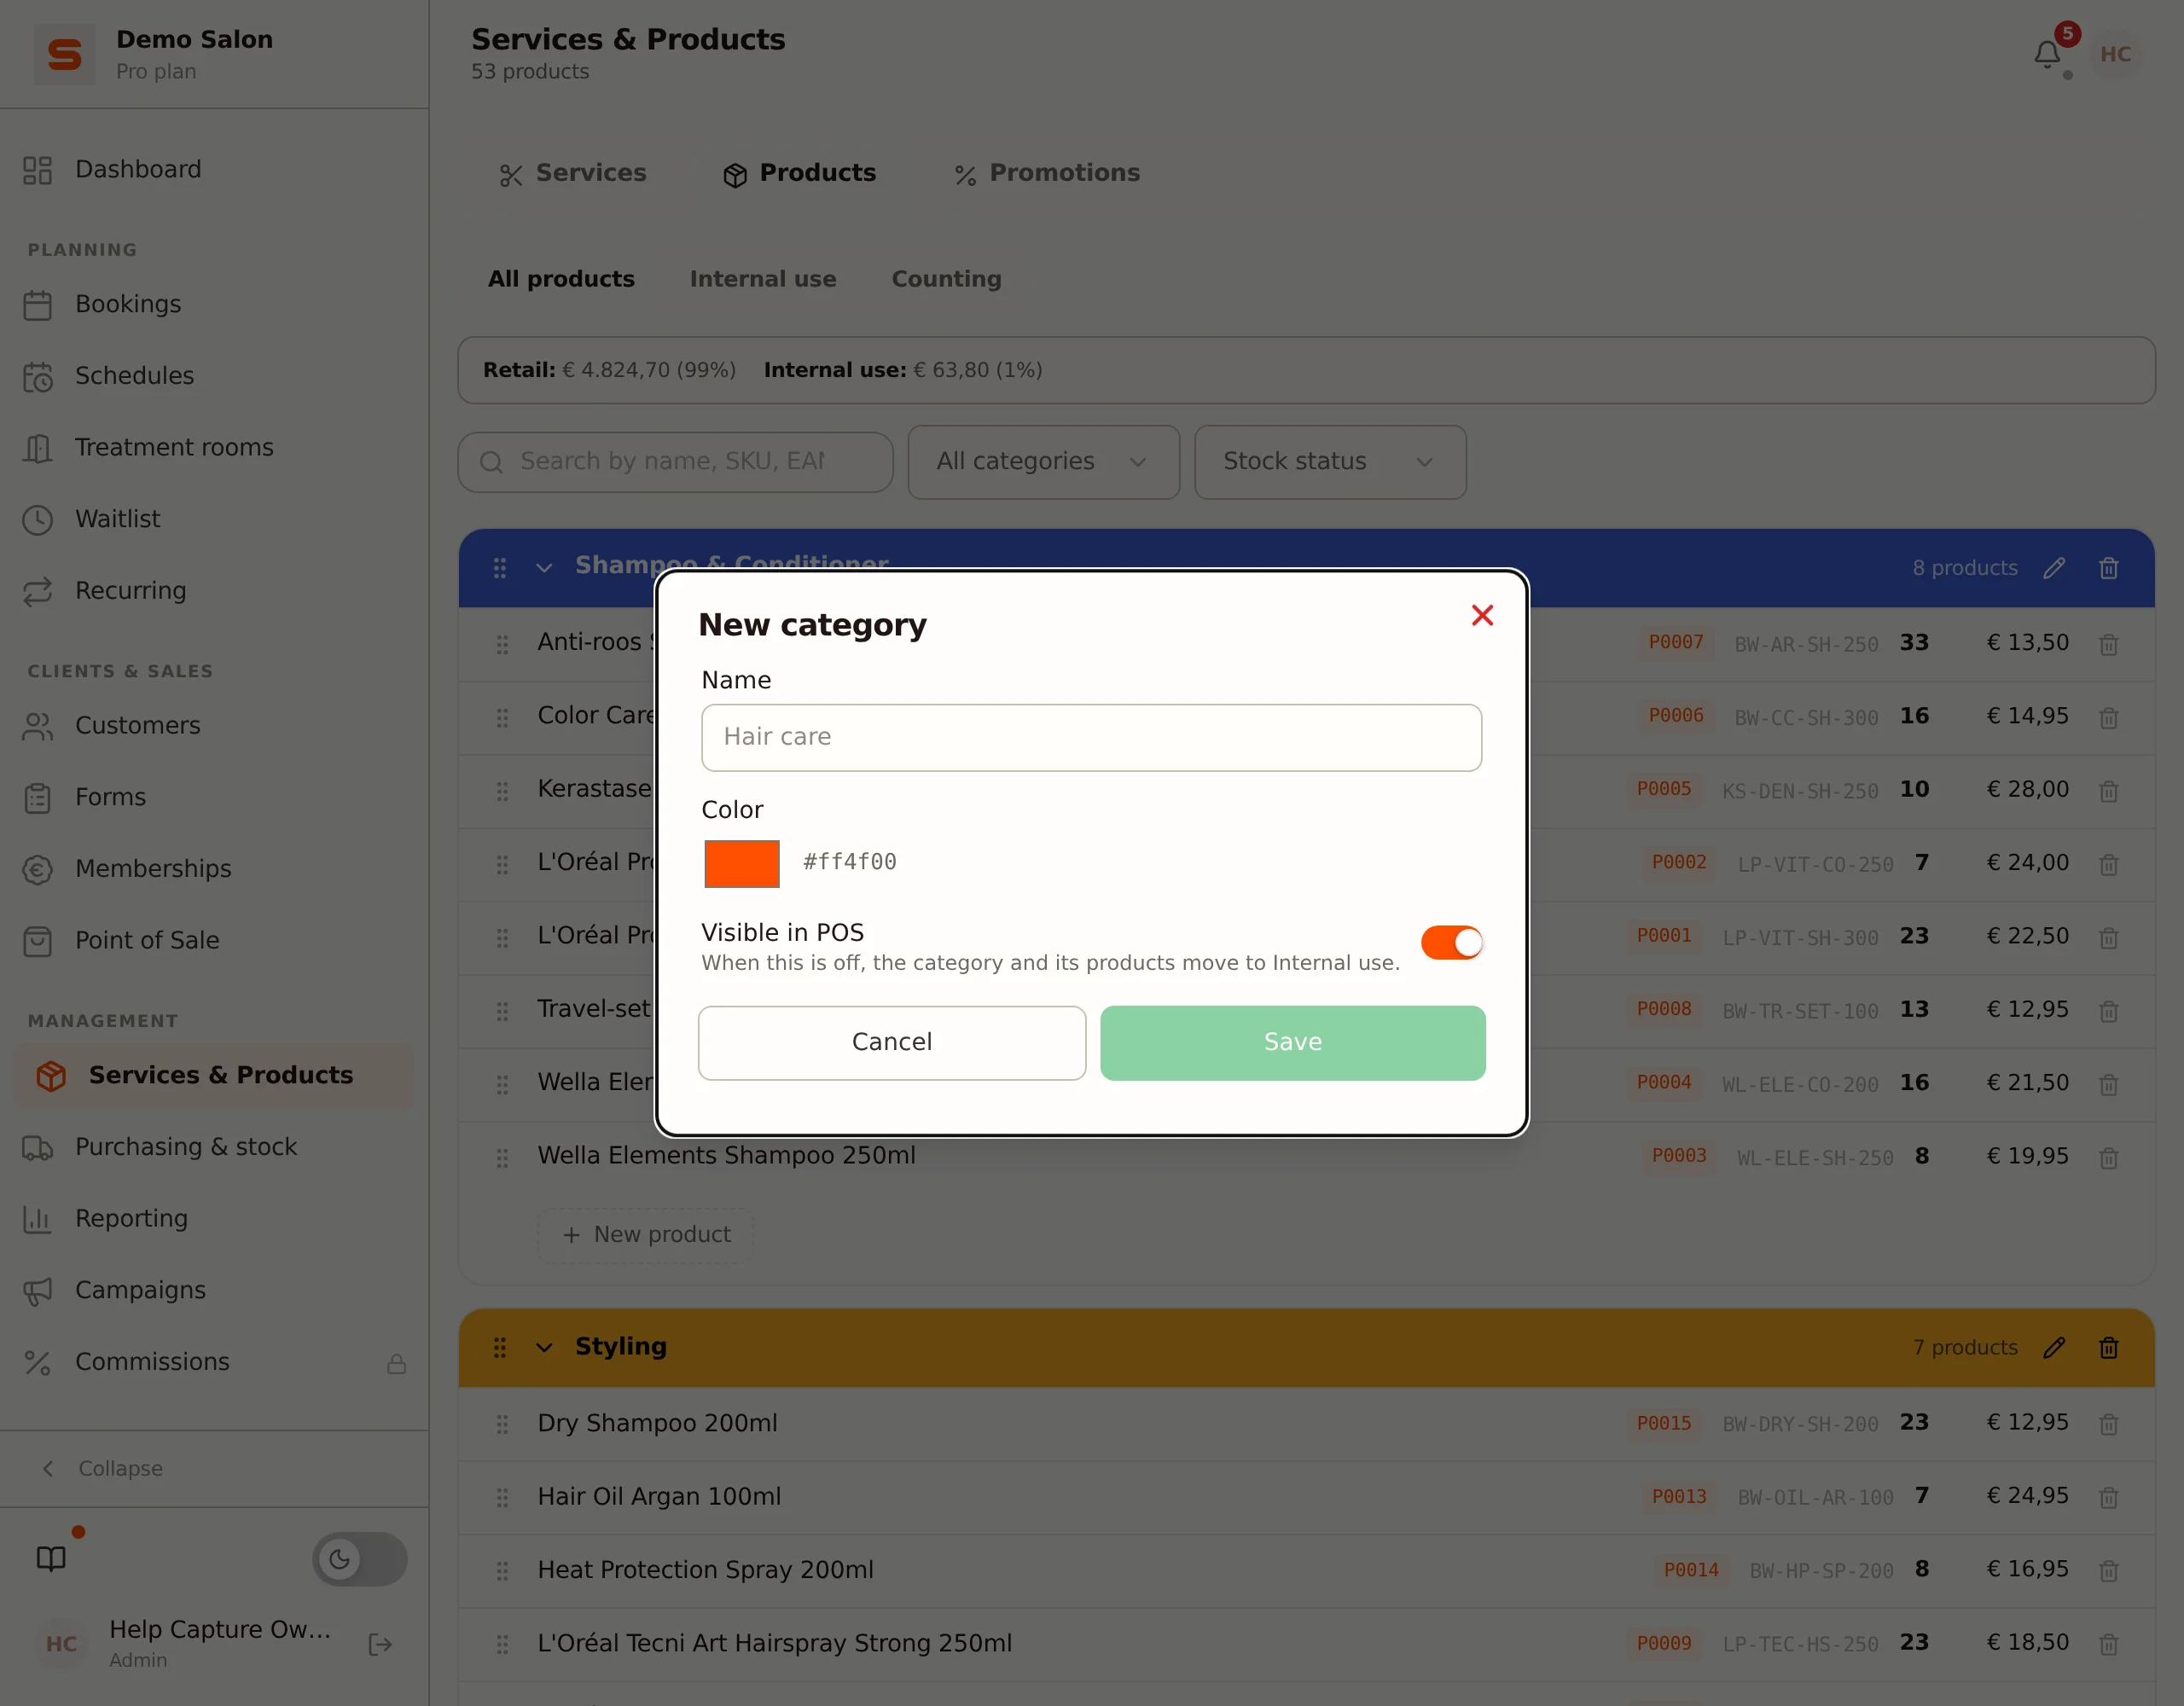
- Click New category. Create a category for the products you sell (for example "Hair care") and leave Visible in POS on.
- Create another category for products you use yourself during treatments (for example "Supplies") and turn Visible in POS off. That category then appears under the Internal use list and not in the POS.
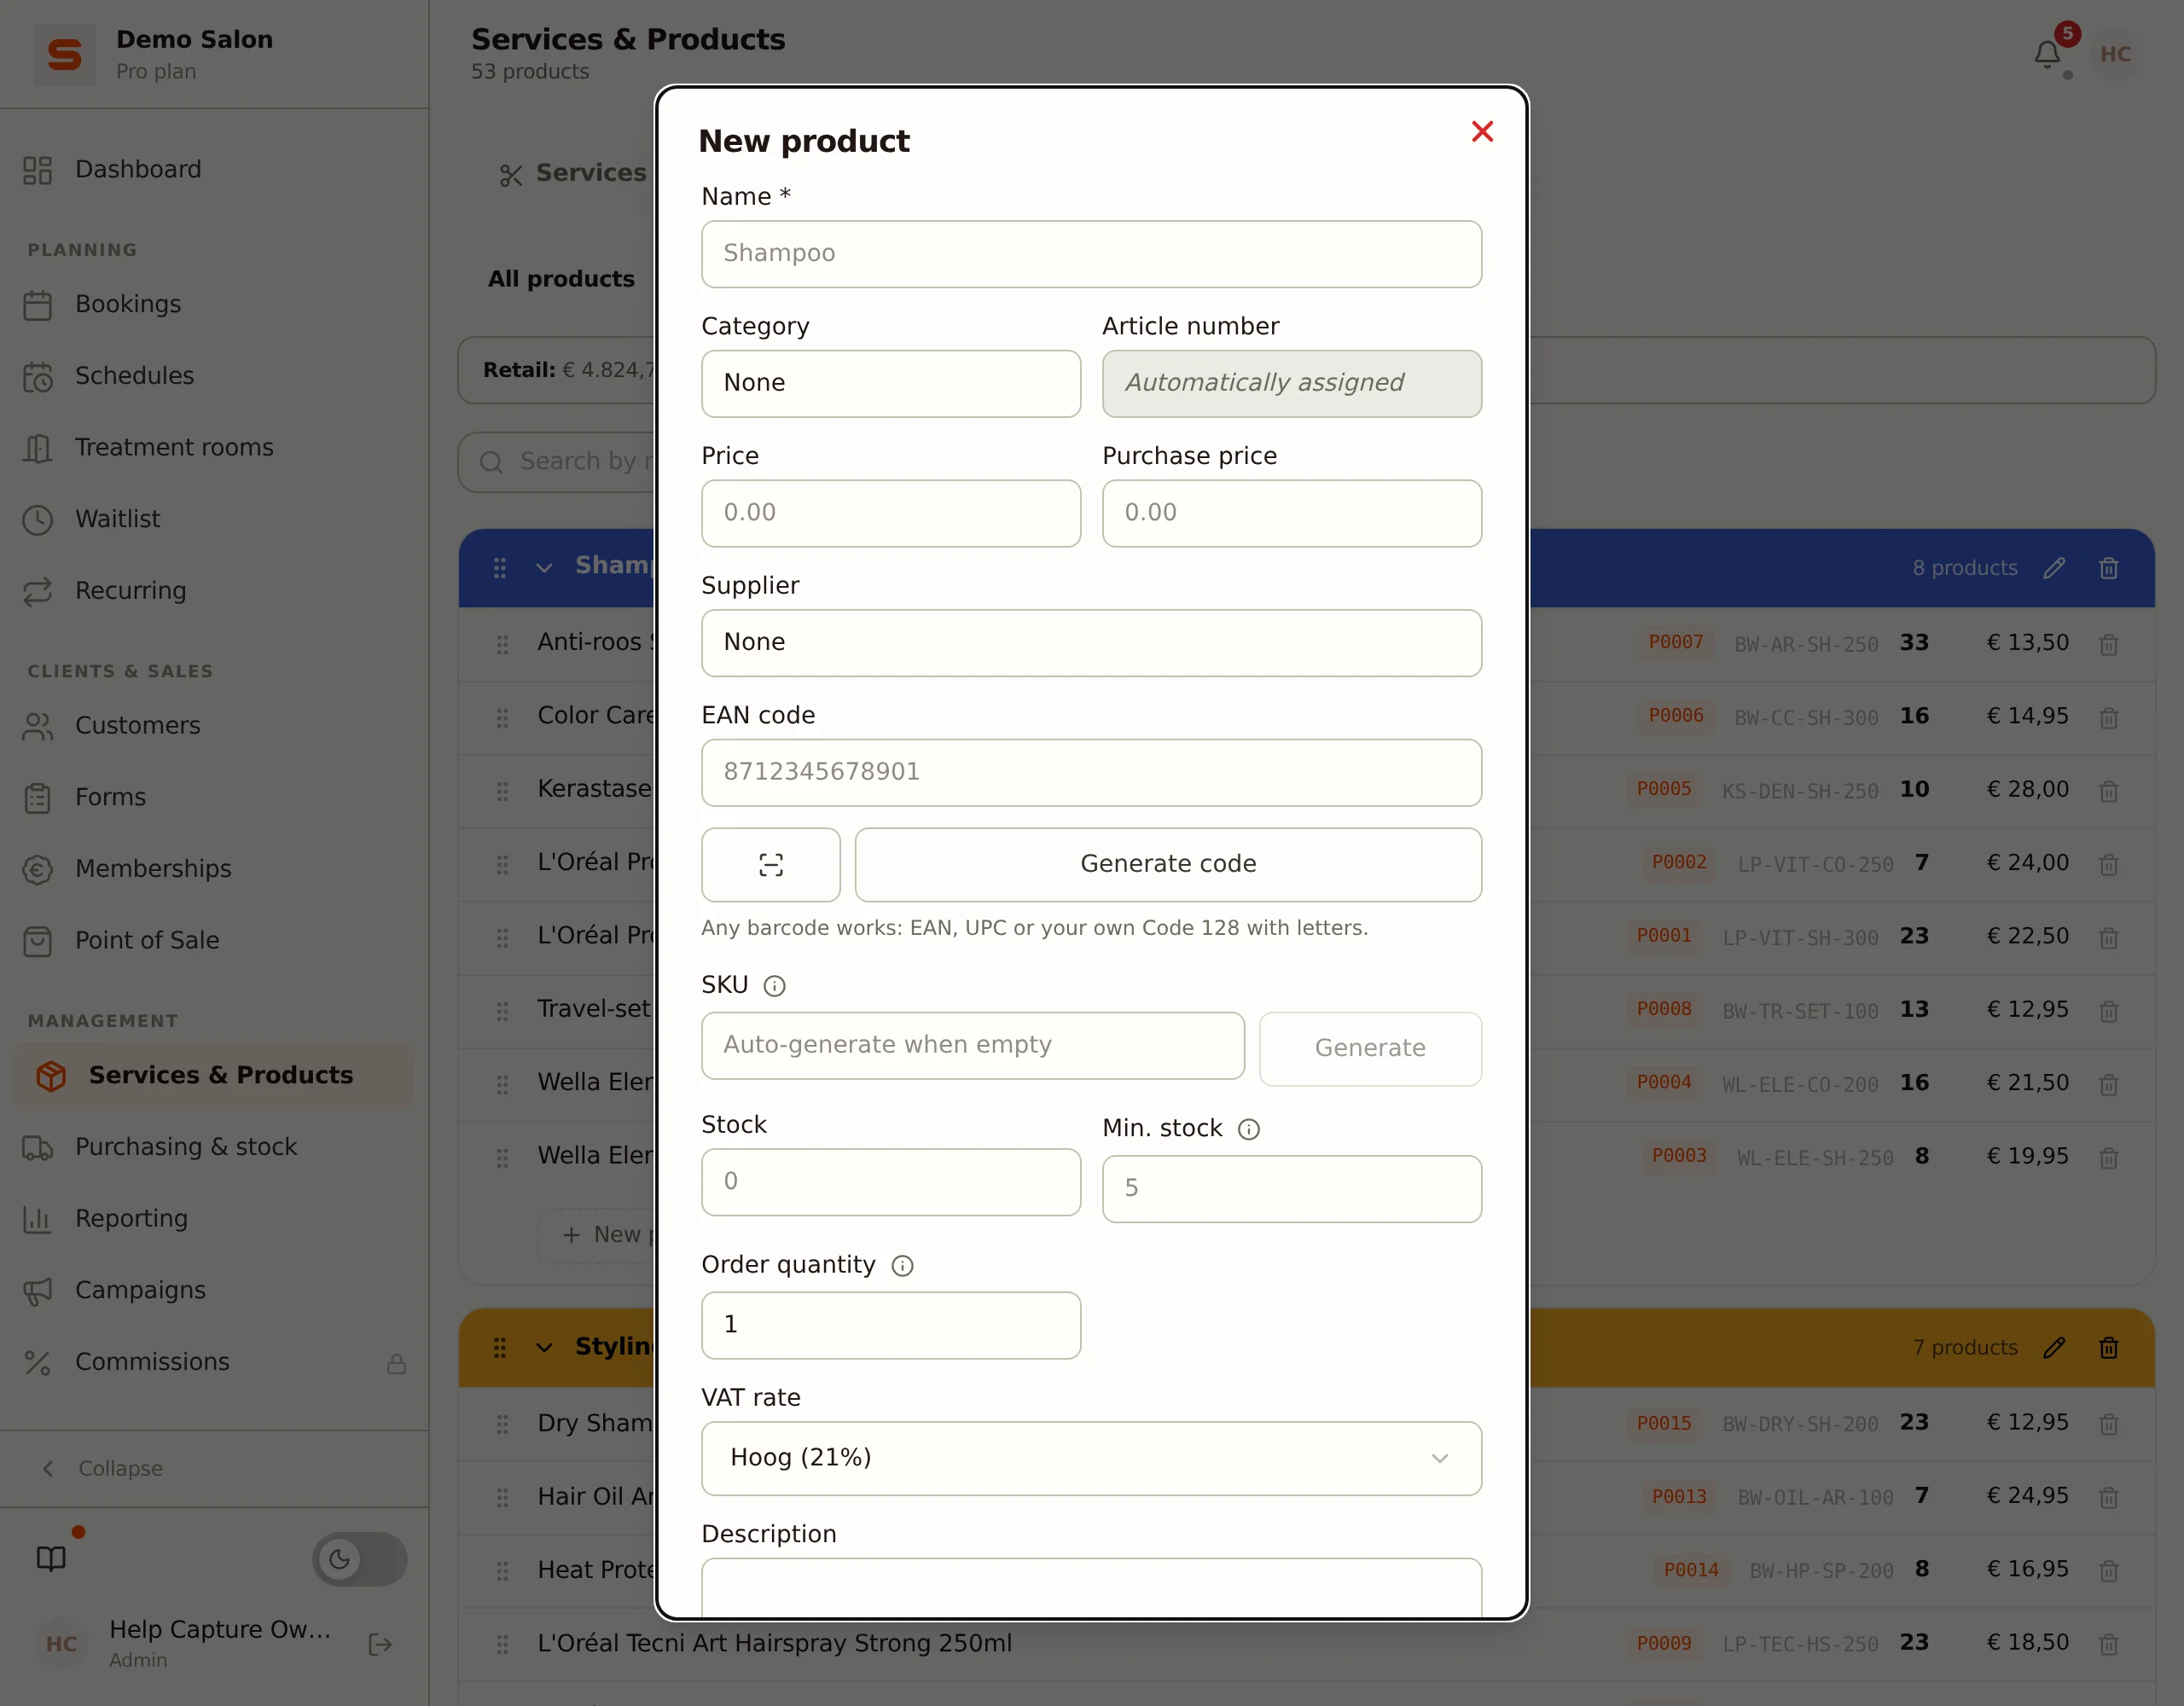
- Click New product. Fill in the name and price, choose your sales category under Category and click Save. This product now shows in the POS.
- Create a product for internal use the same way and pick the category with Visible in POS turned off. A sales price is not needed.
Want to mark each product as for sale, internal use or both? Turn on Split retail and internal use under Settings > Advanced > Features; the product form then gets an Inventory type field. Products are part of the Starter and Pro plans; on Free the Products tab explains how to upgrade. See Services & Products and stock management and Internal Use.
6. A service category and a service
- Stay on Services & Products and open the Services tab.
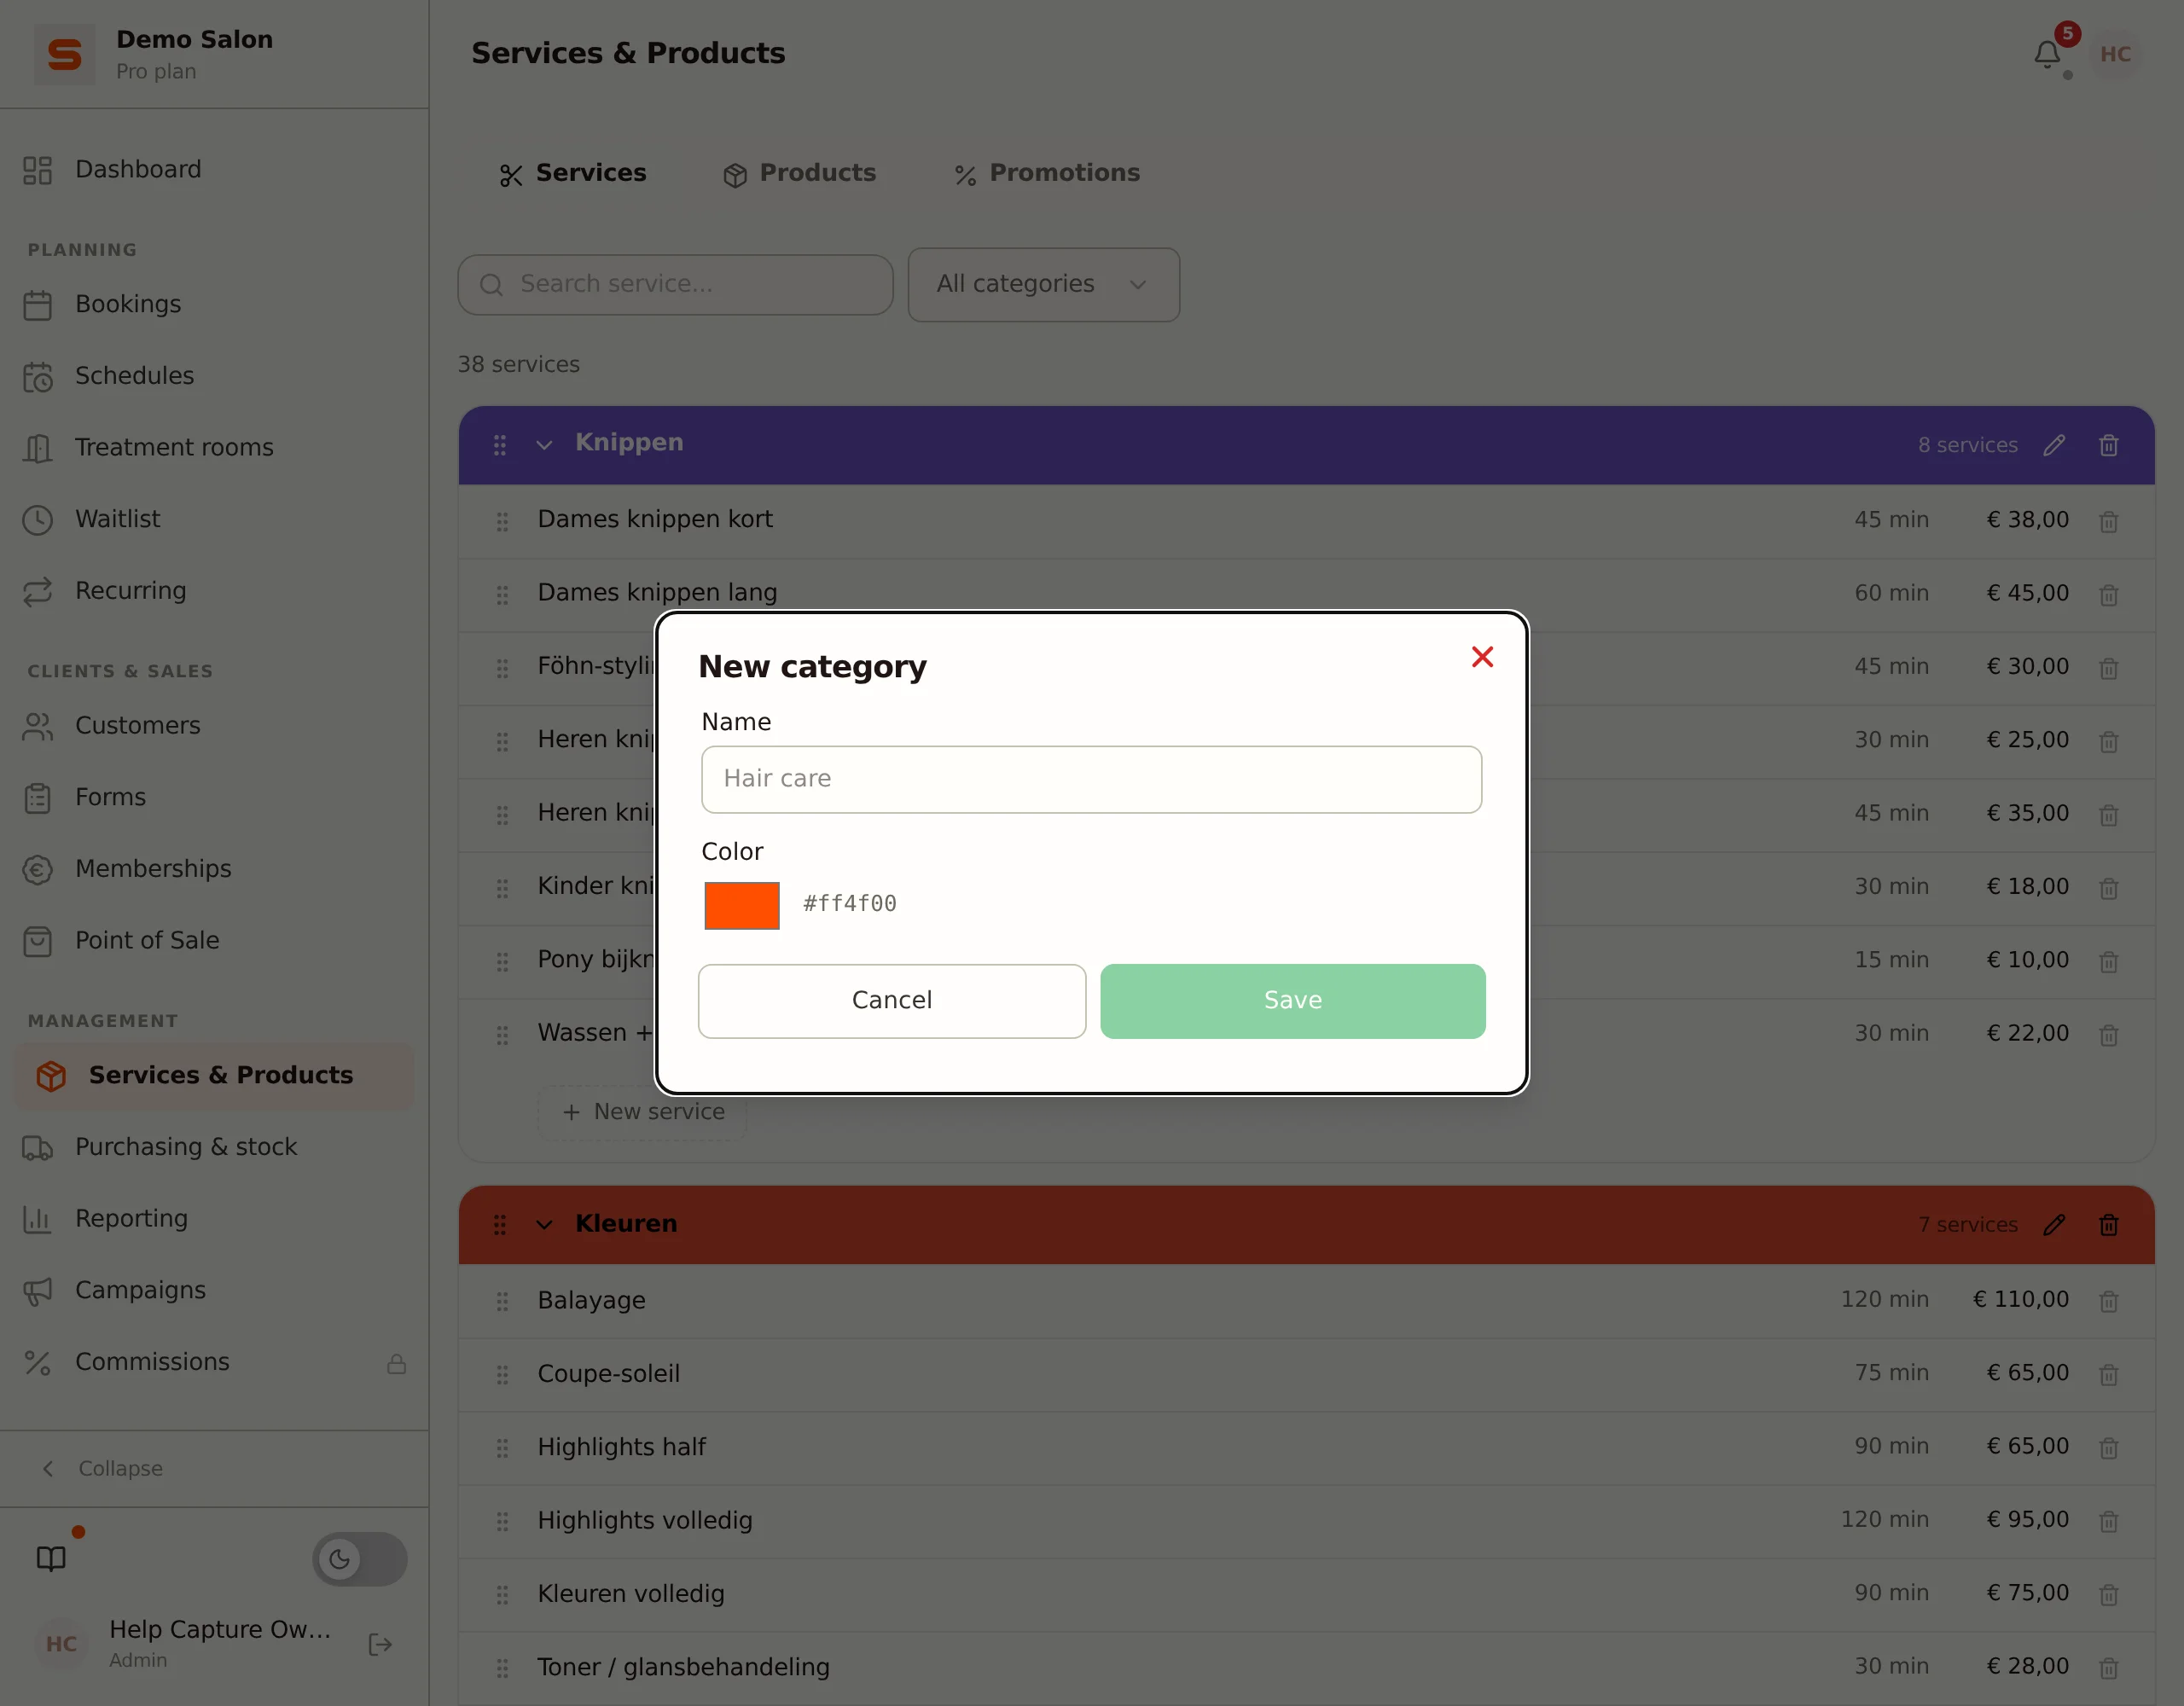
- Click New category, enter a name (for example "Haircuts"), choose a colour and click Save.
- In that category, click New service. Fill in Name, Duration (min) and Price, choose the VAT rate and click Save.
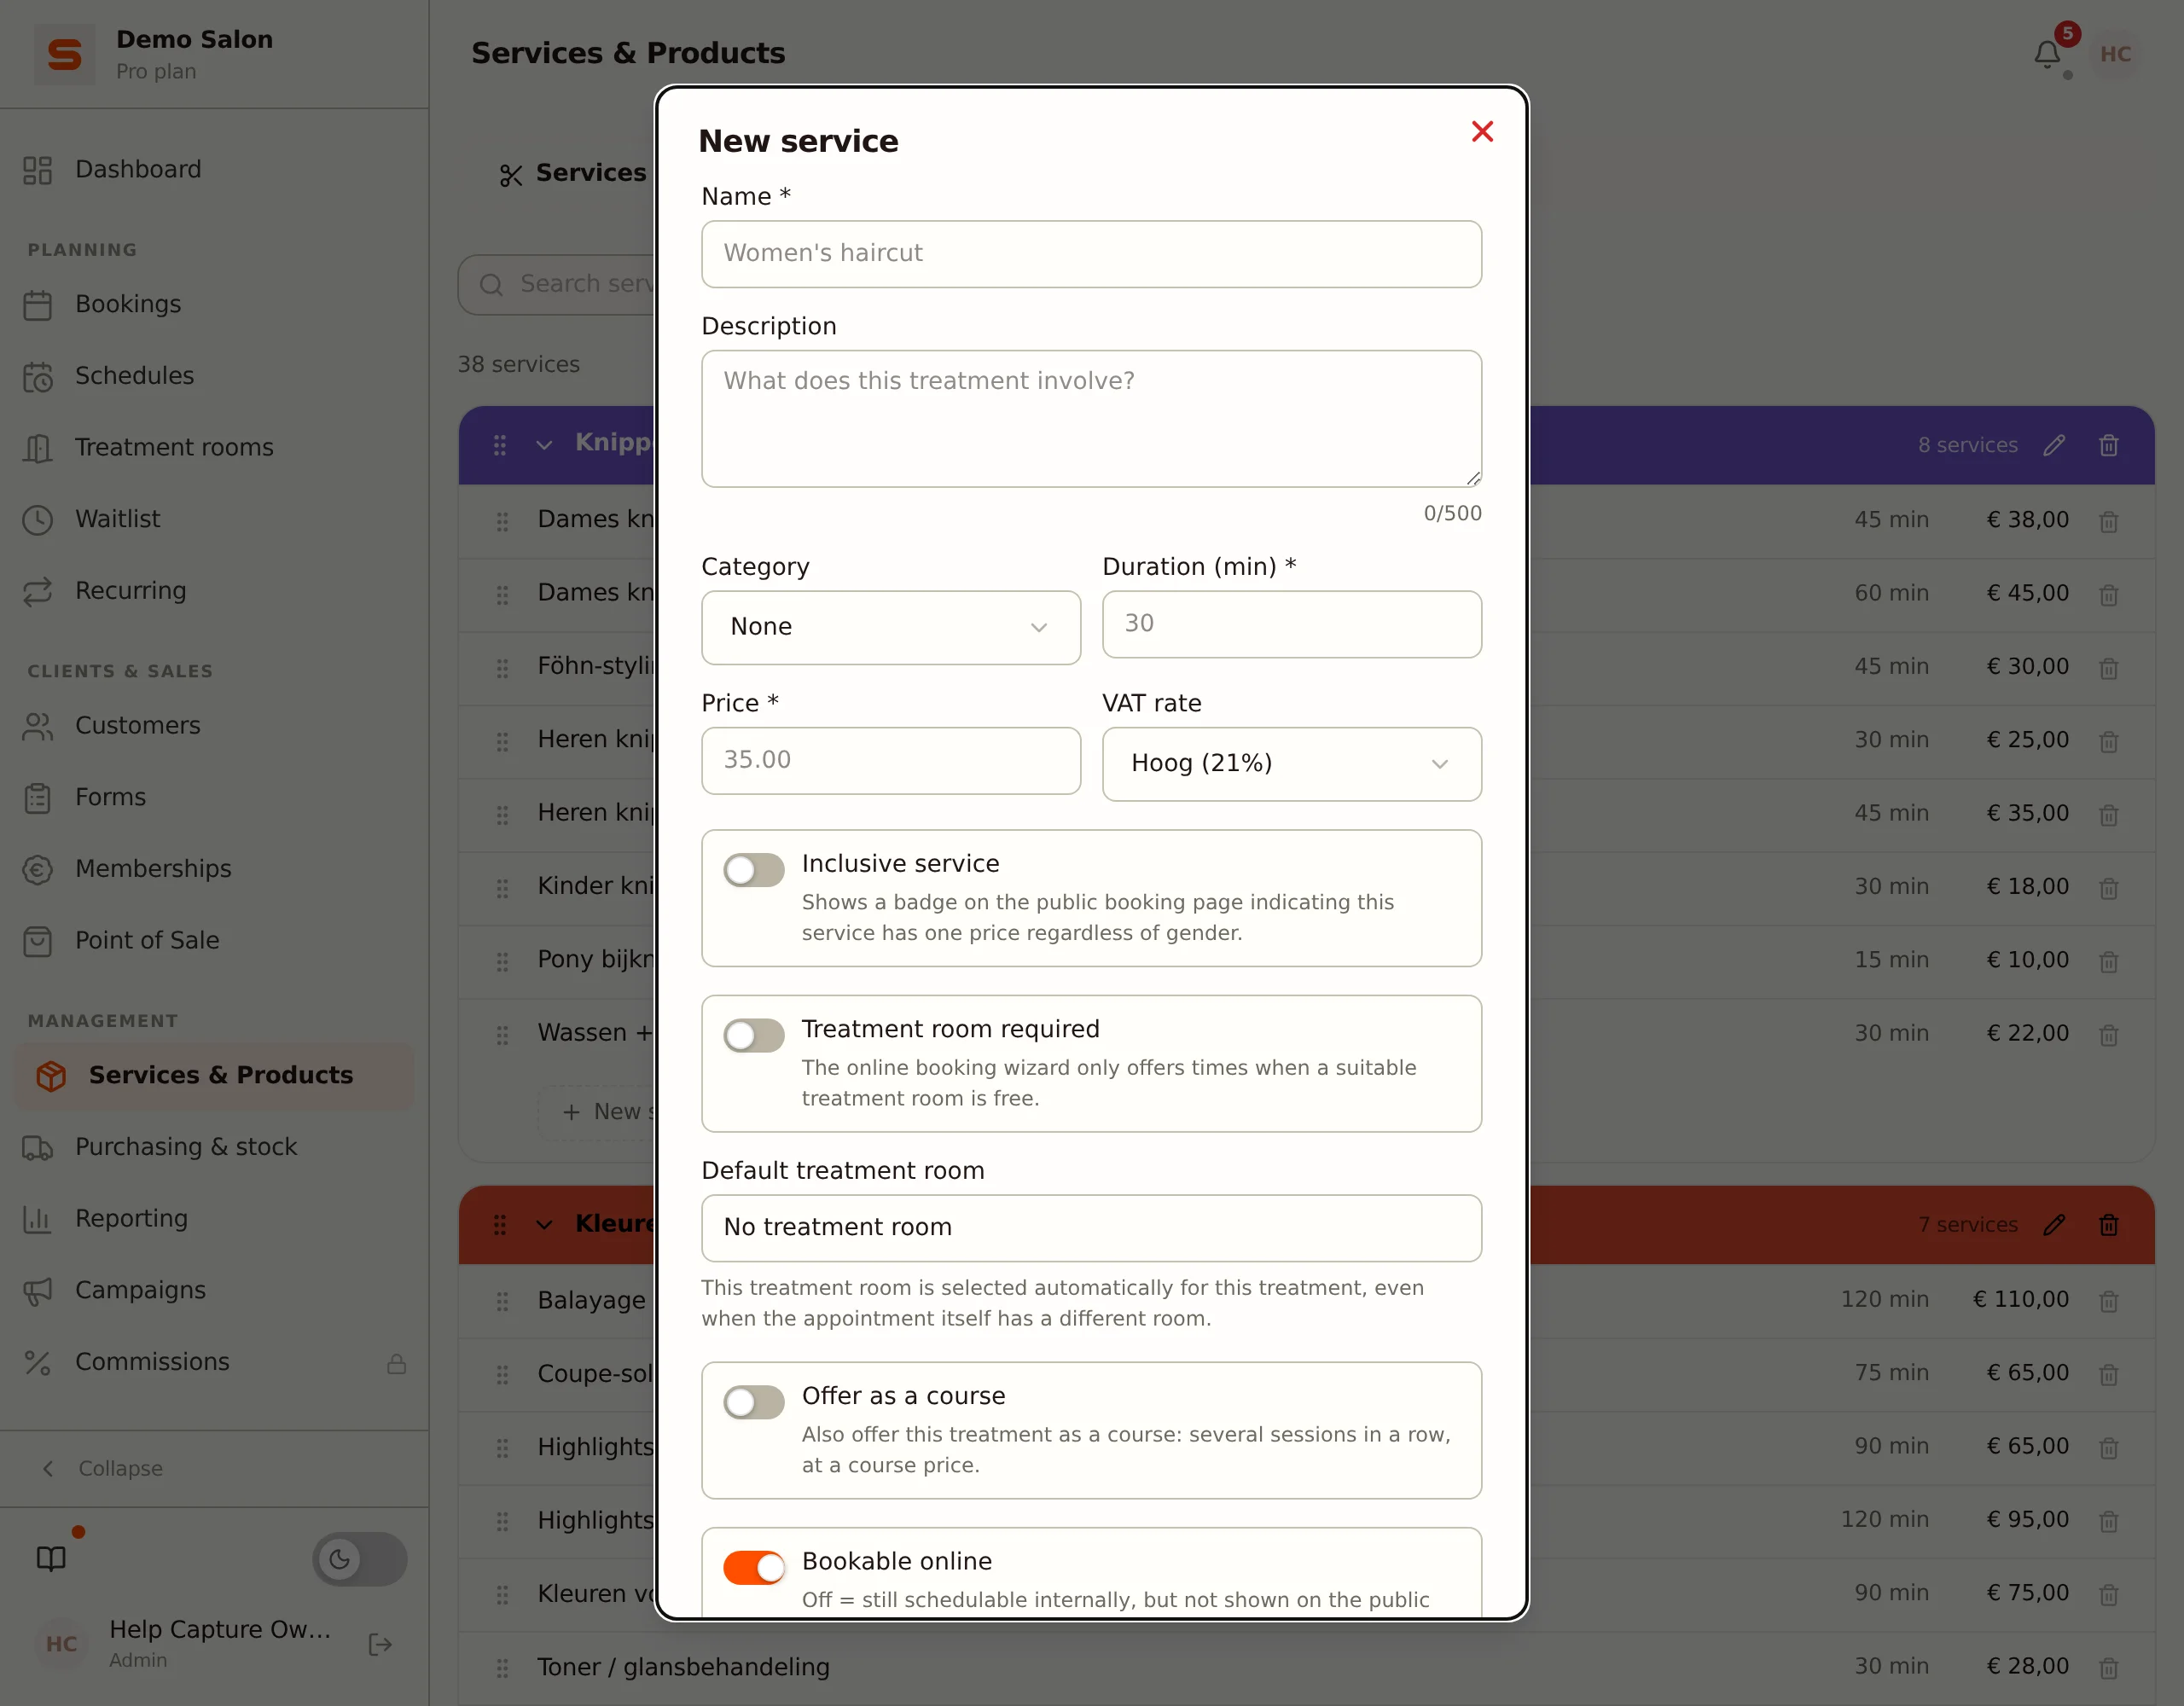
Your services appear on your online booking page straight away. See Services and categories.
7. Connect Mollie
With Mollie you receive online payments (such as iDEAL and credit card) and card payments at the counter. If you do not have a Mollie account yet, create one first; see Create and activate your Mollie account.
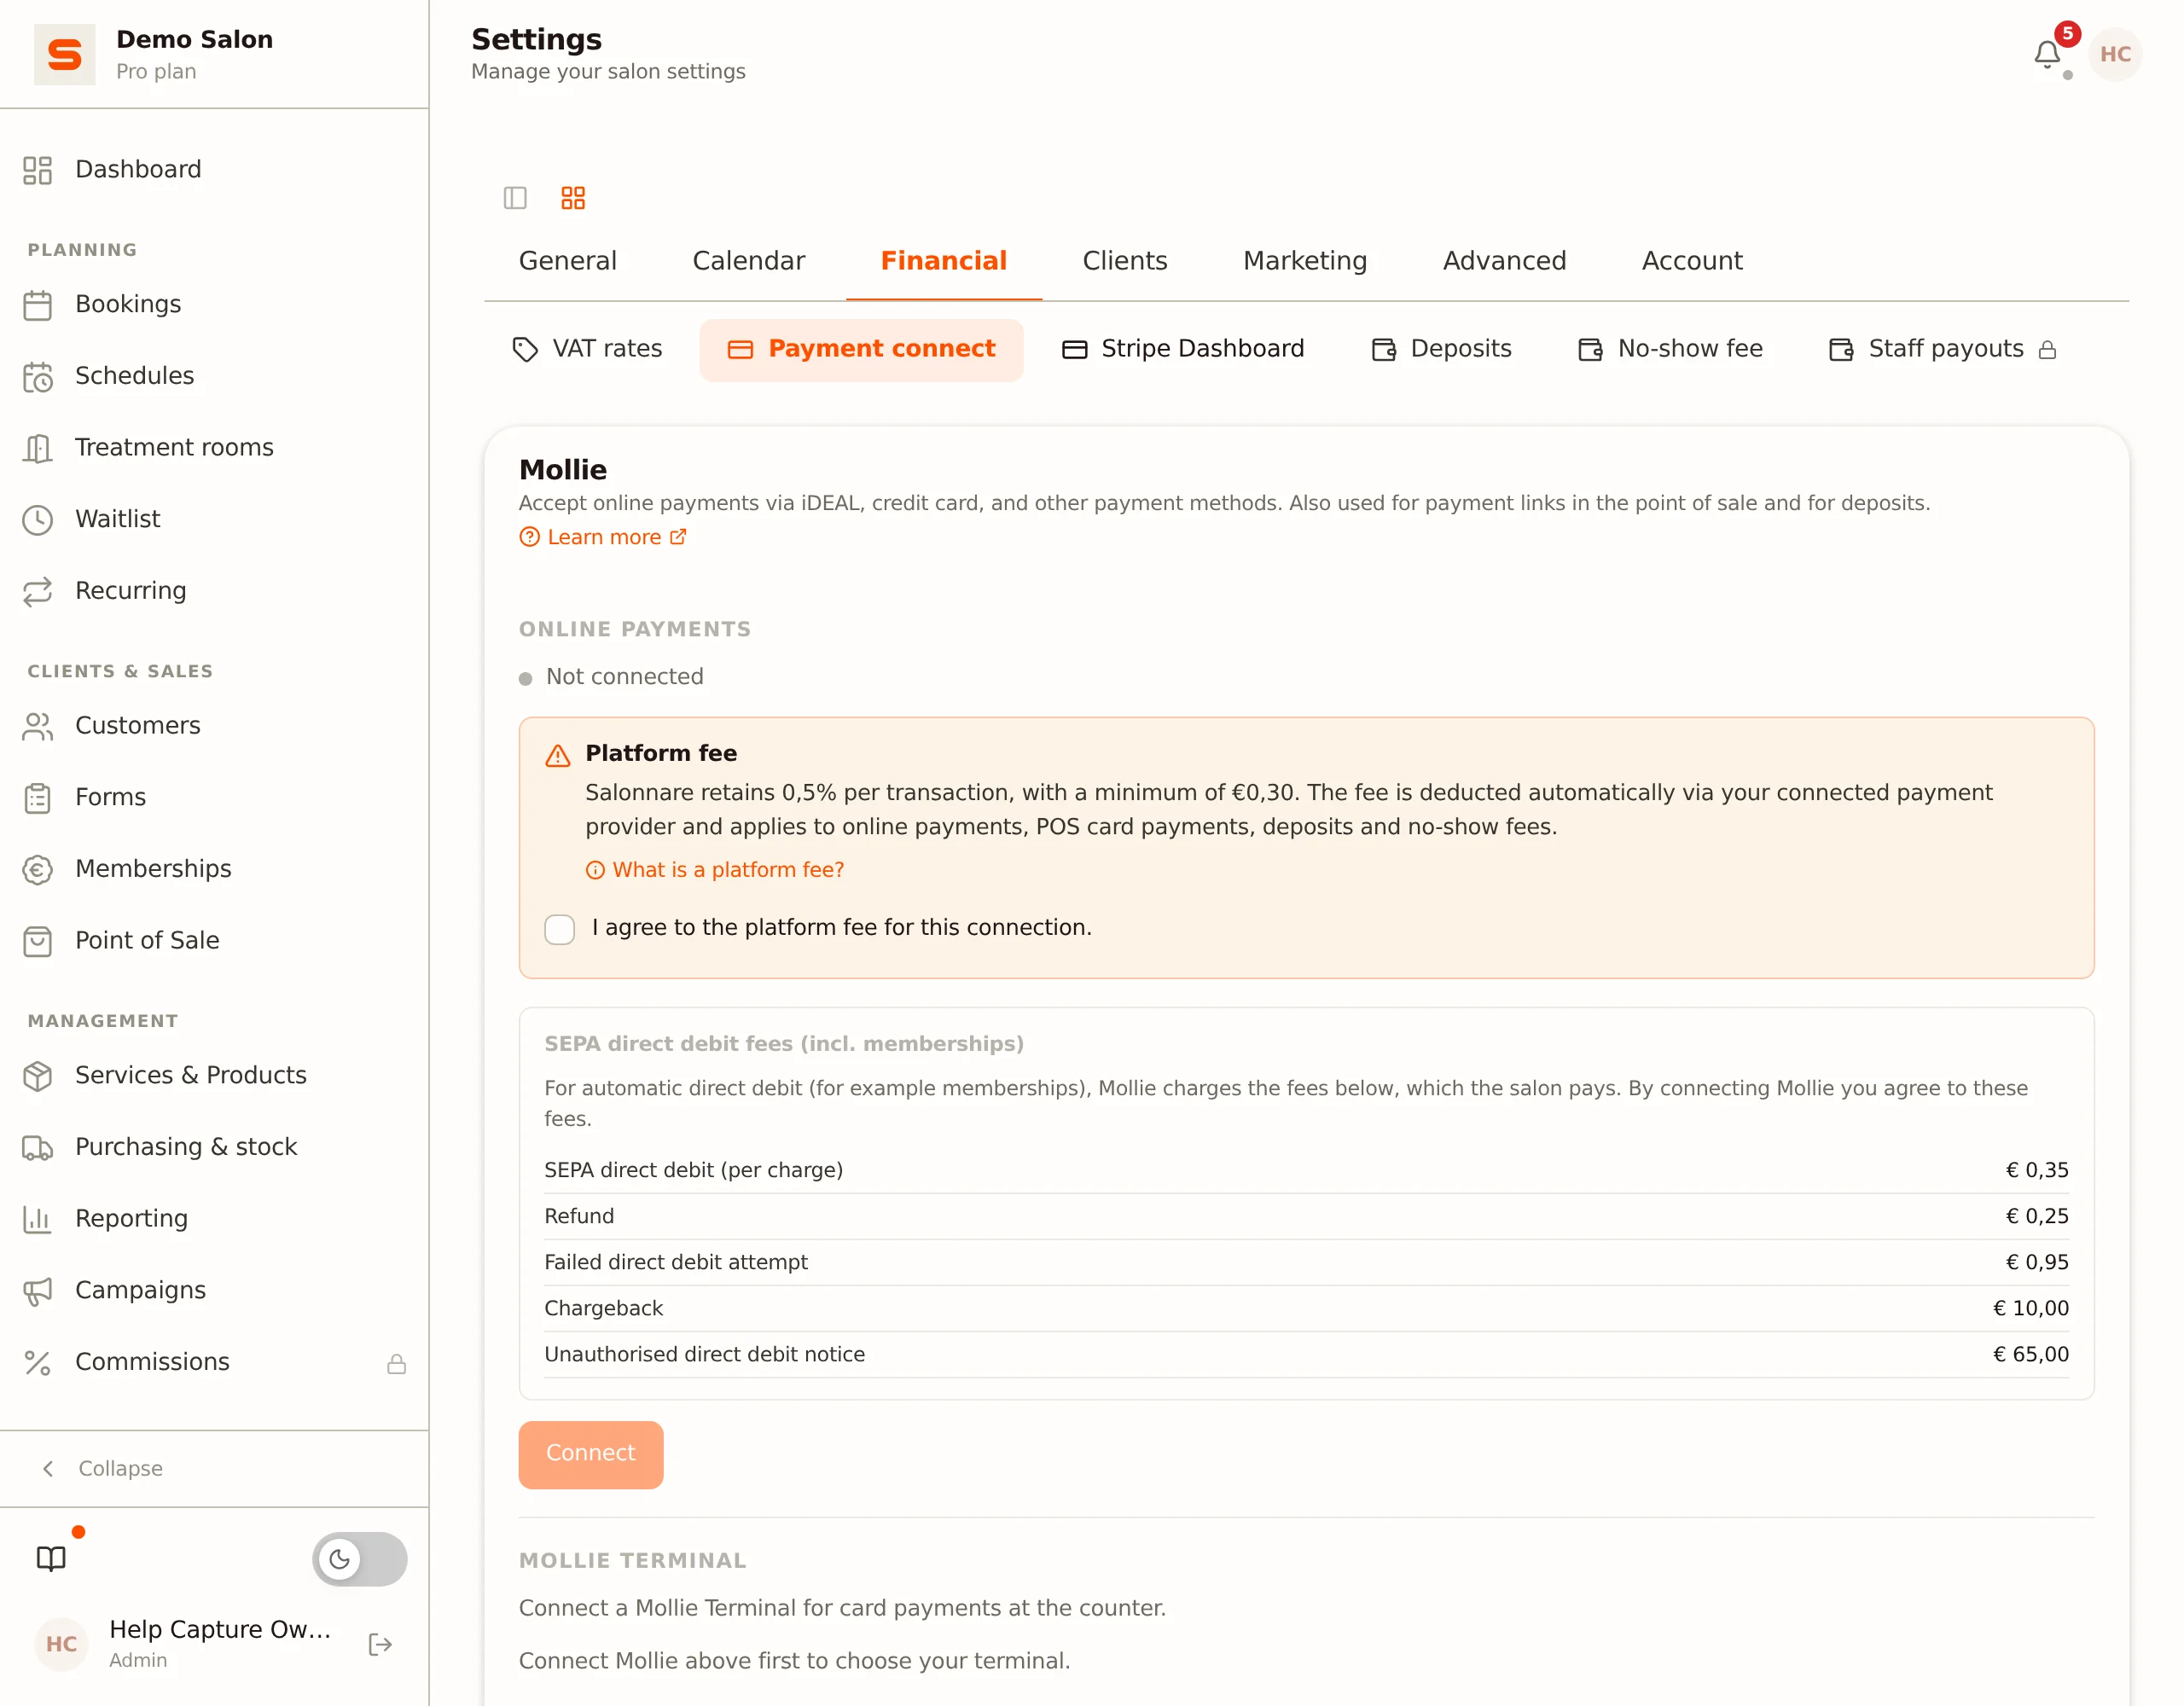
- Go to Settings > Financial > Payment connect.
- Under Mollie, tick the agreement with the platform fee and click Connect.
- Log in to Mollie and grant access. You return to Salonnare automatically; the status then shows Connected.
See Payment Setup for the details.
8. The Mollie Tap app for card payments
The Mollie Tap app turns your phone into a card terminal: customers pay contactless with their card, phone or watch. You do not need a separate terminal.
- Install the Mollie Tap app from the App Store or Google Play on a phone with NFC (an iPhone with iOS 17.4 or later, or Android 11 or later).
- Activate the app as a terminal in your Mollie account. Make sure Point of Sale (in-person payments) is enabled for your Mollie profile. Mollie explains the steps in How do I set up the Tap app?
- Once Mollie is connected in Salonnare (step 7), go back to Settings > Financial > Payment connect. When the Tap app is listed as a terminal in your Mollie account, choose it in the list under Mollie Terminal.
From then on you can take card payments at the Point of Sale with your phone.
Logging in
Logging in happens in steps:
- Open your browser and go to your salon's Salonnare address (for example
yoursalon.salonnare.com). - Enter your email address and click Continue. Salonnare looks up which salon(s) this address belongs to.
- If you have access to multiple salons, you first pick the right one. Then you reach the password screen.
- Enter your password and click Log in. Optionally tick Remember me to stay signed in.
That's it -- you're in!
You can also log in with Google, Microsoft, Facebook, or Apple using the buttons on the login screen, provided that email address is linked to your account.
Forgot your password? No problem. Click Forgot password? on the password screen and we'll email you a reset link. Check your spam folder if it doesn't arrive within a few minutes.
If you have two-factor authentication (2FA) enabled, Salonnare will ask for the six-digit code from your authenticator app after your password.
Finding your way around
After logging in you'll see a sidebar on the left of your screen. This is your main menu. The Dashboard sits on its own at the top; below it the items are grouped under Planning, Clients & Sales, Management, and Account.
- Dashboard -- Your home base. See today's appointments, revenue, and notifications at a glance.
Under Planning:
- Bookings -- Your appointment calendar. Create, edit, and manage all bookings here.
- Schedules -- Opens your own work schedule (under Settings > Staff).
- Treatment rooms -- Manage your rooms and see occupancy per room.
- Waitlist -- Clients waiting for an open time slot.
- Recurring -- Fixed, repeating appointments for your loyal clients.
Under Clients & Sales:
- Customers -- Your client database with contact details, notes, appointment history, and more.
- Forms -- Intake and consent forms filled in by your client or staff.
- Memberships -- Manage your clients' subscriptions and memberships.
- Point of Sale -- Check clients out after their appointment in just a few clicks.
Under Management:
- Services & Products -- Your services, products (with stock), and promotions such as packages and deals.
- Purchasing & stock -- Internal Use, Suppliers, and Purchase Orders. This item only appears once you have turned on purchase orders.
- Reporting -- See how your business is performing, including accounting exports and the audit log.
- Campaigns -- Send email campaigns and marketing promotions.
- Commissions -- Staff see My commission here. This feature is still marked "Soon" and can't be used yet.
Under Account:
- Settings -- Customize everything, from your salon details to payment methods, marketing, integrations, and your own account.
- Support -- Ask a question or open a support ticket.
Some items depend on your plan, on feature toggles, or on the permissions you've been given as a staff member. An item that isn't included in your plan shows a lock.
On smaller screens you have a navigation bar at the bottom with the key items (Dashboard, Bookings, Customers, Point of Sale) and a More button for the rest.
If you registered during the beta or you're an early-access member, you also have the Send feedback button with a bug icon: in the sidebar next to "What's new?", in the menu behind your initials at the top right, and on mobile under More. Use it to report anything you notice straight away.
What can Salonnare do?
Here's a quick overview of everything at your disposal:
- Appointment management -- A visual calendar with day, week, and month views. Drag and drop to reschedule. Set up recurring appointments for regulars.
- Online booking -- Let clients book themselves via a beautiful booking page you can share on your website and social media.
- Client management -- Keep track of each client's preferences, color formulas, visit history, and loyalty points.
- Point of Sale -- Process payments in cash, by card, or online. Sell gift cards, apply discounts, and email receipts automatically.
- Staff management -- Add your team, set schedules and permissions, and track performance.
- Stock -- Monitor stock levels, get low-stock alerts, and manage suppliers.
- Marketing -- Send email campaigns, run promotions, set up a loyalty program, and collect reviews.
- Reporting -- Revenue reports, no-show tracking, accounting exports, and an audit log.
Two roles: Admin and Staff
Salonnare has two user roles:
- Admin -- Full access to everything, including settings, reports, and account management. As the salon owner, this is you.
- Staff -- By default access to the calendar, clients, the POS, forms, the waitlist, recurring appointments, and stock counts. Settings and reports are hidden by default. An admin can adjust permissions per staff member and per page (no access, view, or edit). See Managing staff.
The checklist on your dashboard
Alongside this guide, the dashboard has an onboarding checklist with a progress indicator: create a schedule, add services, add clients, set up payment, create your first booking and use the POS. Steps you have already done are ticked off automatically. See Getting-started checklist for the full explanation.
Choosing your language
Salonnare is available in five languages: English, Dutch, German, French, and Spanish.
- Go to Settings > General.
- In the Preferences block, click Edit.
- Choose your language under Language and save.
The interface switches over instantly -- no reload needed. Note: this is your salon's language, so it's also the language your clients receive their emails in. On the login screen you can pick the language of that screen separately.
Need help?
You're reading our help center right now, and that's a great start! Browse the categories on the left or use the search bar at the top to find what you need. If you get stuck, open a ticket via Support in the sidebar.
Ready to dive in? Head to your Dashboard to see what's happening today.