Hands and nails
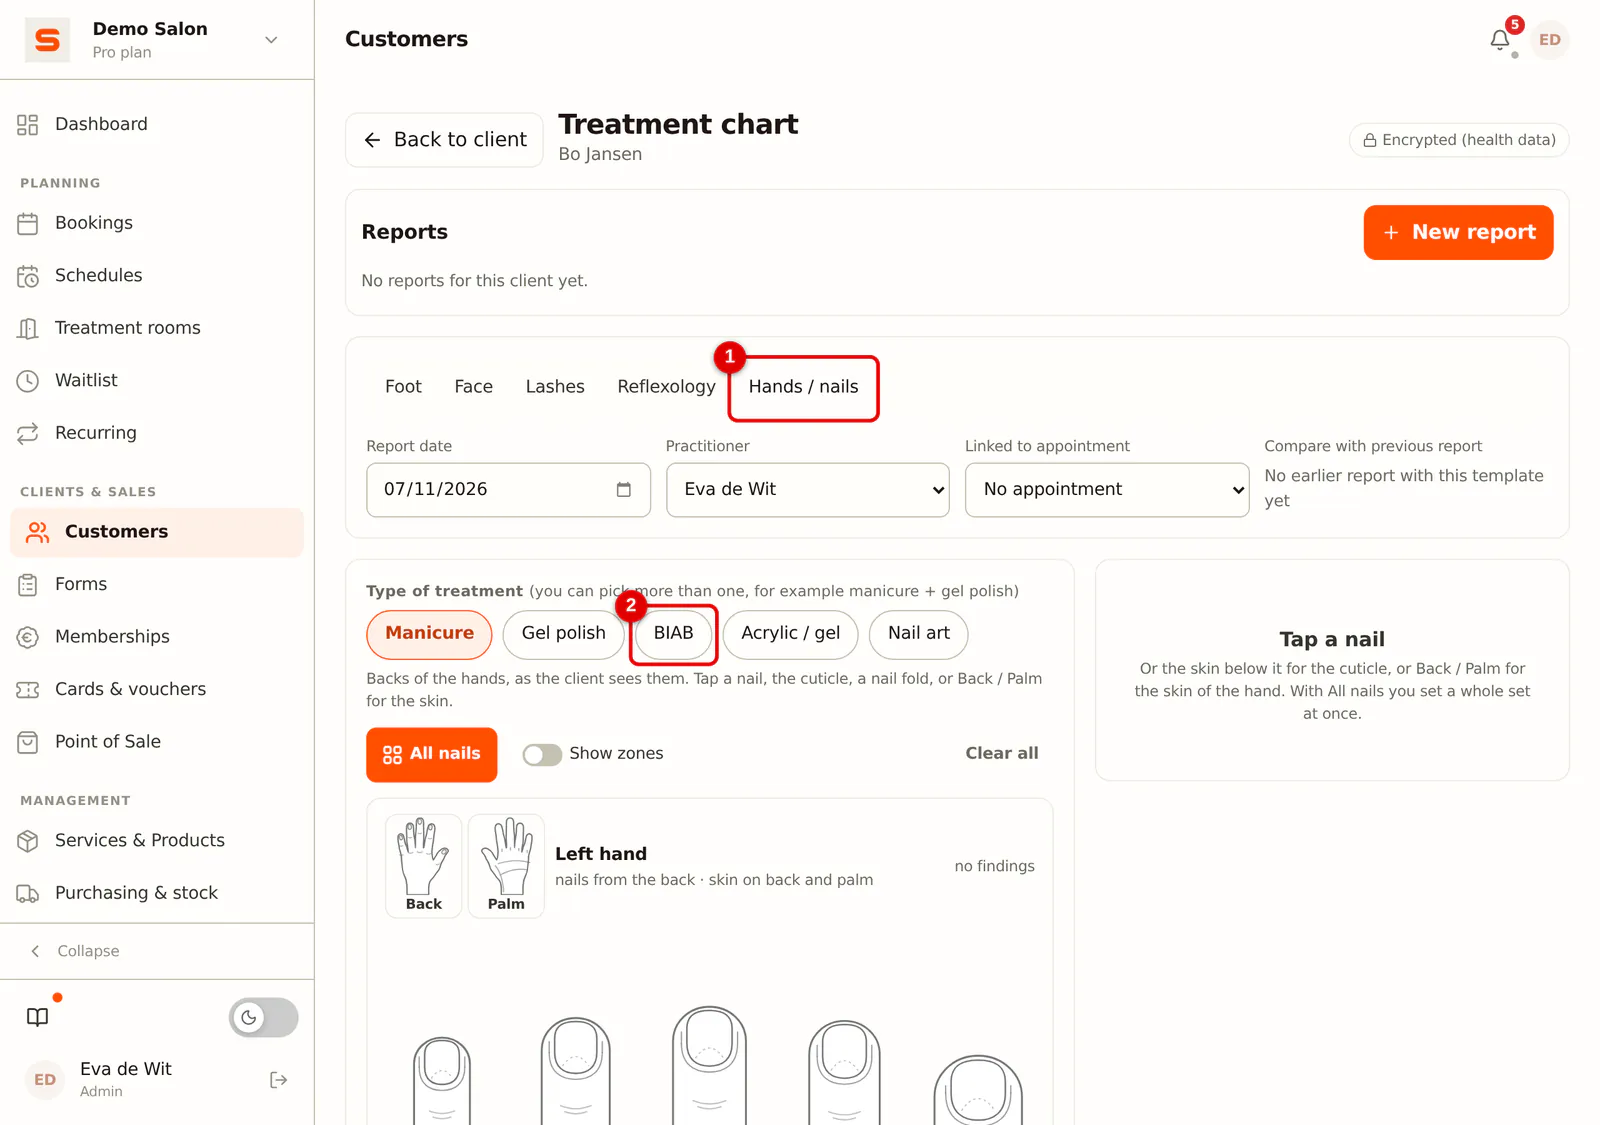
With the Hands / nails template you record per nail what you did and what you saw: for a manicure, gel polish, BIAB, acrylic or gel and nail art. The drawing shows the hands from the back, as the client sees them: the left hand on the left with the thumb on the right, the right hand on the right with the thumb on the left. What you choose shows up in the drawing straight away.
Open a new report from the appointment or the client card (see Filling in a treatment chart).
Per nail
-
Step 1: Choose the template and the treatment
Choose Hands / nails at the top. Then pick what you are doing under Type of treatment; you can pick more than one, for example Manicure and Gel polish. The chart only shows the fields that belong to those treatments.
 (Enlarge image)
-
Step 2: Tap a nail
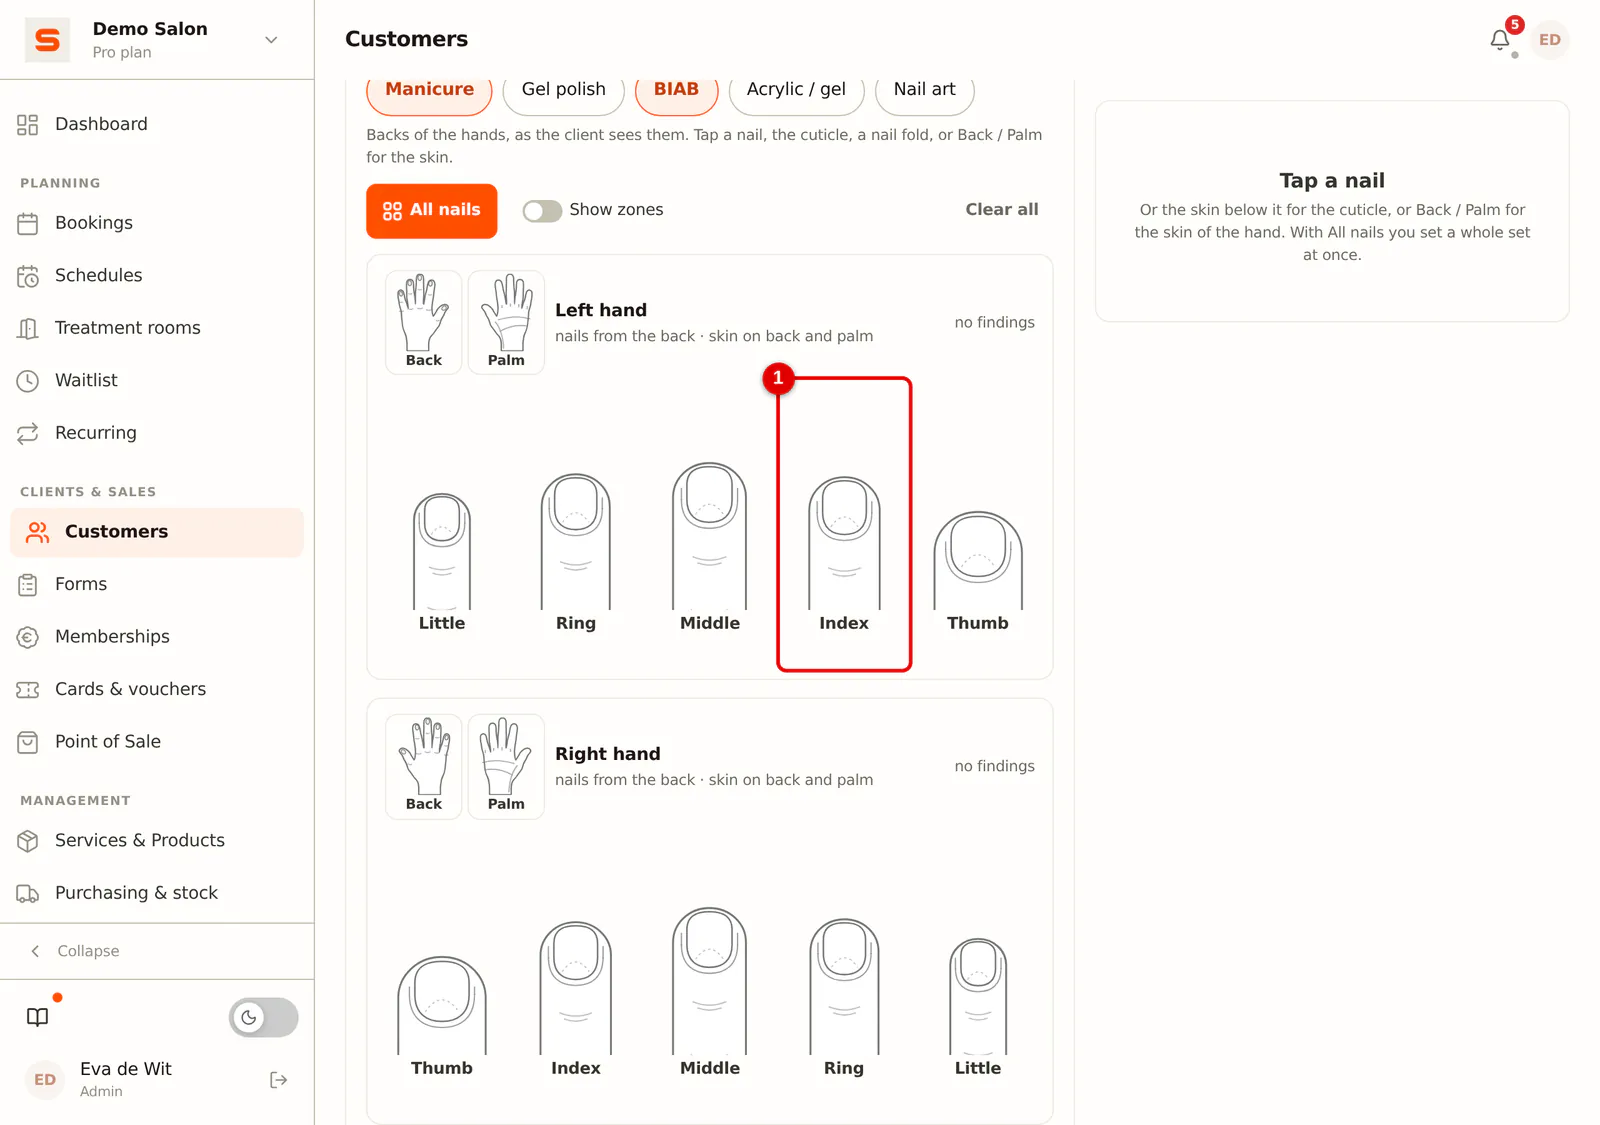
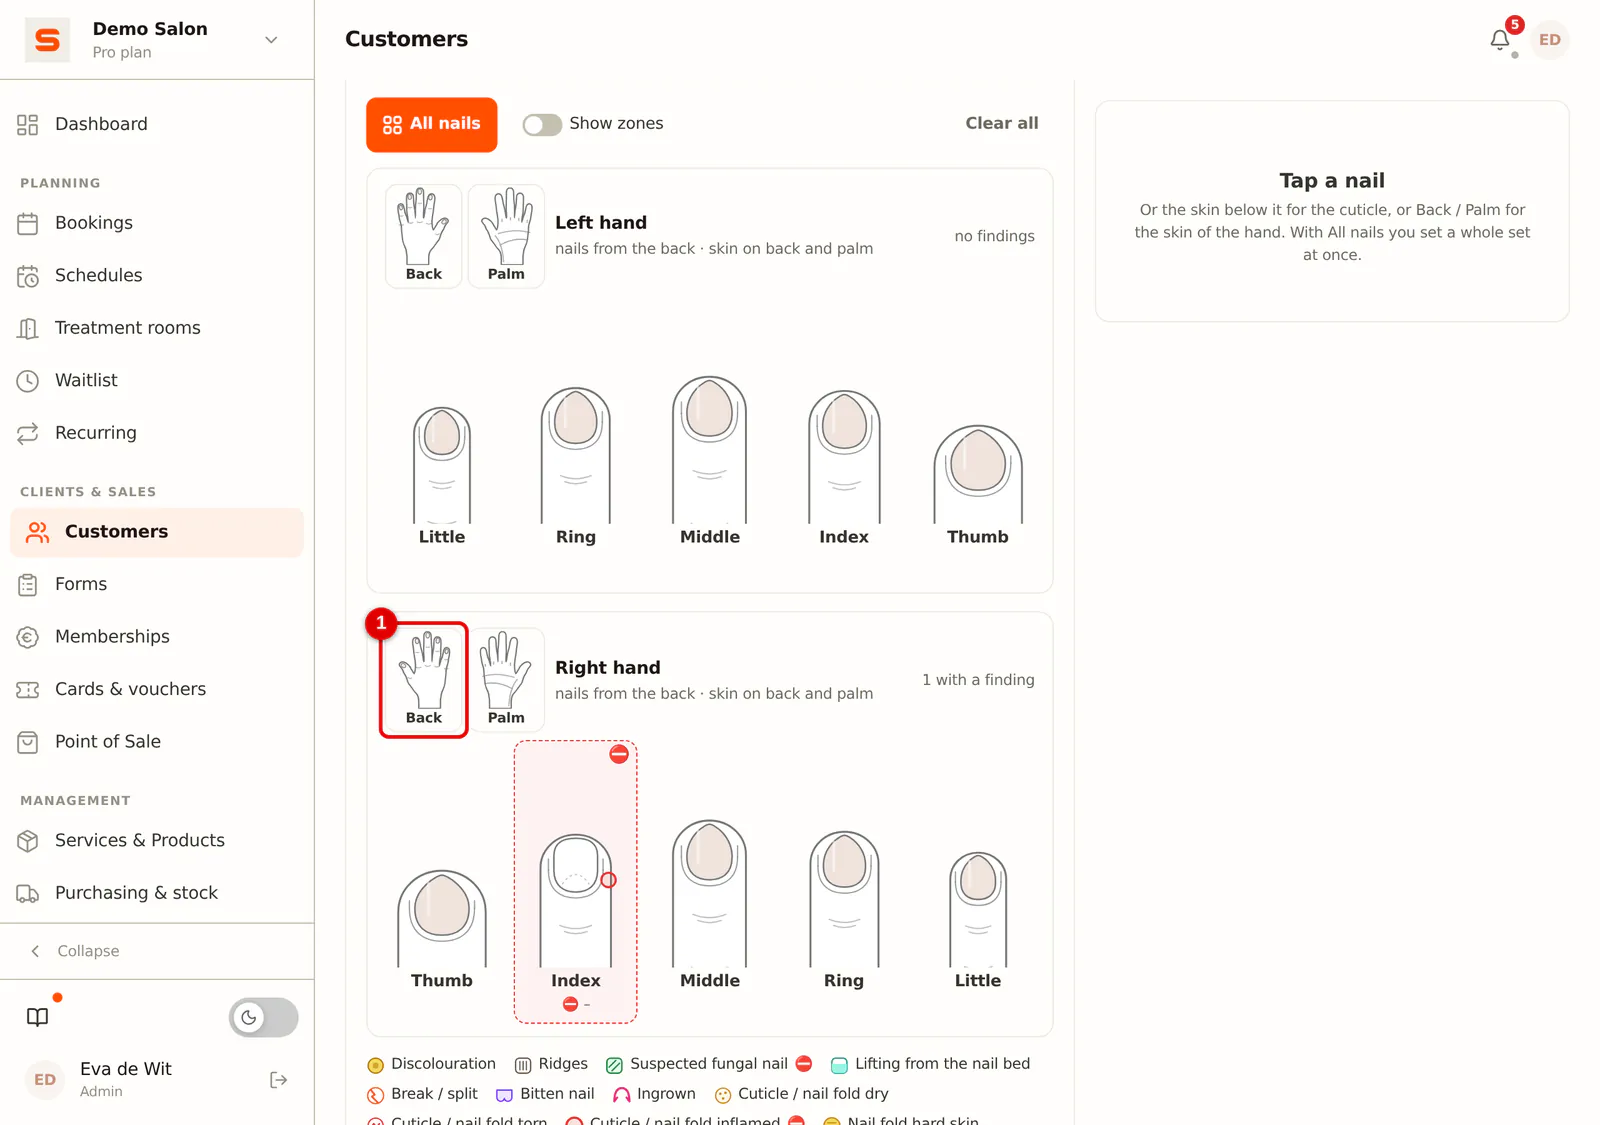
Tap a nail. A panel for that nail opens on the right (at the bottom on a phone). Tap the skin just below the nail to open the panel at Cuticle; tap beside the nail to open it at Nail folds.
 (Enlarge image)
-
Step 3: Choose the shape and length
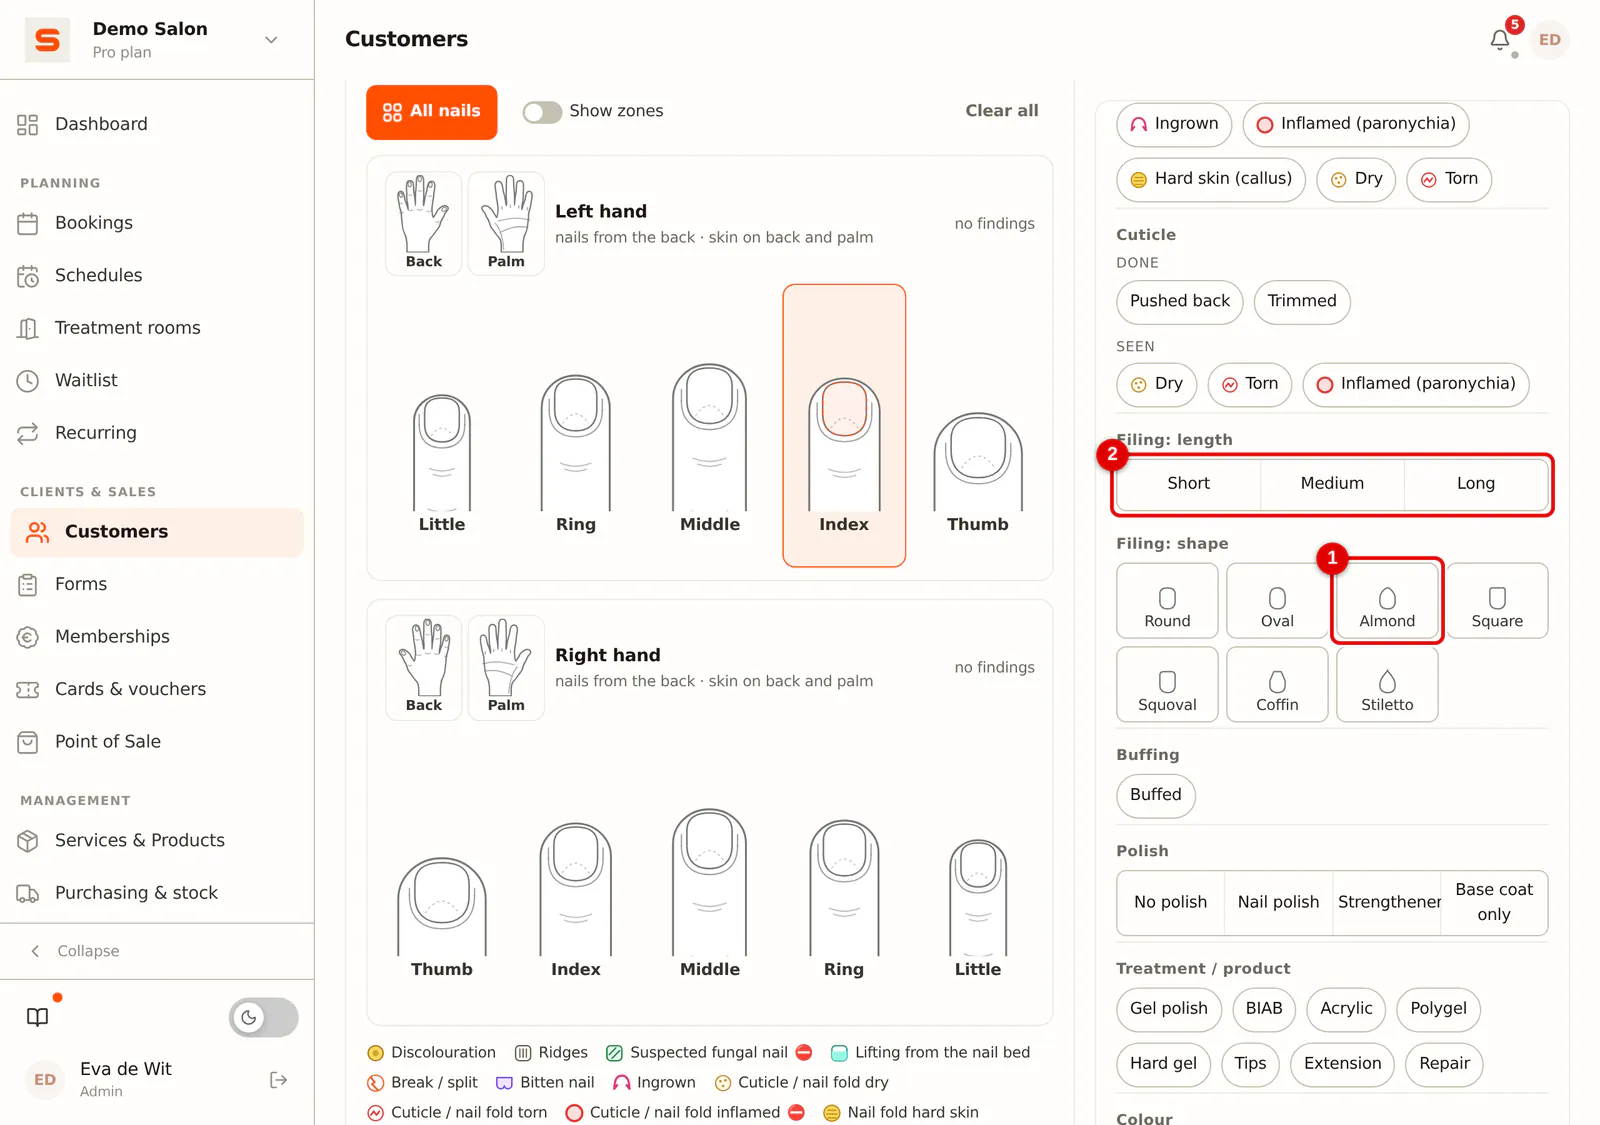
Under Shape (for a manicure Filing: shape) choose round, oval, almond, square, squoval, coffin or stiletto. Under Length choose short, medium or long. The nail in the drawing takes that shape and length straight away.
 (Enlarge image)
-
Step 4: Note the colour
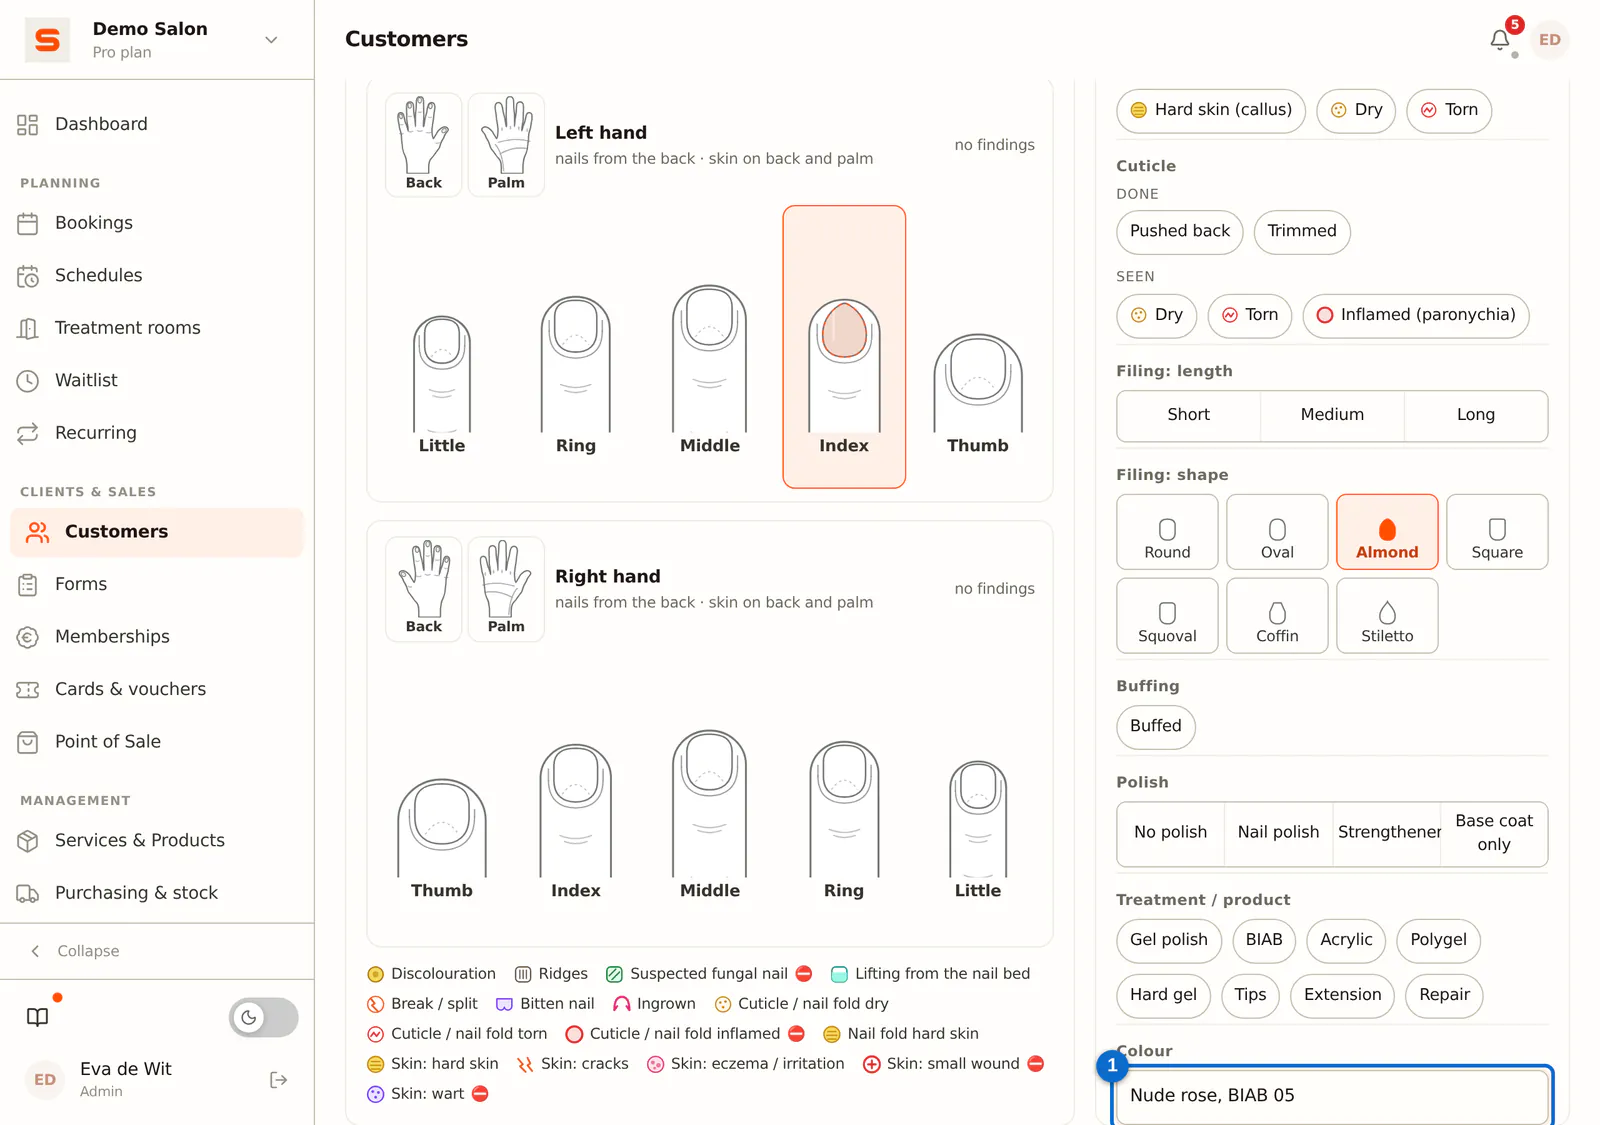
Type the name or code you used under Colour, for example Nude rose, BIAB 05. Colours you typed on earlier hands charts appear below as Typed before. The swatch only colours the nail in the drawing and may stay empty.
 (Enlarge image)
-
Step 5: Record the cuticle
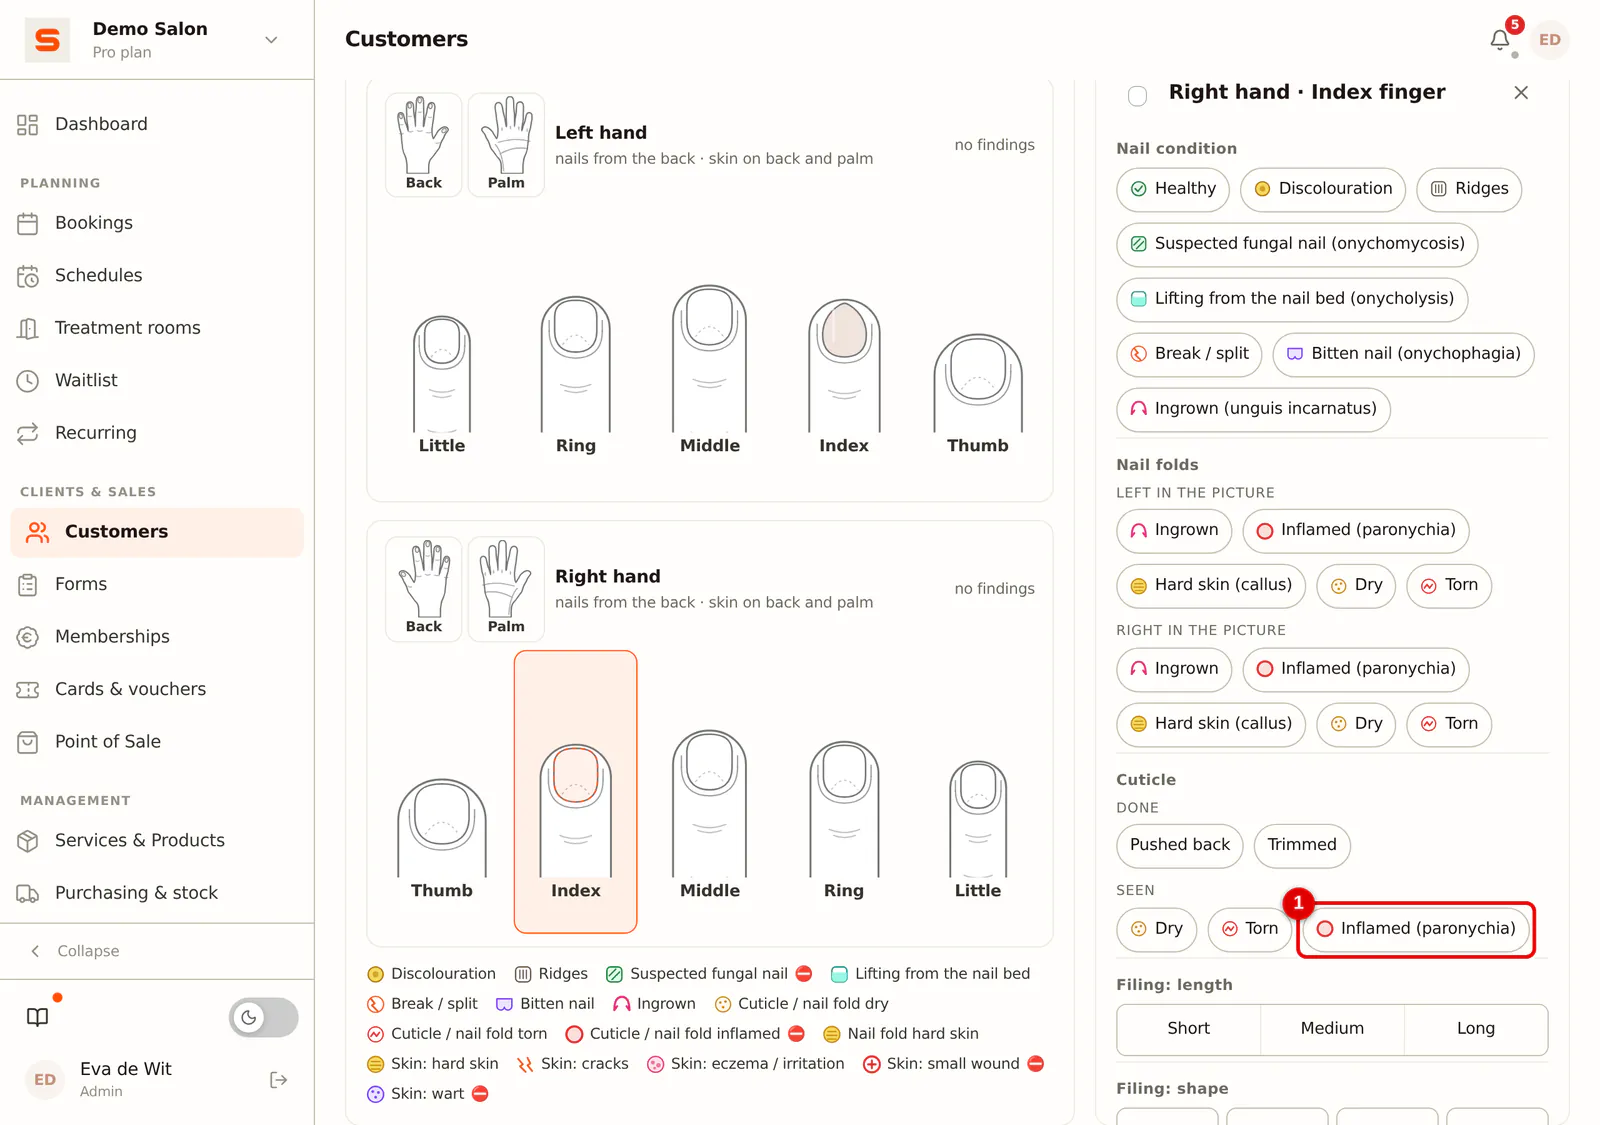
Under Cuticle choose under Done whether you pushed or trimmed it, and under Seen what you noticed, such as dry or torn. Inflamed is a contraindication: do not treat that nail. Under Nail folds you do the same for the left and right side of the nail.
 (Enlarge image)
-
Step 6: Check the contraindications
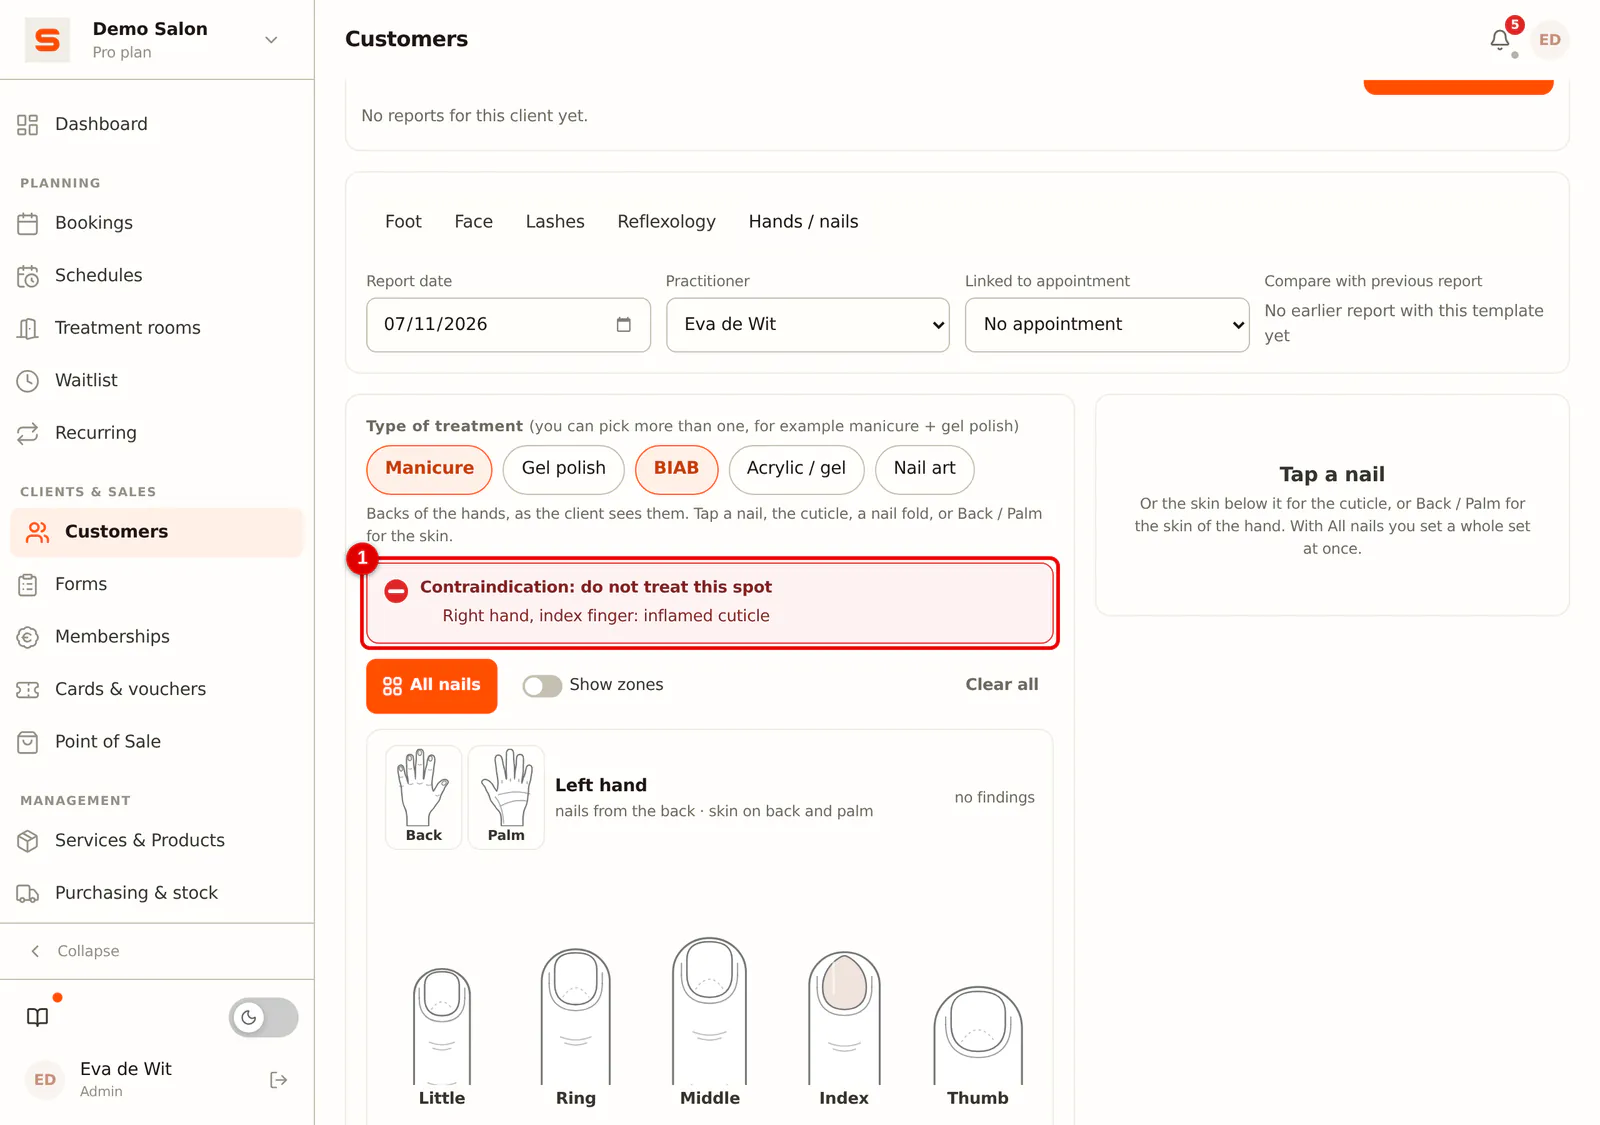
A contraindication on a spot (an inflamed cuticle or nail fold, a suspected fungal infection, a small wound or a wart) appears in the red bar at the top, and the nail gets a red border. They are also on the printout, and at the next appointment as Take note.
 (Enlarge image)
All nails at once
-
Step 1: Open All nails
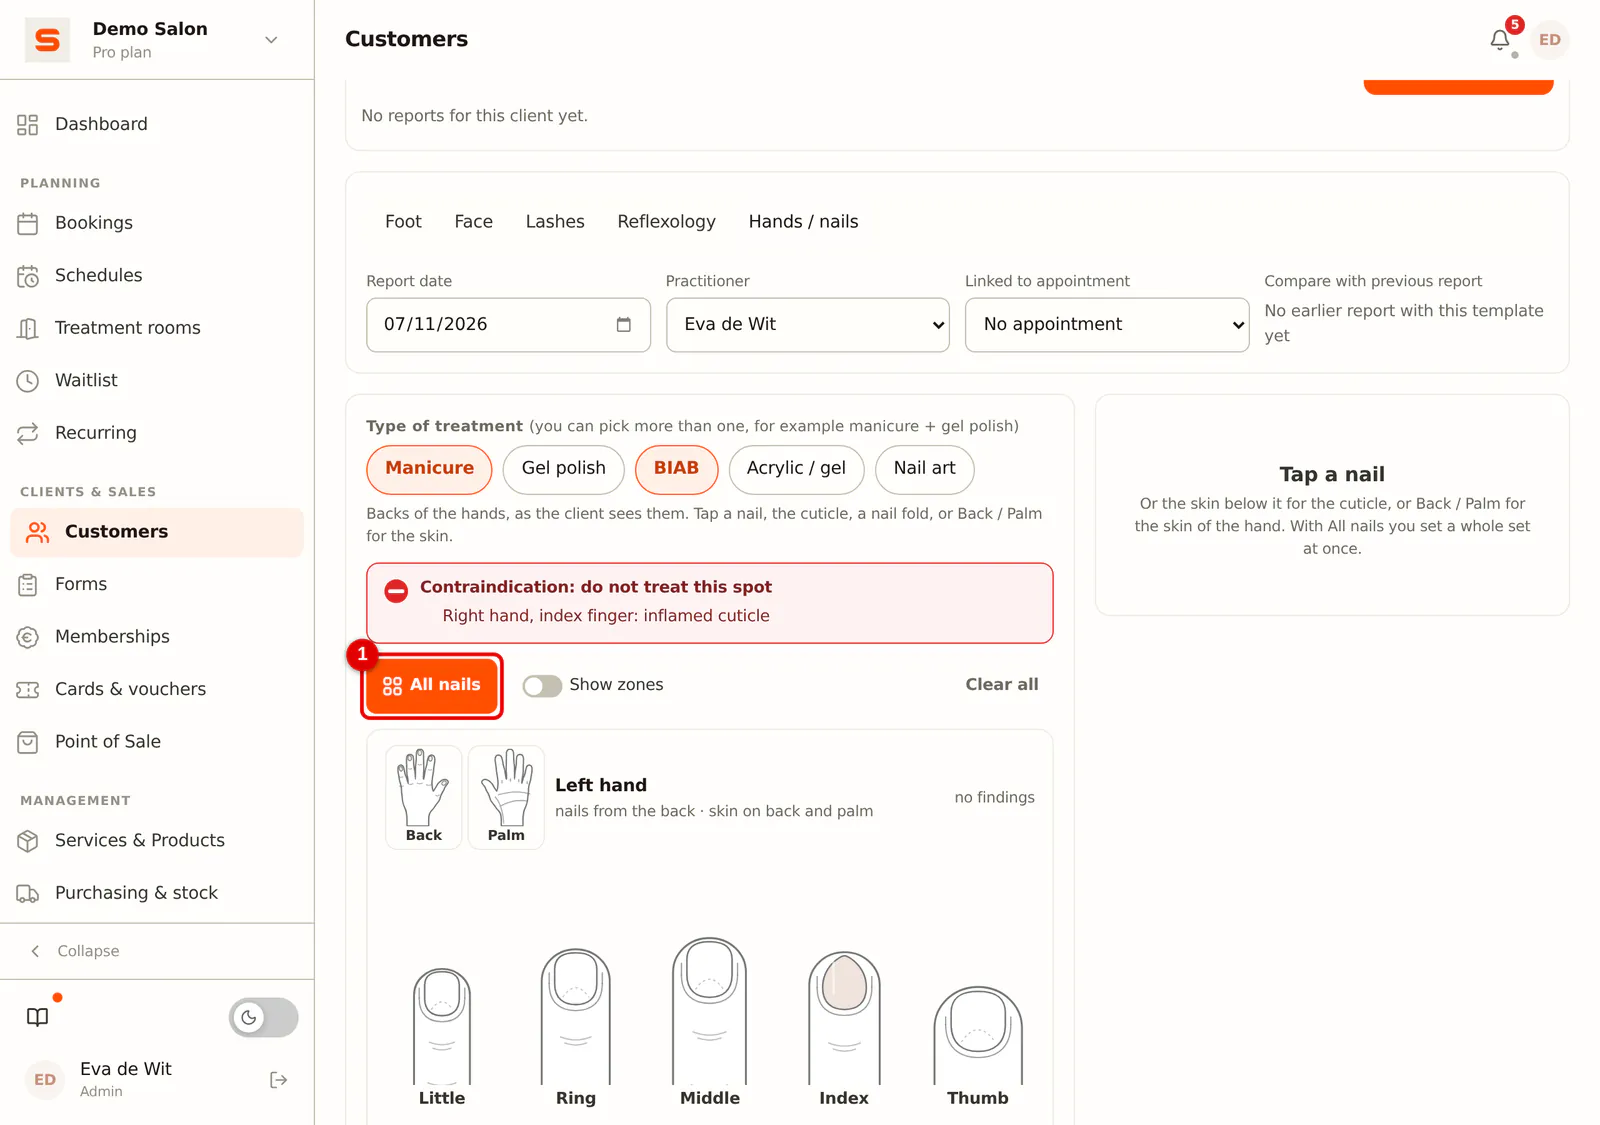
If you do the same on every nail, click All nails.
 (Enlarge image)
-
Step 2: Apply to both hands or one hand
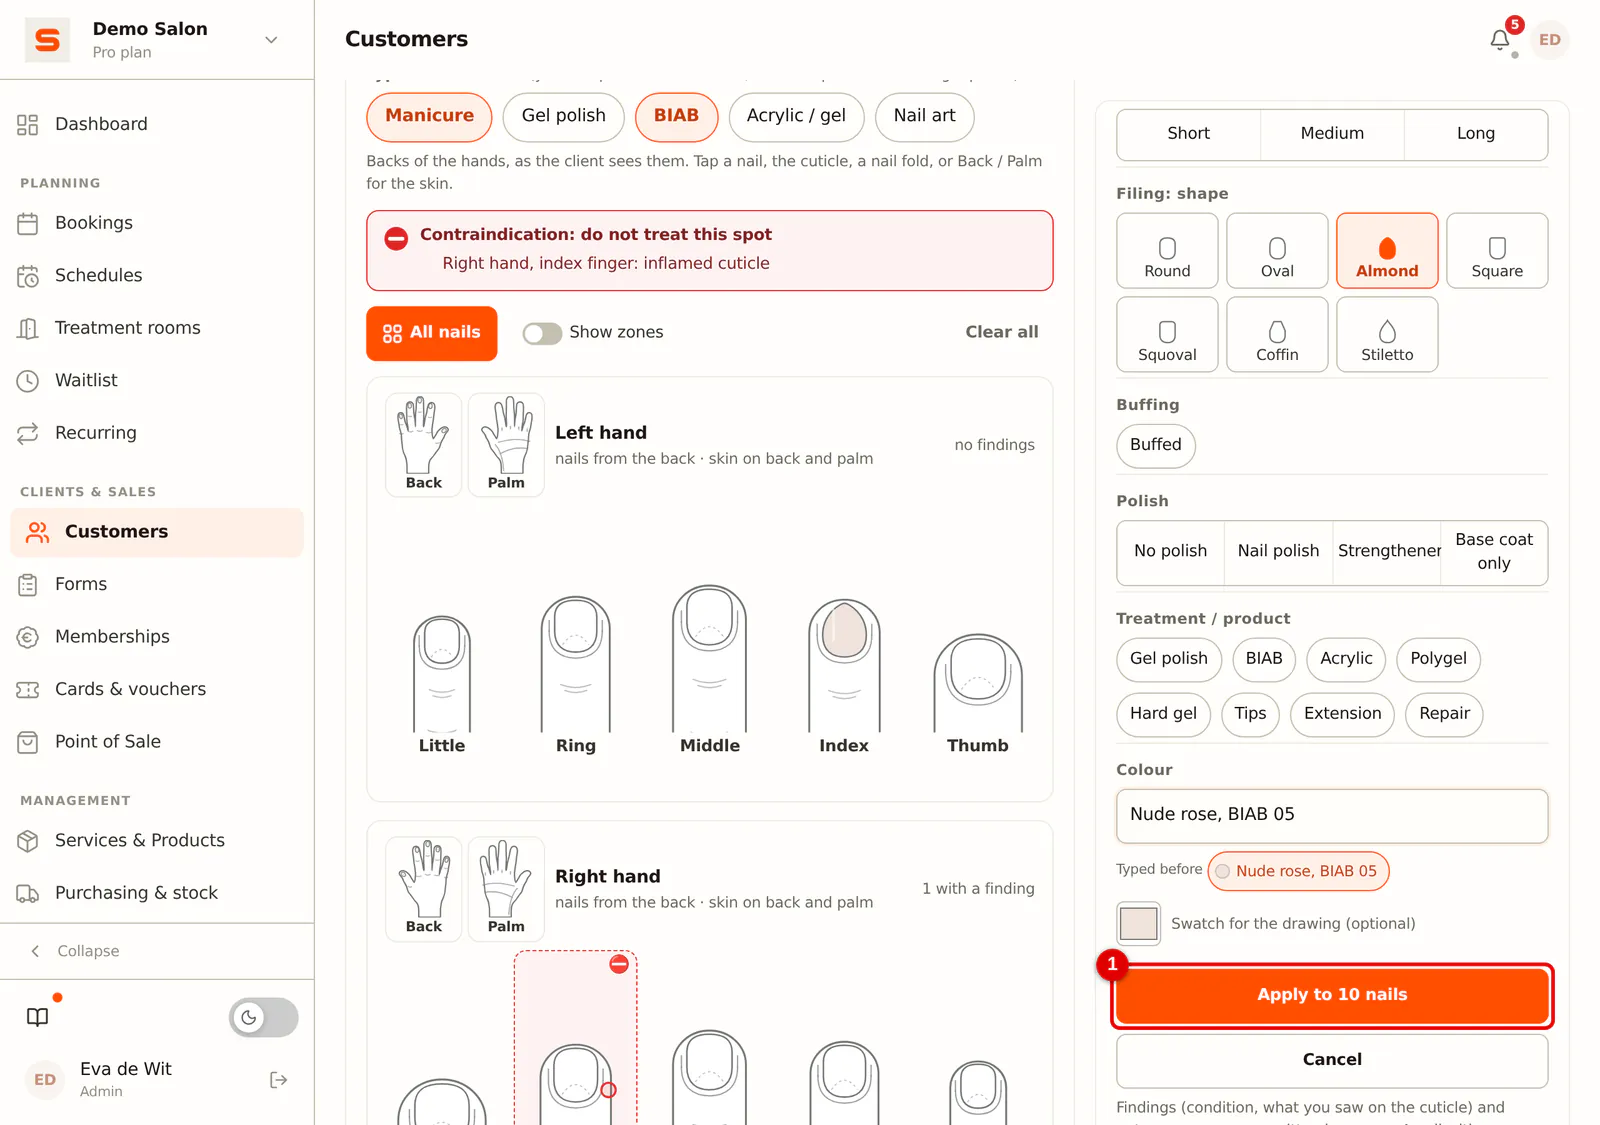
Choose Both hands, Left or Right and fill in what you want to apply, such as shape, length, product and colour. Click Apply to 10 nails (5 for one hand). Empty fields leave the nails as they were. Findings and notes are never overwritten, and a nail with a contraindication is skipped.
 (Enlarge image)
Skin, overview and printout
-
Step 1: Record the skin of the hand
For a manicure, the buttons Back and Palm sit next to each hand. Tap them to record the skin, such as dry, hard skin, cracks or eczema. A small wound or a wart is a contraindication: no scrub or massage there.
 (Enlarge image)
-
Step 2: Check the overview
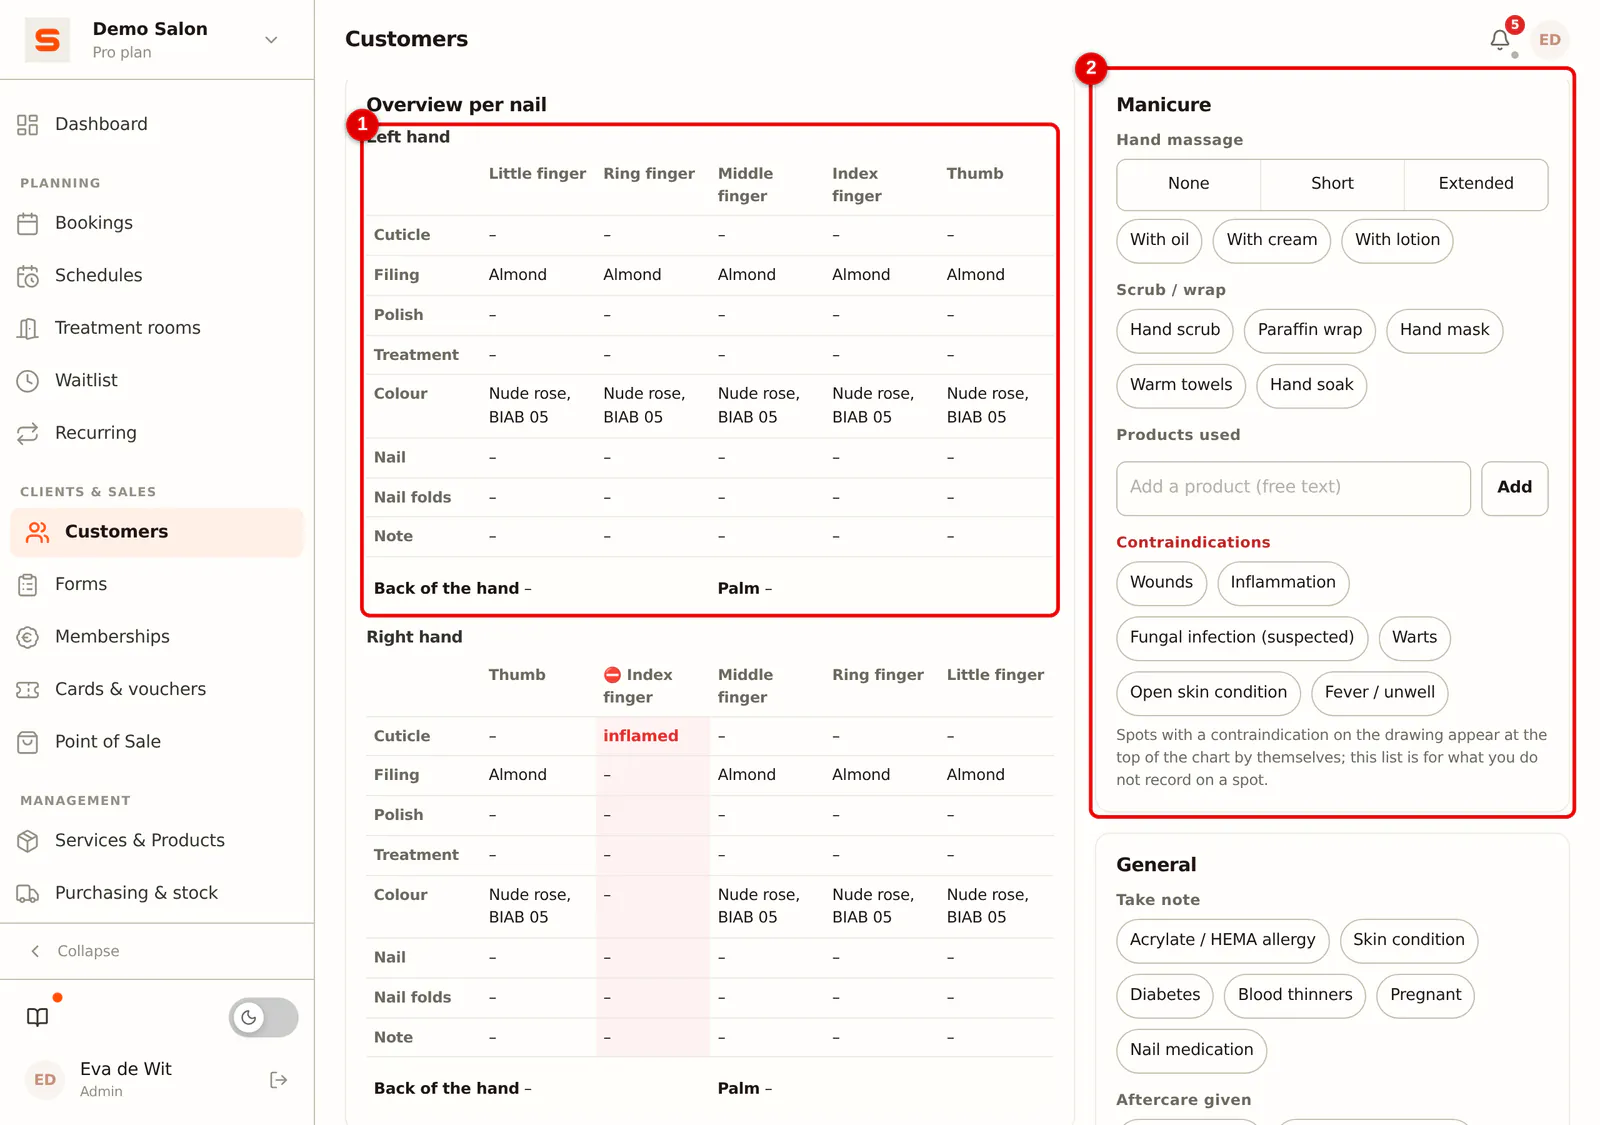
Below the drawing is the Overview per nail: per hand the shape, length, polish or product, colour and findings. For a manicure, the Manicure card holds the hand massage, scrub or wrap and the products. Under General you tick what to take note of and which aftercare you gave.
 (Enlarge image)
Save the report with Save report (on a phone Save). After that you can add a before and after photo per hand. Print / PDF puts the hands, the overview and the contraindications on paper or in a PDF.