Lashes and the lash map
With the Lashes template you record the set you applied per eye: type of treatment, technique, shape, curl, thickness and the length per zone (the lash map). The drawing of the eyes follows what you fill in, so you see at a glance what the set looked like.
Open a new report with the Lashes template from the appointment or the client card (see Filling in a treatment chart). If the client already had a lash report, last time's details are already filled in as a starting point.
Treatment and set
-
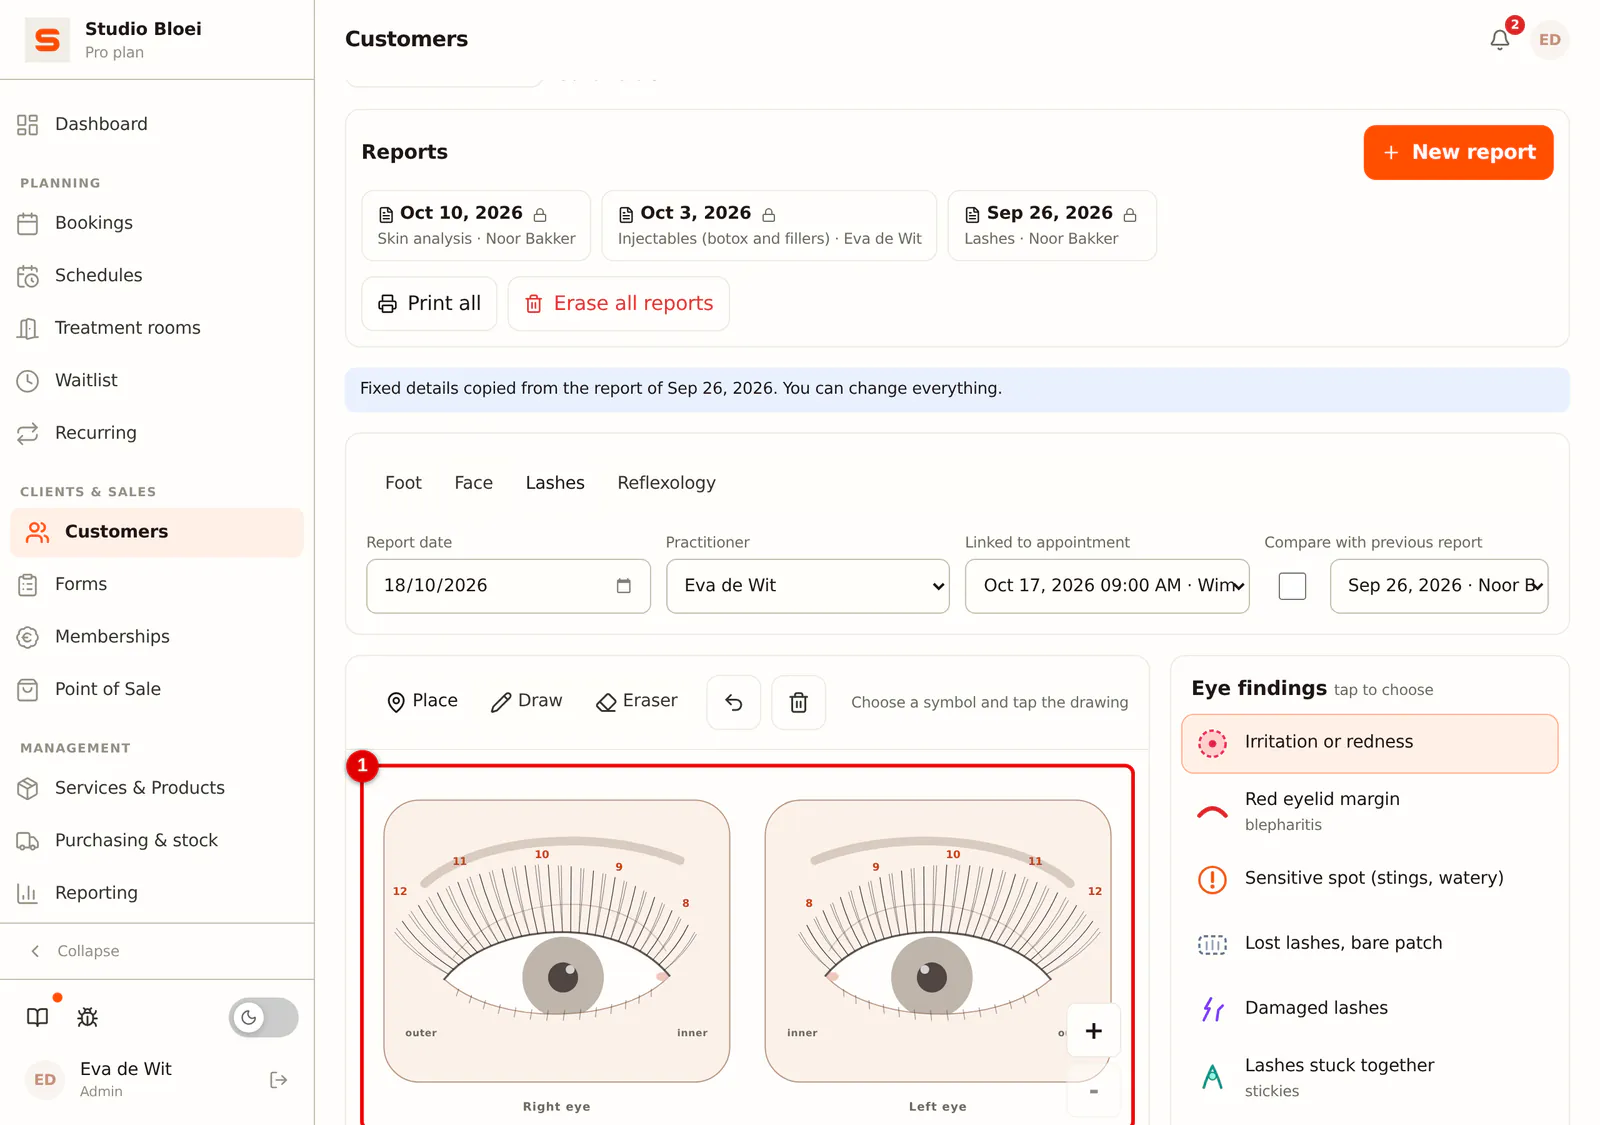
Step 1: Look at the drawing per eye
The drawing shows the right and the left eye, with the lengths of the zones above them. Problems you see, such as irritation or a bald patch, you place as with any template: choose the finding on the right and tap the drawing.
 (Enlarge image)
-
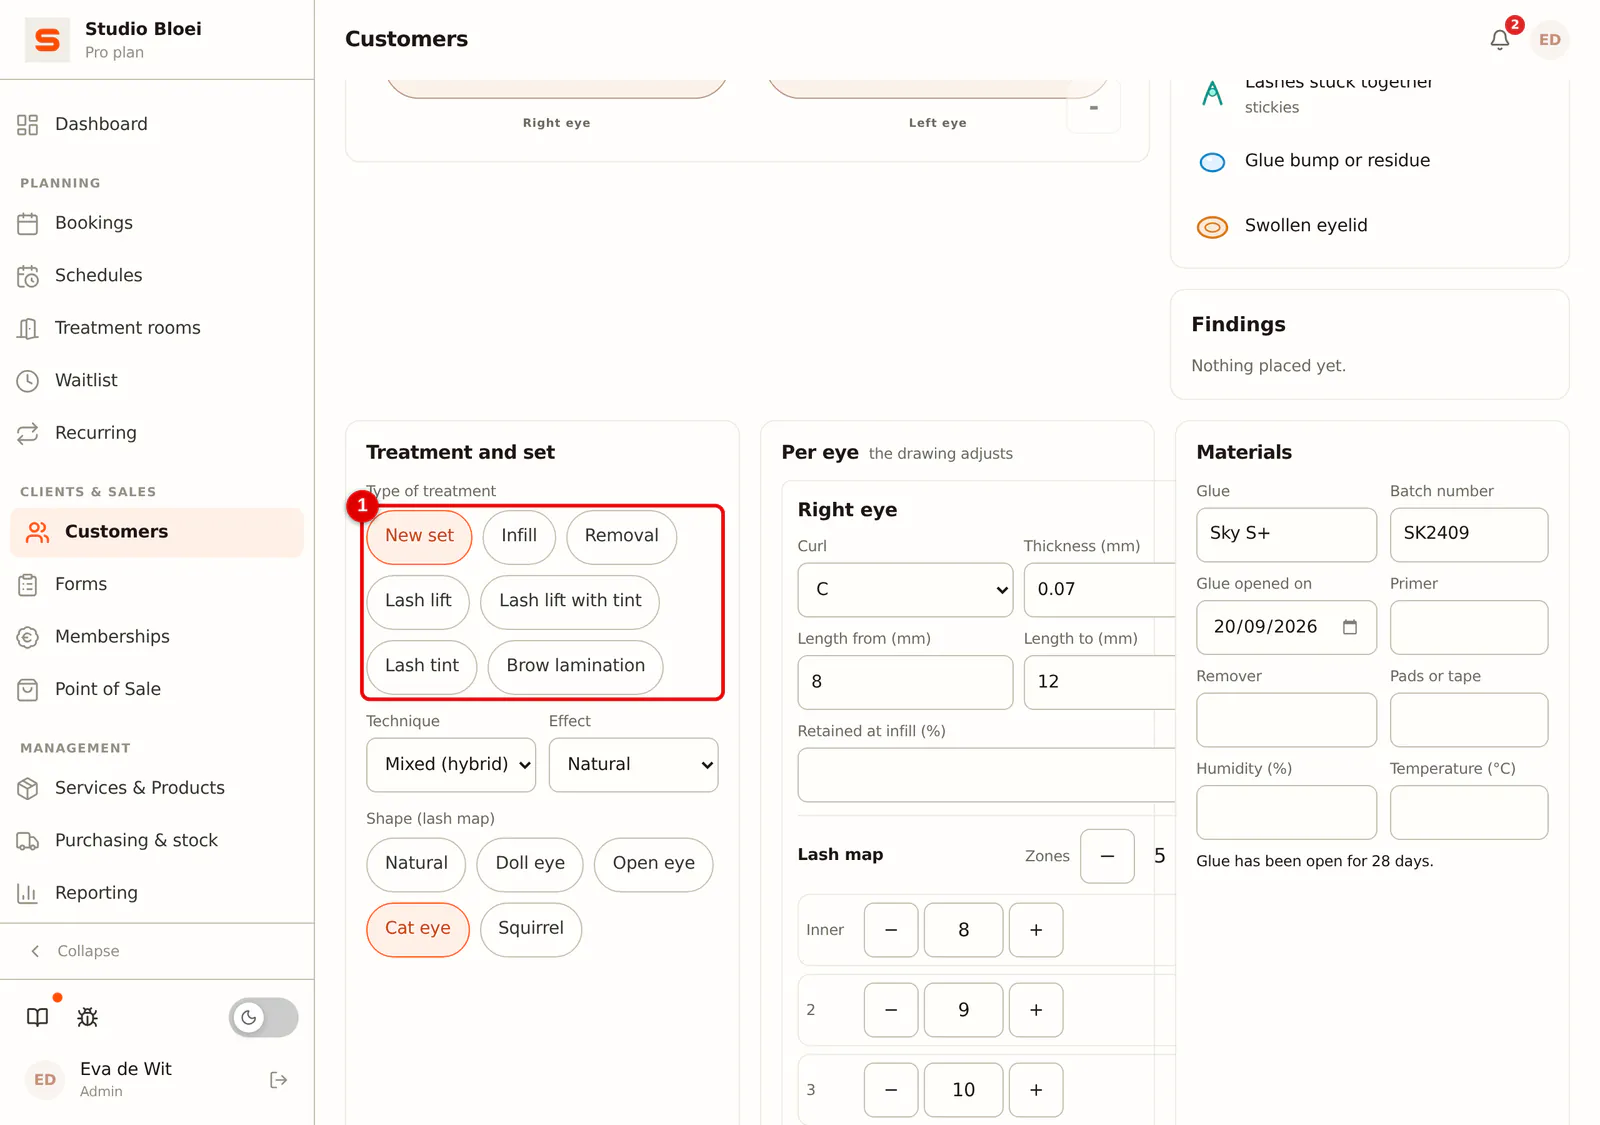
Step 2: Choose the treatment and the shape
Under Treatment and set, choose the Type of treatment (for example a new set or a refill), the Technique, the Effect and the Shape (lash map), such as cat eye or doll eye. The shape sets the default lengths of the lash map.
 (Enlarge image)
Per eye and the lash map
The steps below are shown as they look on a phone. On a computer the right eye and the left eye are next to each other, with the same fields and buttons.
-
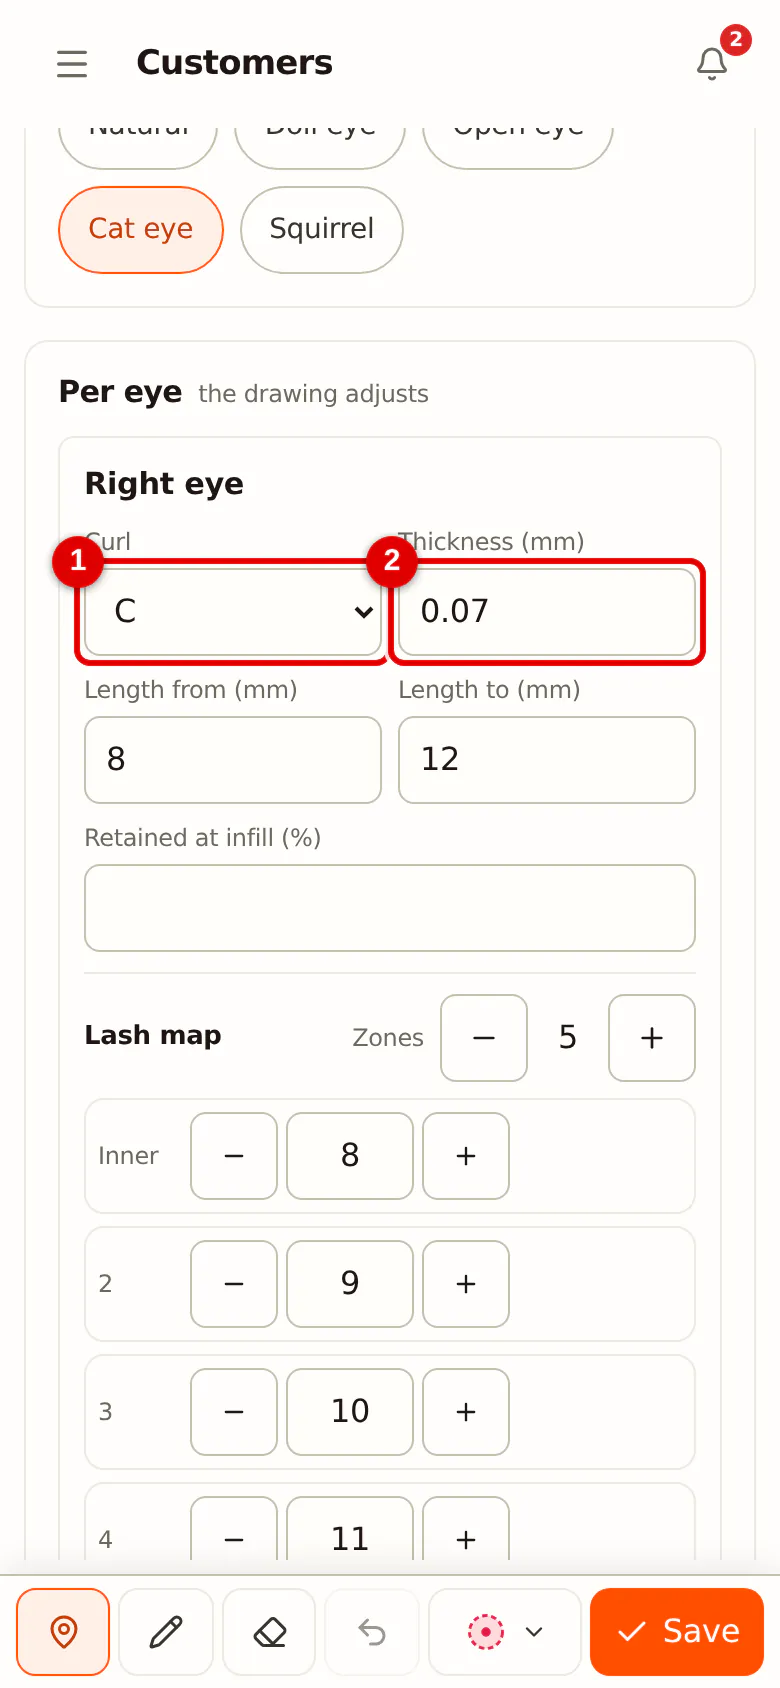
Step 1: Choose curl and thickness
Under Per eye, choose the Curl and the Thickness (mm) for each eye, and fill in the shortest and longest length. If you use a thickness that is heavy for volume, or lashes longer than 14 mm, you get a warning.
 (Enlarge image)
-
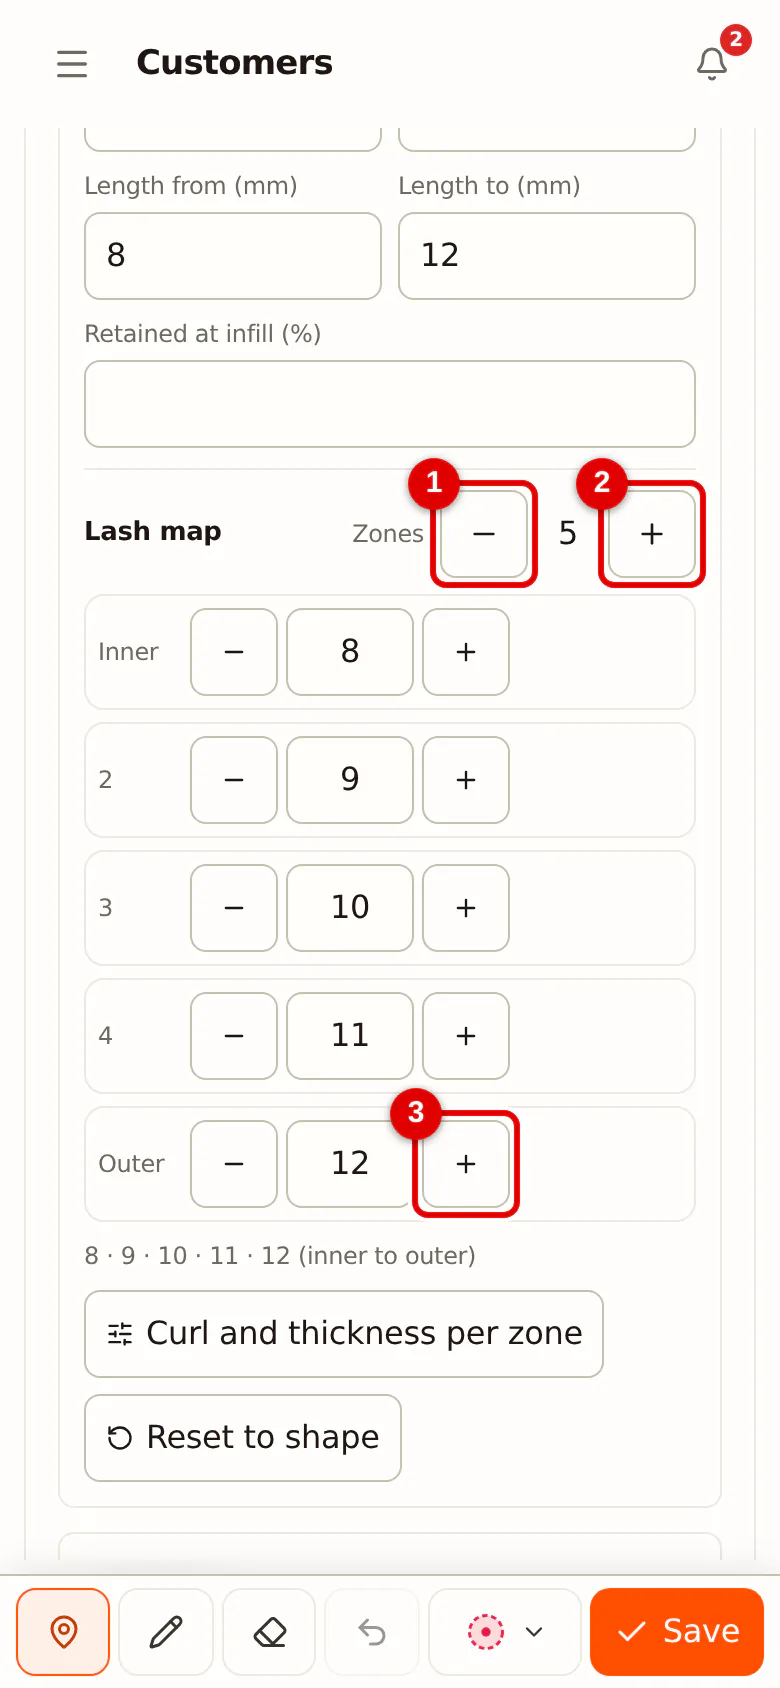
Step 2: Set the number of zones
The Lash map runs from Inner (inner corner of the eye) to Outer. By default there are 5 zones; with - and + next to Zones you go down to 3 or up to 15.
 (Enlarge image)
-
Step 3: Adjust the length per zone
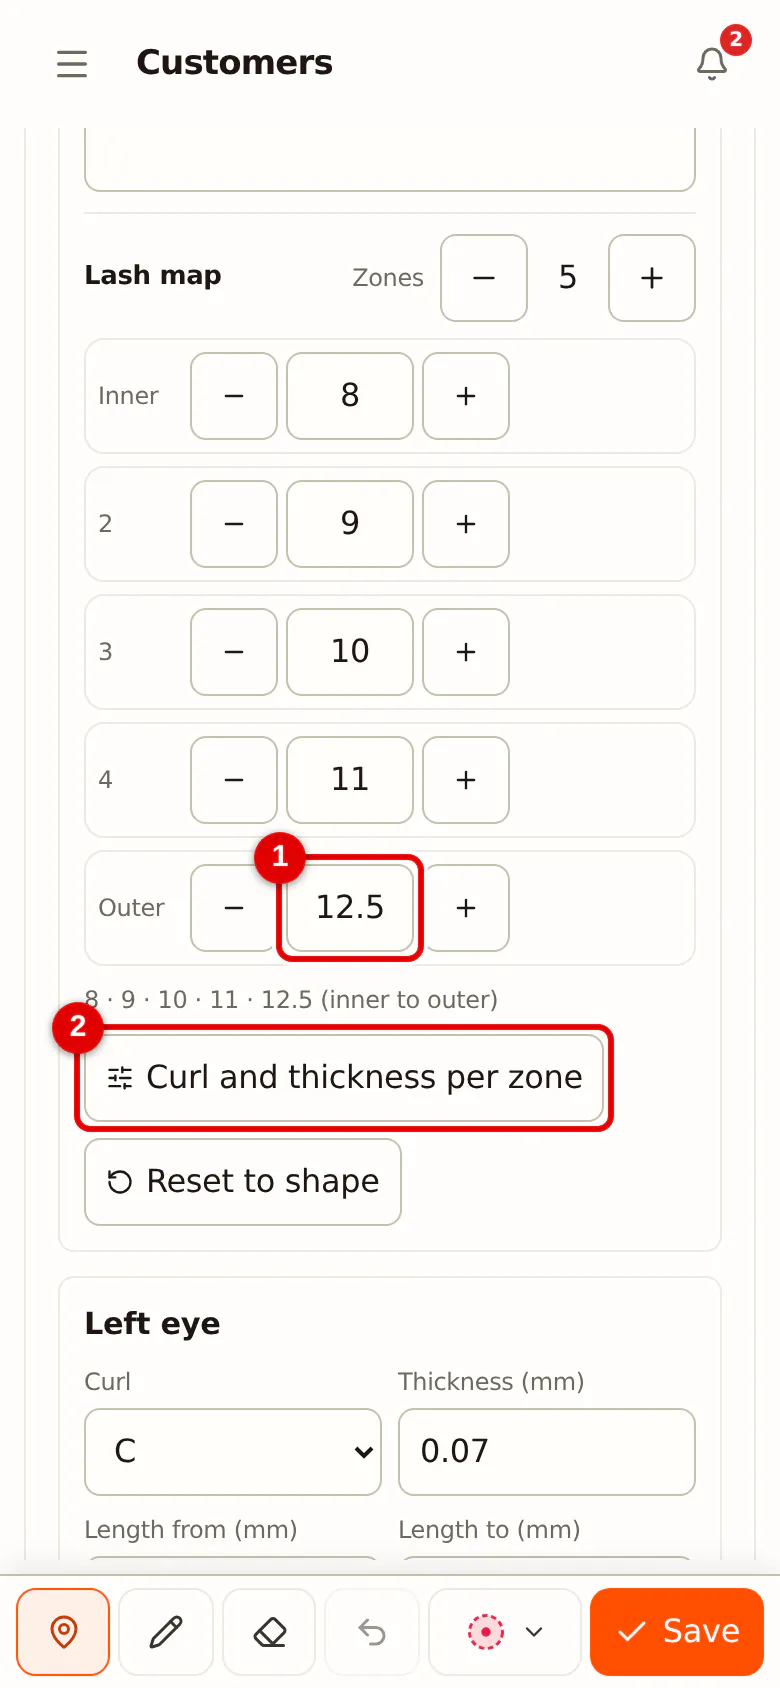
With - and + at a zone you make that zone half a millimetre shorter or longer; you can also type the length. Below the zones the whole map is shown again on one line, for example 8 · 9 · 10 · 11 · 12.5.
 (Enlarge image)
-
Step 4: Curl and thickness per zone
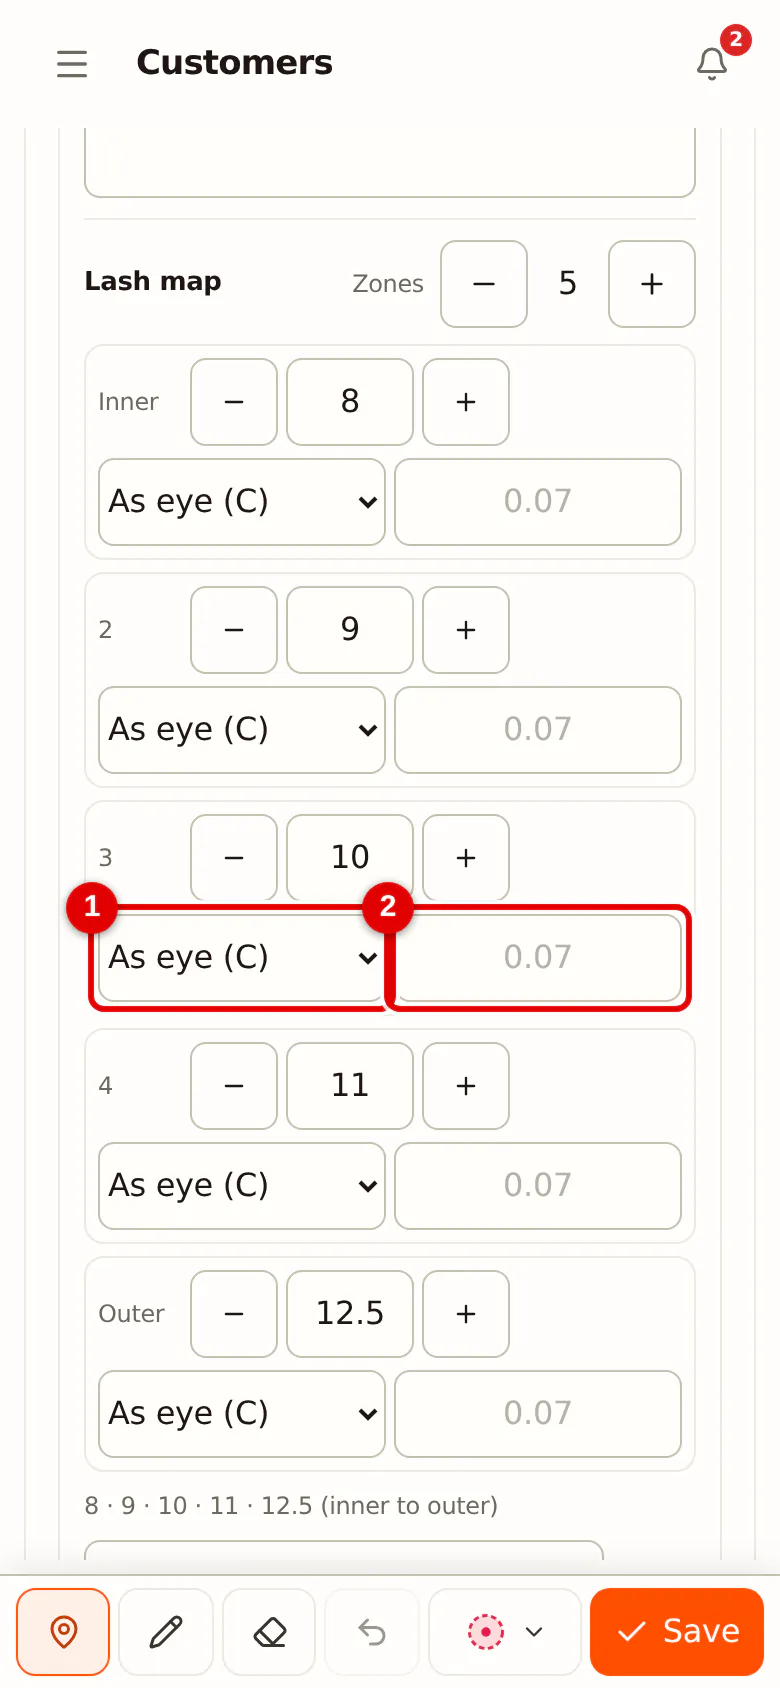
If you use a different curl or thickness in a zone, click Curl and thickness per zone. A choice then appears per zone; if you leave it on As eye, the curl or thickness of the whole eye applies.
 (Enlarge image)
-
Step 5: Back to the shape
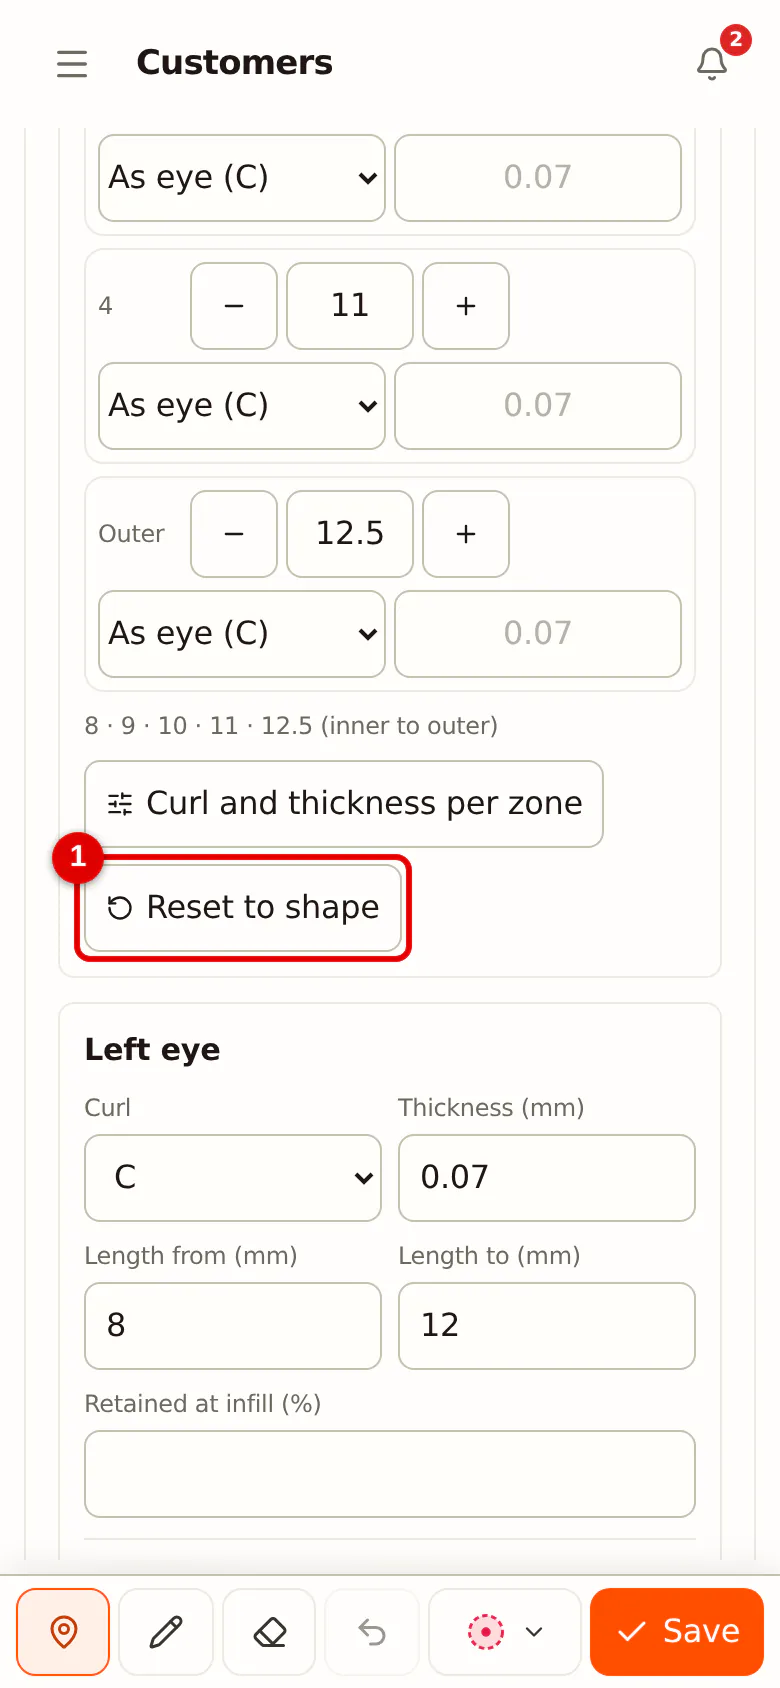
To start again, click Reset to shape. The lengths then follow the chosen shape and the shortest and longest length again.
 (Enlarge image)
-
Step 6: Copy right to left
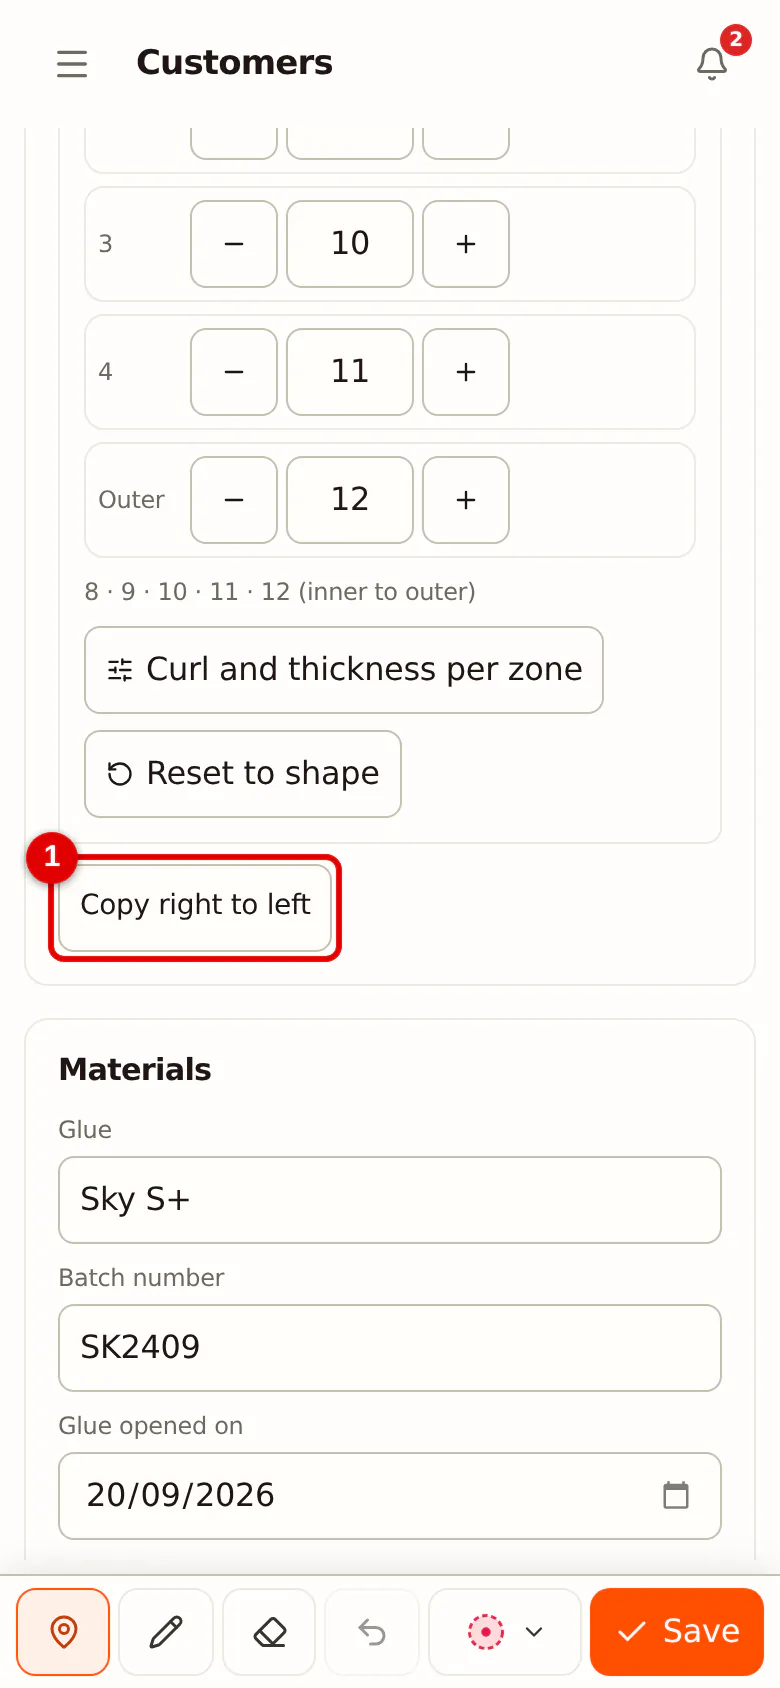
If the left eye is the same as the right eye, click Copy right to left. After that you only adjust the differences.
 (Enlarge image)
Materials, safety and aftercare
Under Materials you note the glue with its batch number and the date you opened it. Salonnare shows how many days the glue has been open and warns you when that is longer than most manufacturers advise. Under Safety you record the patch test and special points, such as contact lenses, and under Aftercare given you tick the advice you gave. You can add to these lists yourself (see Setting up the treatment chart).
Save the report with Save report (on a phone Save). After saving you can add a before and after photo per eye.