Own sending domain
With Pro, emails to your clients come from your own address, for example info@yoursalon.com, instead of noreply@mail.salonnare.com. This applies to all email from your salon: confirmations, reminders, receipts, gift cards, review requests, forms and campaigns. Your clients see your own name and your own domain, and replies arrive at your salon's email address.
Email about your own account, such as a new password or an invoice from Salonnare, always comes from Salonnare itself.
Salonnare does not touch your existing mailbox. The records you add live on a separate subdomain (send) and a separate key; your MX records and your normal email on yoursalon.com stay as they are.
Adding your domain
-
Step 1: Enter your domain and sender address
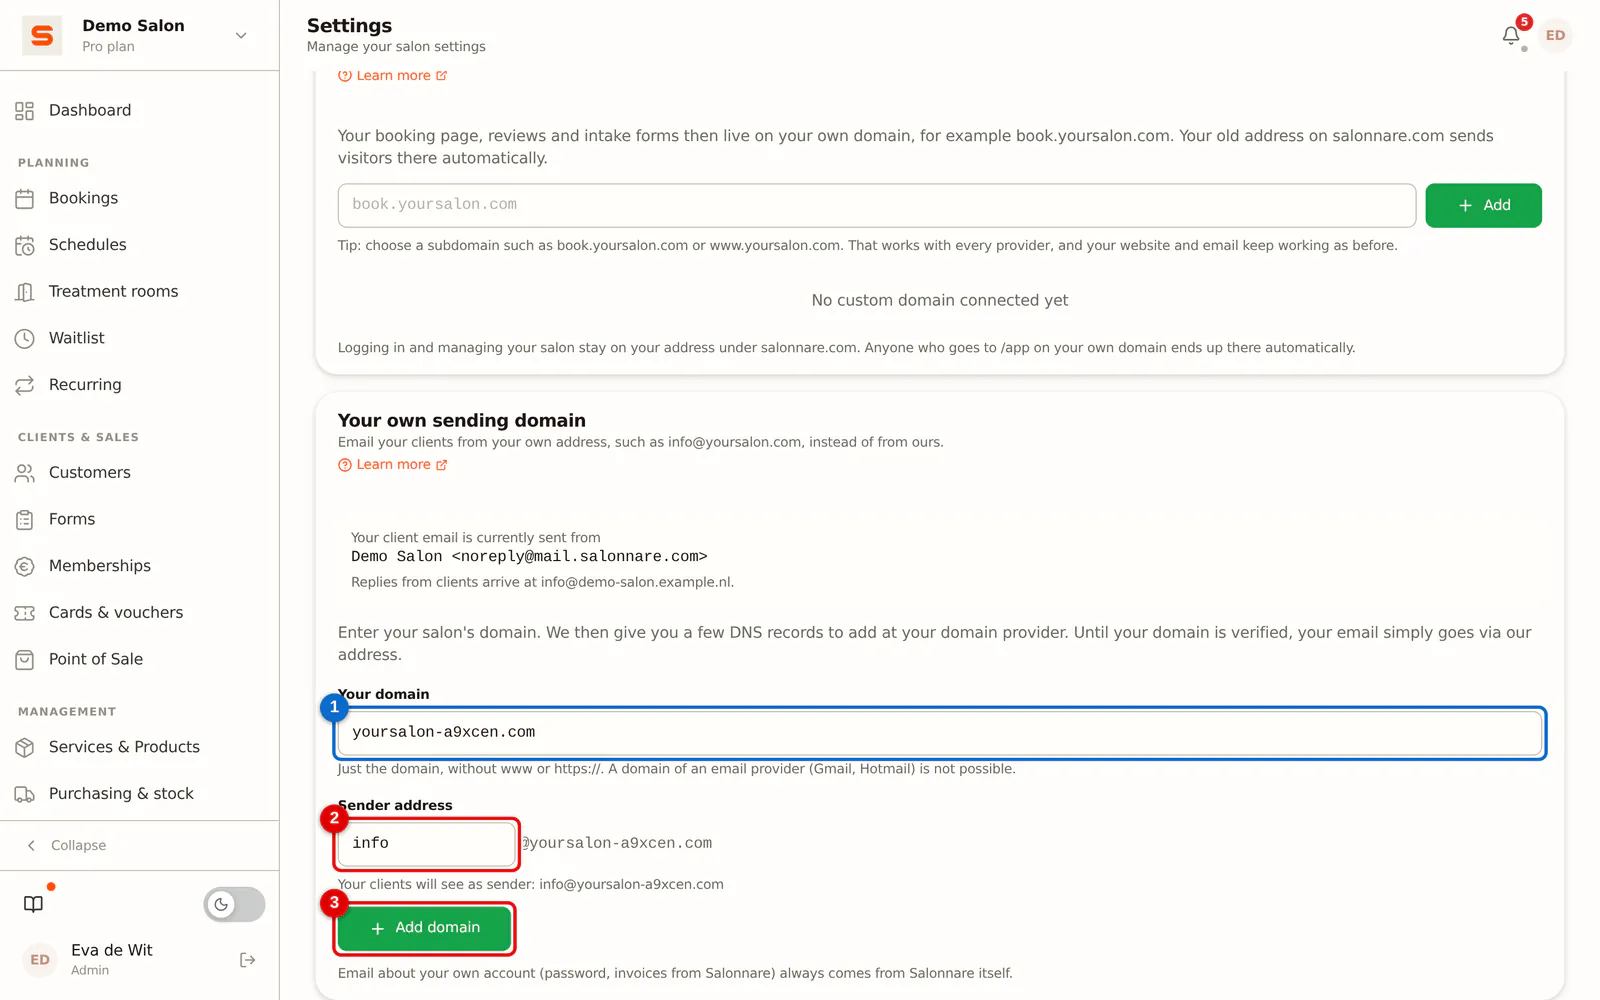
Go to Settings > Advanced > Custom domain and scroll to Your own sending domain. Enter your domain, for example yoursalon.com, without www or https://. Under Sender address, choose the part before the @, for example info or bookings. Click Add domain.
If you paste a whole address, such as info@yoursalon.com, Salonnare splits it for you. A domain of an email provider (Gmail, Hotmail, Outlook, iCloud) is not possible: that domain is not yours.
 (Enlarge image)
-
Step 2: Add the records at your domain provider
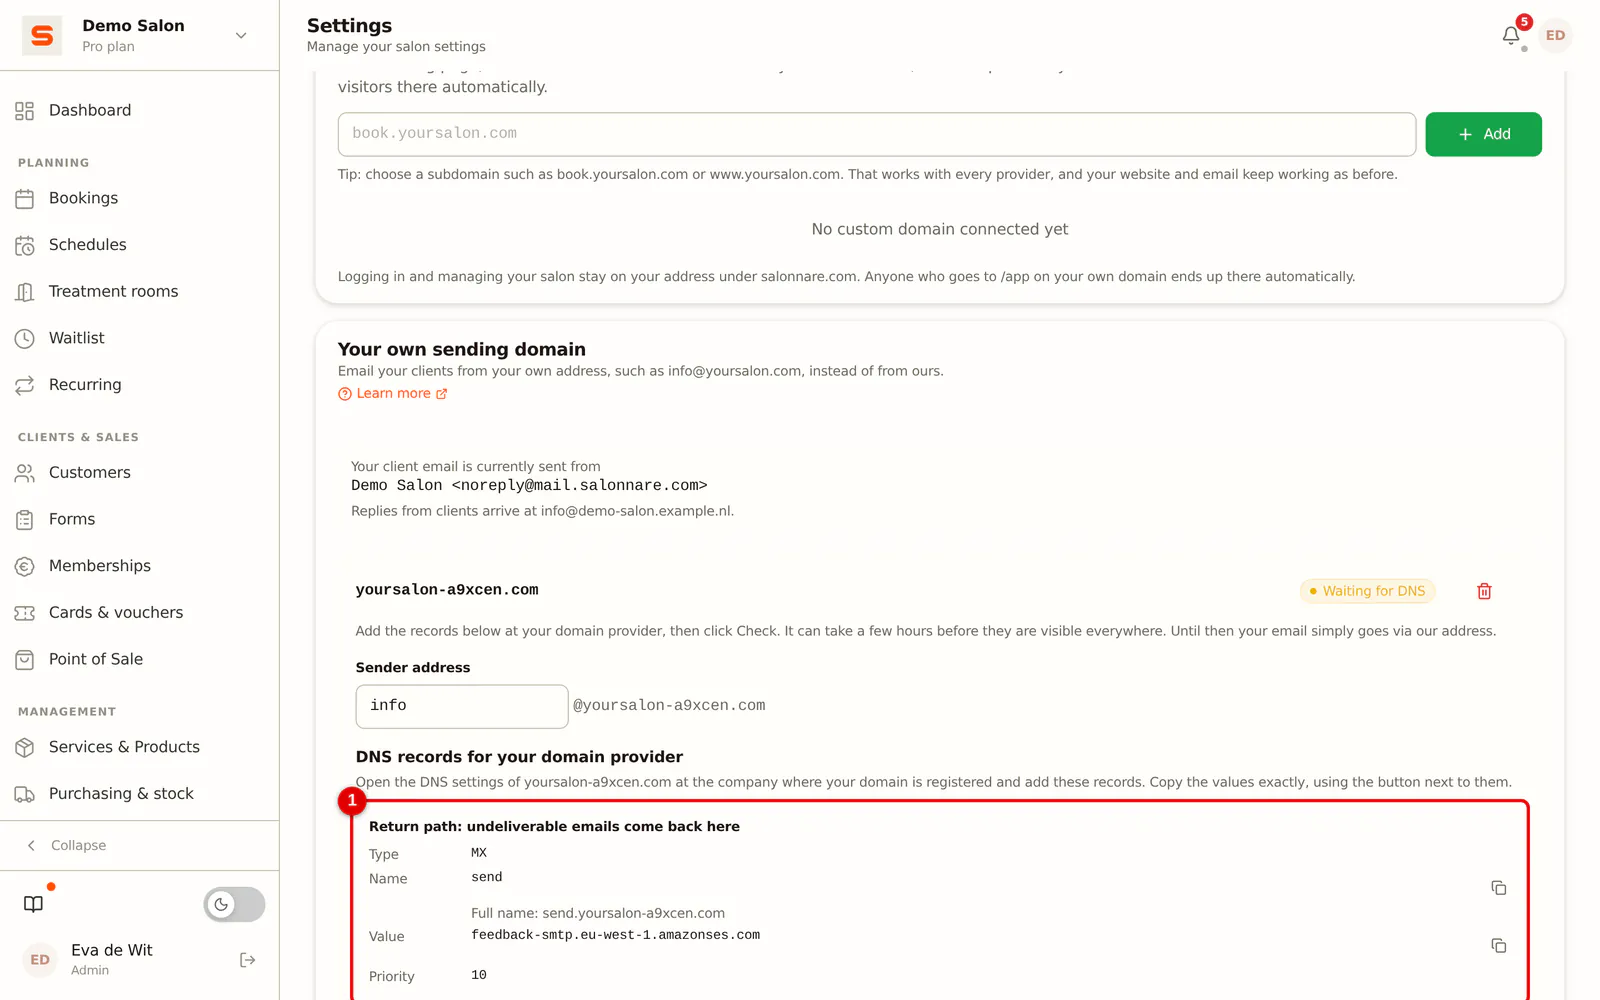
Salonnare now shows a few records. Log in at the company where your domain is registered, open the DNS settings and add all of them:
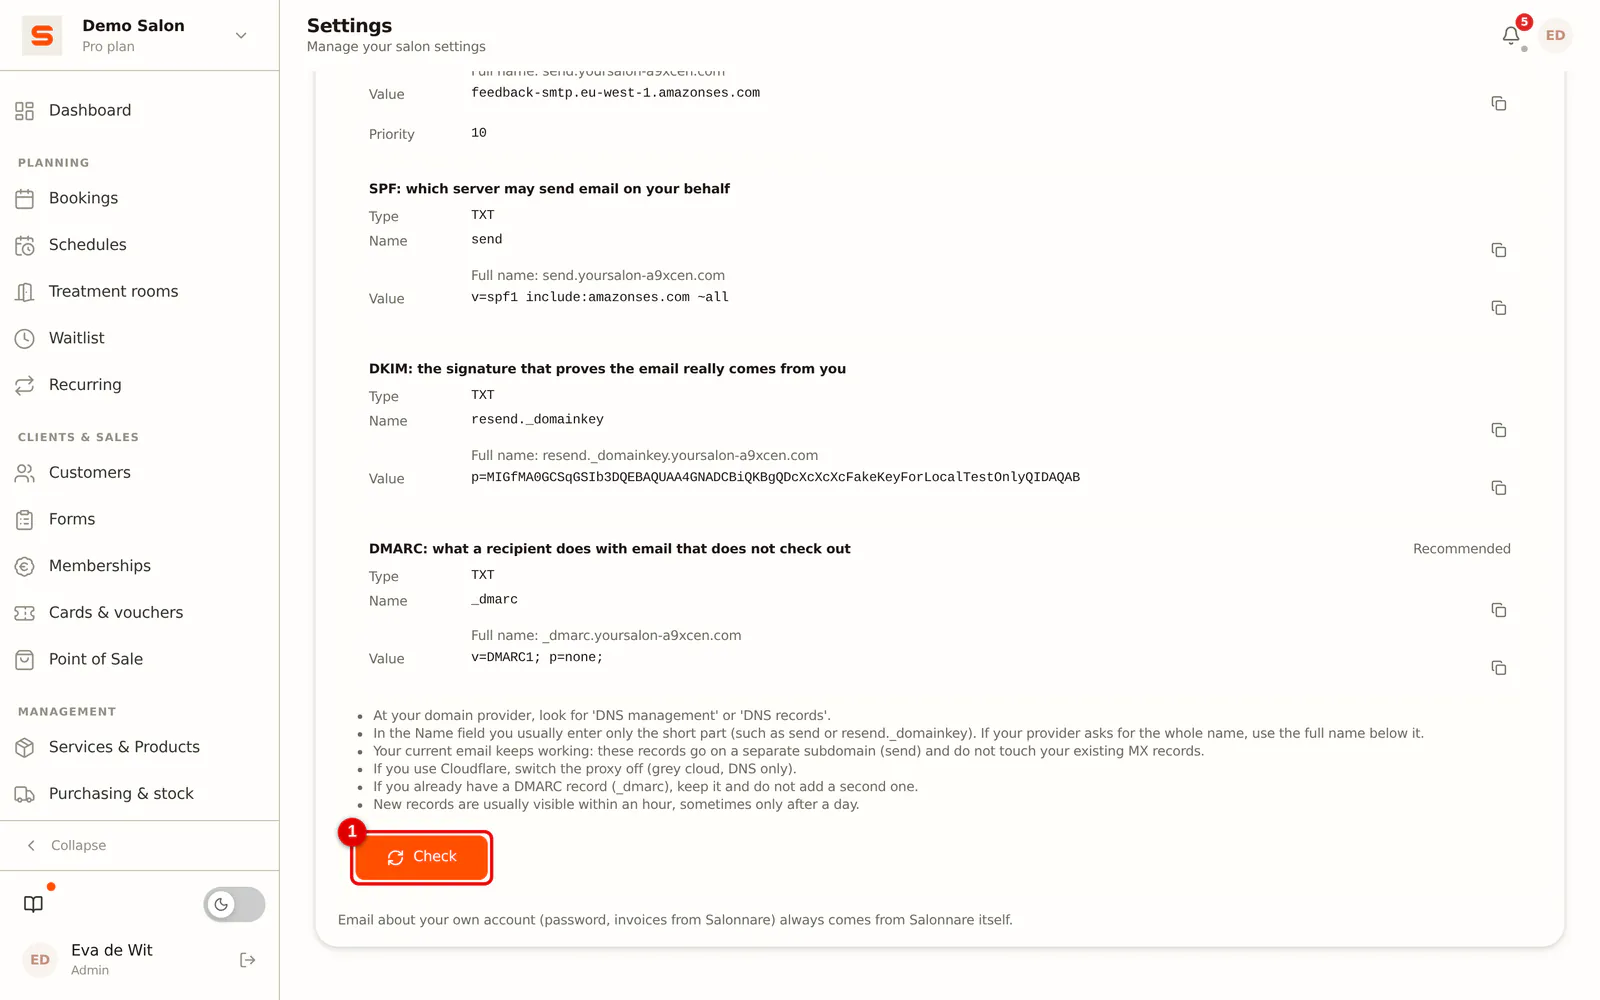
- MX and TXT on send: the return path and SPF. Undeliverable emails come back here, and they state which server may send email on your behalf.
- TXT on resend._domainkey: the signature (DKIM) that proves the email really comes from you.
- TXT on _dmarc (recommended): what a recipient does with email that does not check out. If you already have a DMARC record, keep it.
In the Name field you usually enter only the short part, such as send; your provider adds your domain itself. If your provider asks for the whole name, use the full name shown below it. Copy every value with the button next to it. If you use Cloudflare, switch the proxy off (grey cloud).
 (Enlarge image)
-
Step 3: Click Check
New records are usually visible within an hour, sometimes only after a day. Then click Check. If they are not there yet, you will see that straight away; try again later. Until your domain is verified, your email simply goes via our address.
 (Enlarge image)
-
Step 4: Done: your email comes from your own domain
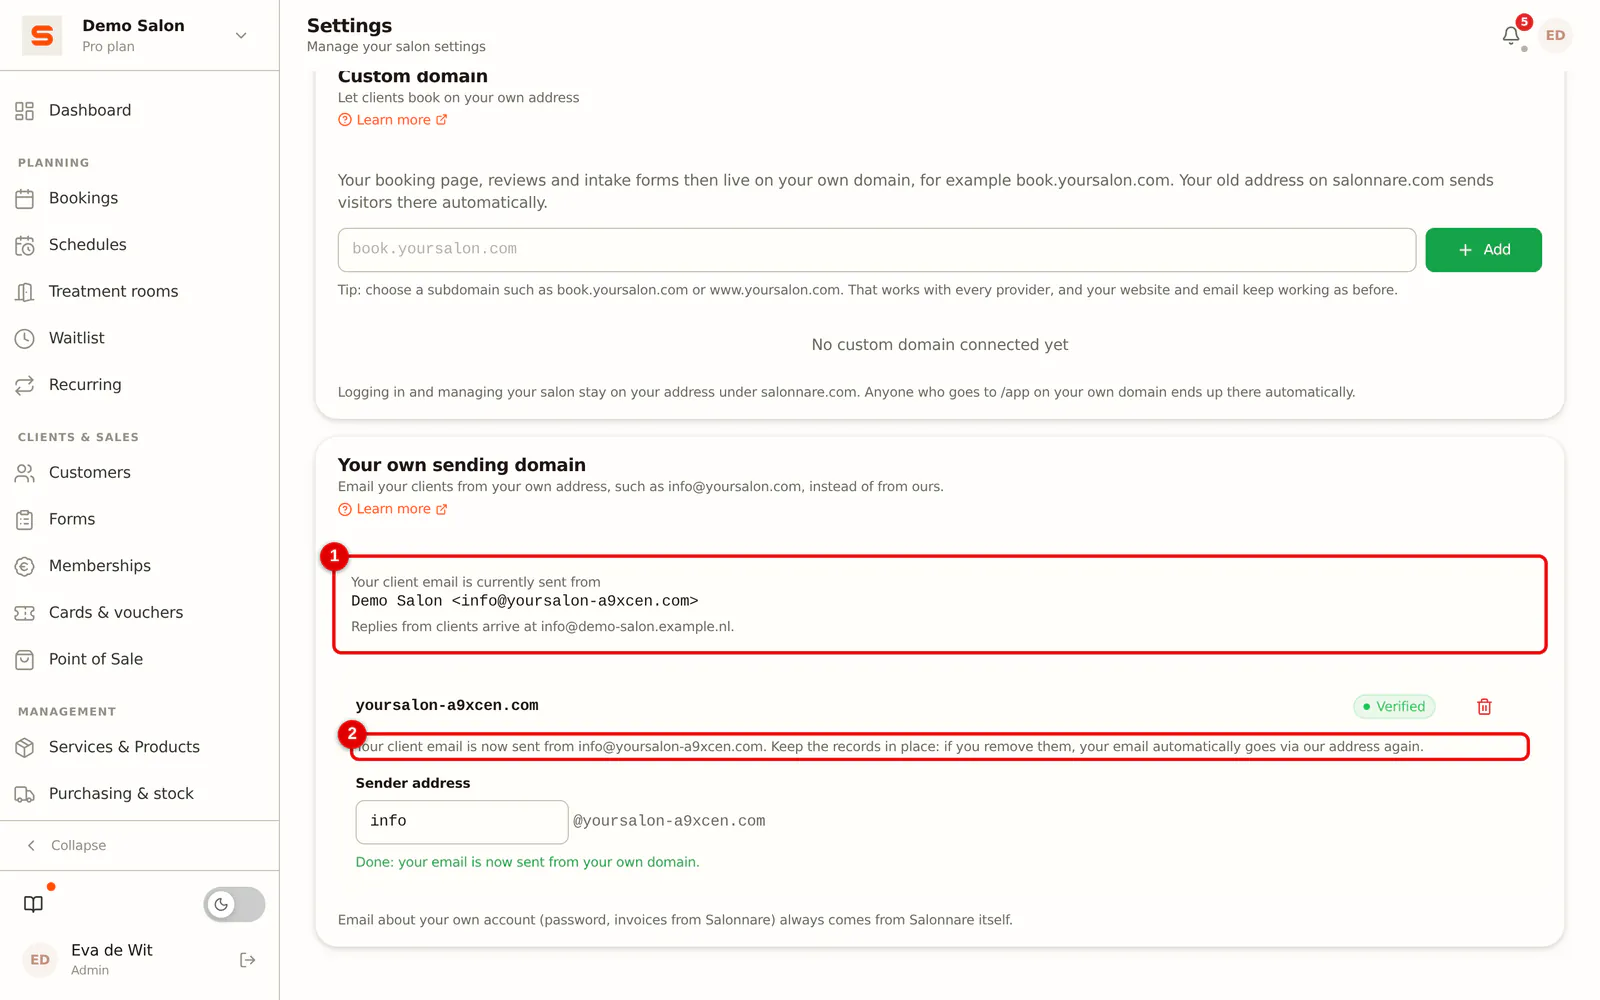
Once your domain is Verified, every client email is sent from your own address. At the top you see exactly which address your clients see. You can still change the sender address at any time. Keep the records at your provider for as long as you use the domain.
 (Enlarge image)
What the status means
- Waiting for DNS: the records are not visible (everywhere) yet. Your email goes via our address.
- Verified: your email is sent from your own domain.
- Failed: the records were not found (or are not correct). Compare them character by character with the values in Salonnare and click Check again.
- Stopped working: your domain worked, but not anymore, for example because a record was removed. Your clients still get their email, just from our address again, and you get a notification in the app. Put the records back and click Check.
When you switch to another provider, DNS records sometimes get lost. Add them at the new provider straight away, otherwise your sending domain stops working.
Removing your domain
-
Step 1: Remove the domain
Click the bin icon next to your domain and confirm. Your email goes via our address again straight away. You can then remove the records at your provider.
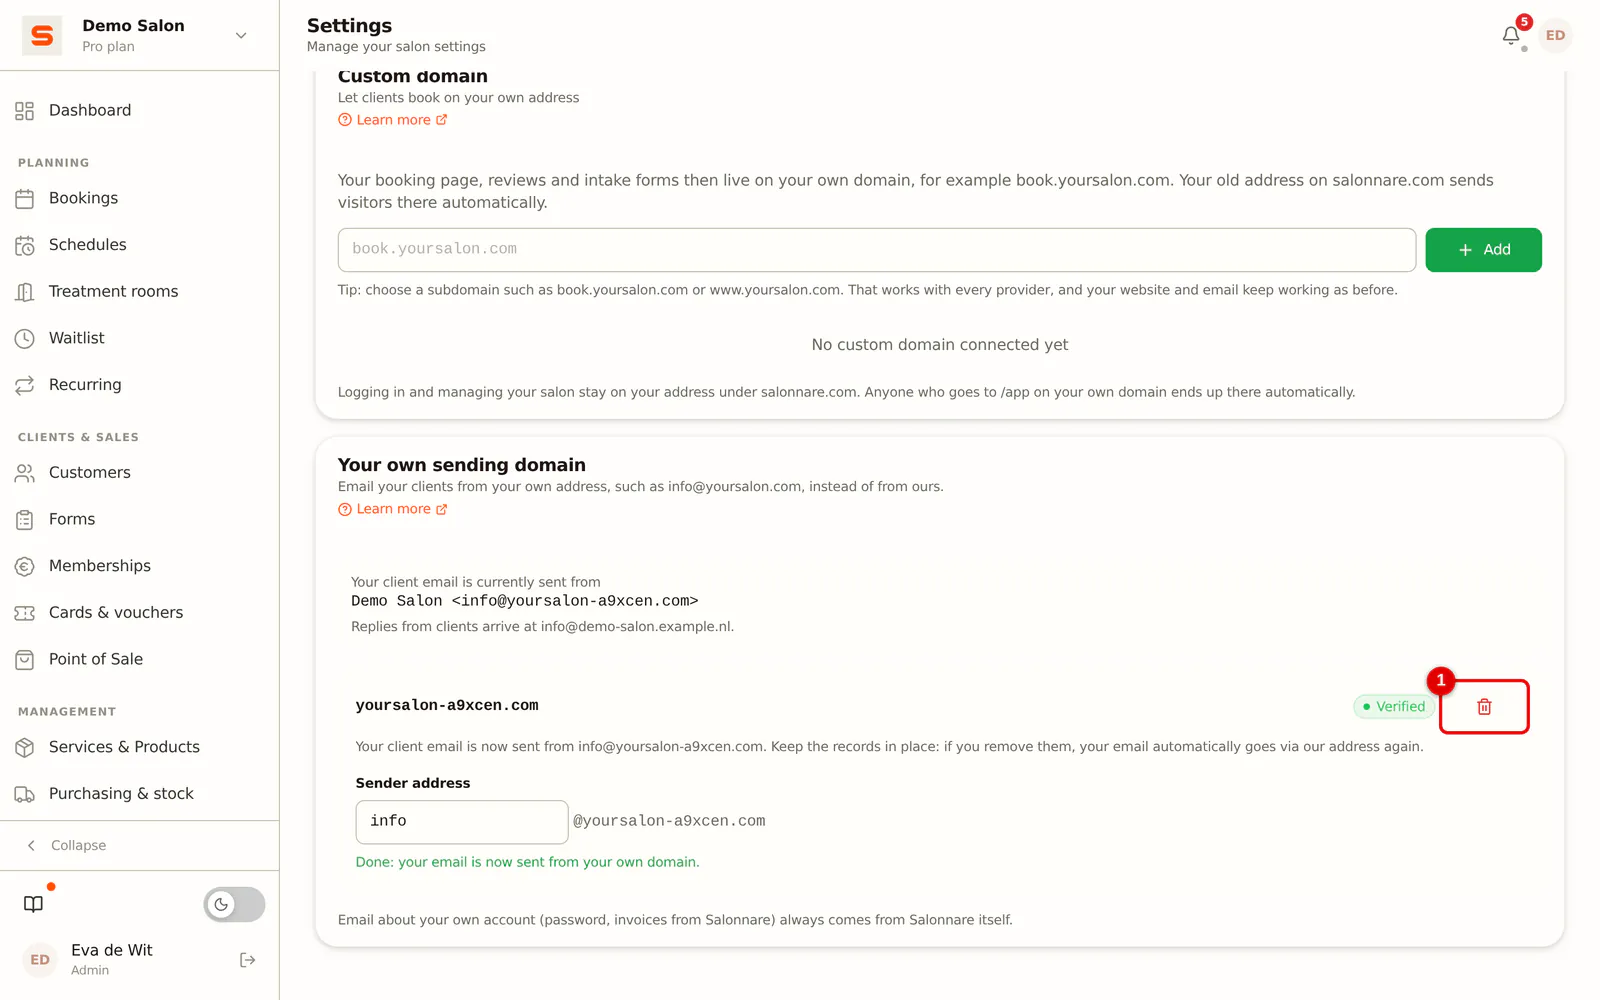 (Enlarge image)
Frequently asked questions
Why don't I see Your own sending domain? The feature is part of Pro. With another plan you see a message to upgrade. If you move to a smaller plan, your email goes via our address again; your domain stays and you can remove it.
Can another salon use my domain? No. A domain belongs to one salon, and without access to the domain's DNS the check does not succeed.
Do I see "Bear with us"? Then we are getting your sending domain ready for you. You do not need to do anything; we will let you know as soon as you can add it.